
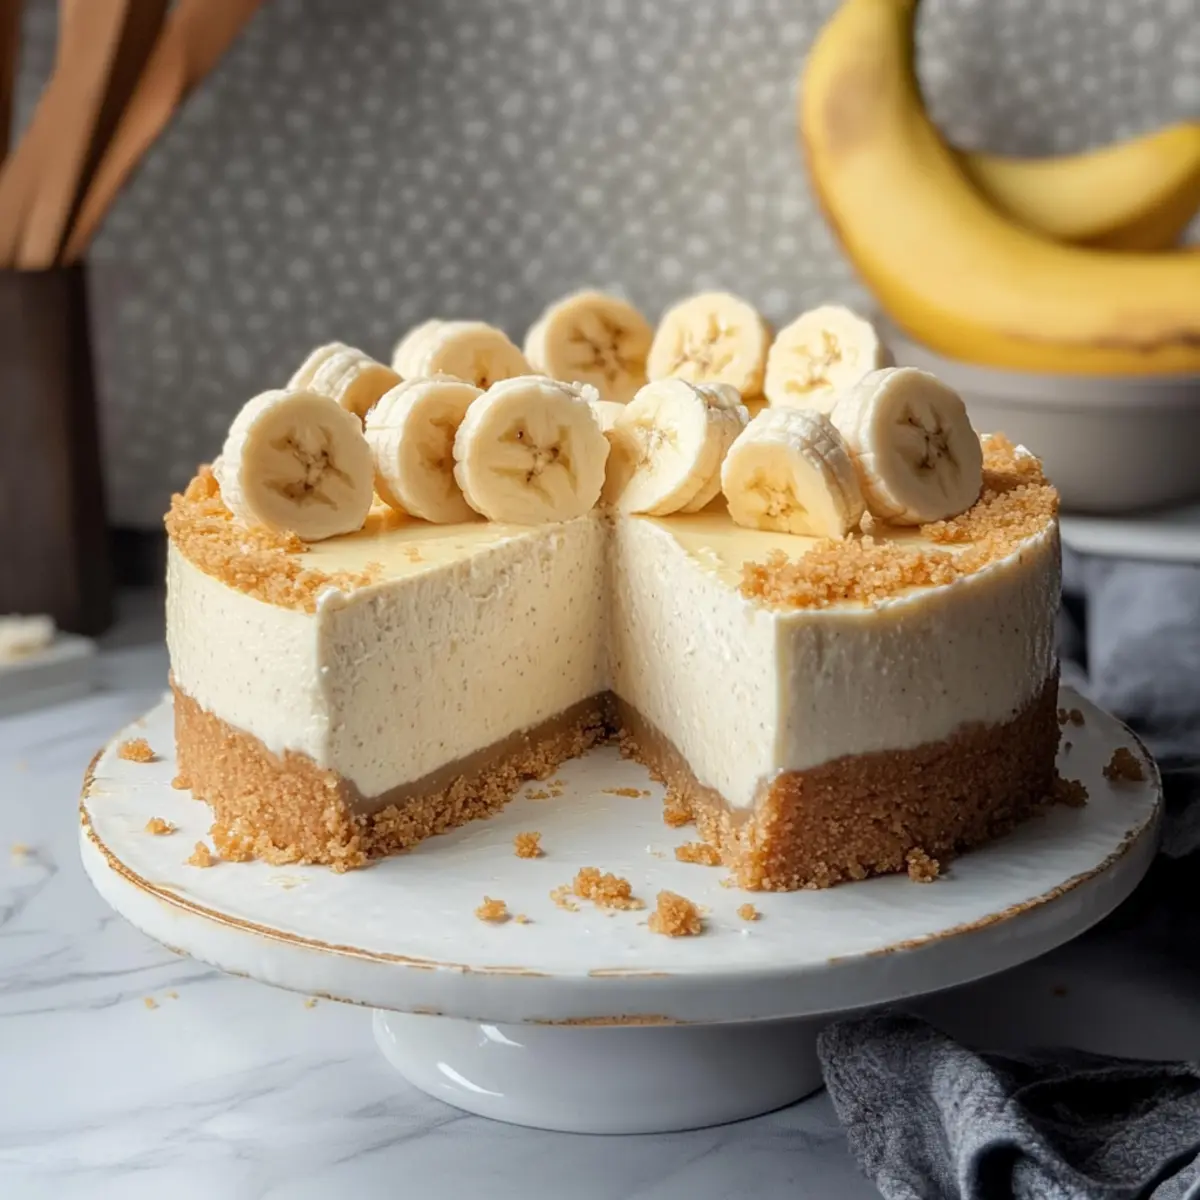
As I was flipping through old family cookbooks, a vivid memory sparked—a potluck where my aunt’s Banana Pudding was the highlight. That classic dessert, with its creamy layers and comforting banana flavor, has inspired my twist: Banana Pudding Cheesecake with a crunchy Nilla Wafer crust. This recipe effortlessly blends two beloved treats into one incredible dessert, making it a perfect way to impress at dinner parties or family gatherings. Plus, it’s surprisingly easy to whip up, saving you precious time in the kitchen while delivering an irresistible crowd-pleaser. Are you ready to elevate your dessert game? Let’s dive into this delicious adventure!
Why is This Banana Pudding Cheesecake Special?
Creamy, Dreamy Delight: This dessert flawlessly marries the best of both worlds—rich cheesecake and the nostalgic flavor of banana pudding!
Simplicity at Its Finest: With just a few key ingredients, you’ll be amazed at how easy it is to create such a show-stopping treat that will leave your guests in awe.
Versatile Serving Ideas: Dress it up with a dollop of whipped cream or fresh fruit, or even explore variations by adding chocolate chips or experimenting with different crusts!
Crowd-Pleasing Favorite: Perfect for any occasion, from casual family dinners to festive holiday feasts, this cheesecake is bound to become a family favorite, just like the classic dessert it’s inspired by.
Make-Ahead Magic: Save time by preparing this cheesecake in advance—friends and family will appreciate your planning when they indulge in this delicious slice of heaven!
If you love the combo of classic flavors, you might also want to check out our Cinnamon Banana Bread for another delightful twist on bananas!
Banana Pudding Cheesecake Ingredients
• Here’s everything you need to make this amazing dessert!
For the Crust
- Nilla Wafers – The foundation for a crunchy, flavorful crust; use vanilla cookies or graham crackers if unavailable.
- Granulated Sugar – Sweetens the crust and balances flavors.
- Unsalted Butter – Binds the crust ingredients together; be sure to melt it for the right texture.
For the Filling
- Cream Cheese – Provides the creamy richness that makes this cheesecake irresistible; let it soften for easier mixing.
- Mashed Ripe Banana – Infuses the filling with natural sweetness and the iconic banana flavor; overripe bananas work best.
- Full-Fat Sour Cream – Enhances the creaminess of the filling; you can substitute Greek yogurt if preferred.
- Instant Banana Cream Pudding Mix – Boosts the banana taste and ensures the filling sets well; avoid the cook and serve variety.
- Pure Vanilla Extract – Adds depth and a lovely aroma to the cheesecake.
- Eggs – Help create the structure of the cheesecake; ensure they’re at room temperature for a smooth blend.
Optional Toppings
- Whipped Cream – A delightful topping for serving; use homemade for a special touch.
- Sliced Bananas – Garnishes for a fresh, appealing pop of flavor and decoration.
- Additional Nilla Wafers – Adds visual appeal and extra crunch to your presentation.
Gather these ingredients and get ready to create your very own Banana Pudding Cheesecake! Each layer is infused with love, making this classic dessert a new family favorite.
Step‑by‑Step Instructions for Banana Pudding Cheesecake
Step 1: Prepare the Crust
Preheat your oven to 325°F (163°C) and line a 9-inch springform pan with parchment paper for easy release. In a large bowl, crush approximately 2 cups of Nilla Wafers until fine crumbs form. Mix the crumbs with granulated sugar and melted unsalted butter, then press this mixture firmly into the bottom of the prepared pan. Bake the crust for 10 minutes, until just set and lightly golden.
Step 2: Make the Cheesecake Filling
While the crust cools, prepare the filling by preheating a water bath. In a mixing bowl, beat softened cream cheese until smooth and creamy. Add in 1 cup of mashed ripe banana and 1 cup of full-fat sour cream. Mix well, then gradually add sugar, instant banana cream pudding mix, and vanilla extract, ensuring everything is thoroughly blended. Finally, incorporate room-temperature eggs one at a time, mixing until just combined to avoid excess air.
Step 3: Assemble and Bake
Wrap the outside of the springform pan with aluminum foil to protect against water leakage, then place it inside a larger roasting pan. Pour the cheesecake filling over the cooled crust, smoothing the top. Carefully pour boiling water into the roasting pan until it reaches about 1 inch deep; this will help the cheesecake bake evenly. Bake for 70-80 minutes, watching for the edges to set while the center remains slightly jiggly.
Step 4: Cool
Once baked, turn off the oven and crack the door open slightly, allowing the cheesecake to cool slowly for about 1 hour. This gentle cooling helps prevent cracking. Afterward, transfer the springform pan to a wire rack to cool completely. Once cooled, refrigerate the cheesecake for at least 5-6 hours or overnight for the best texture and flavor.
Step 5: Serve
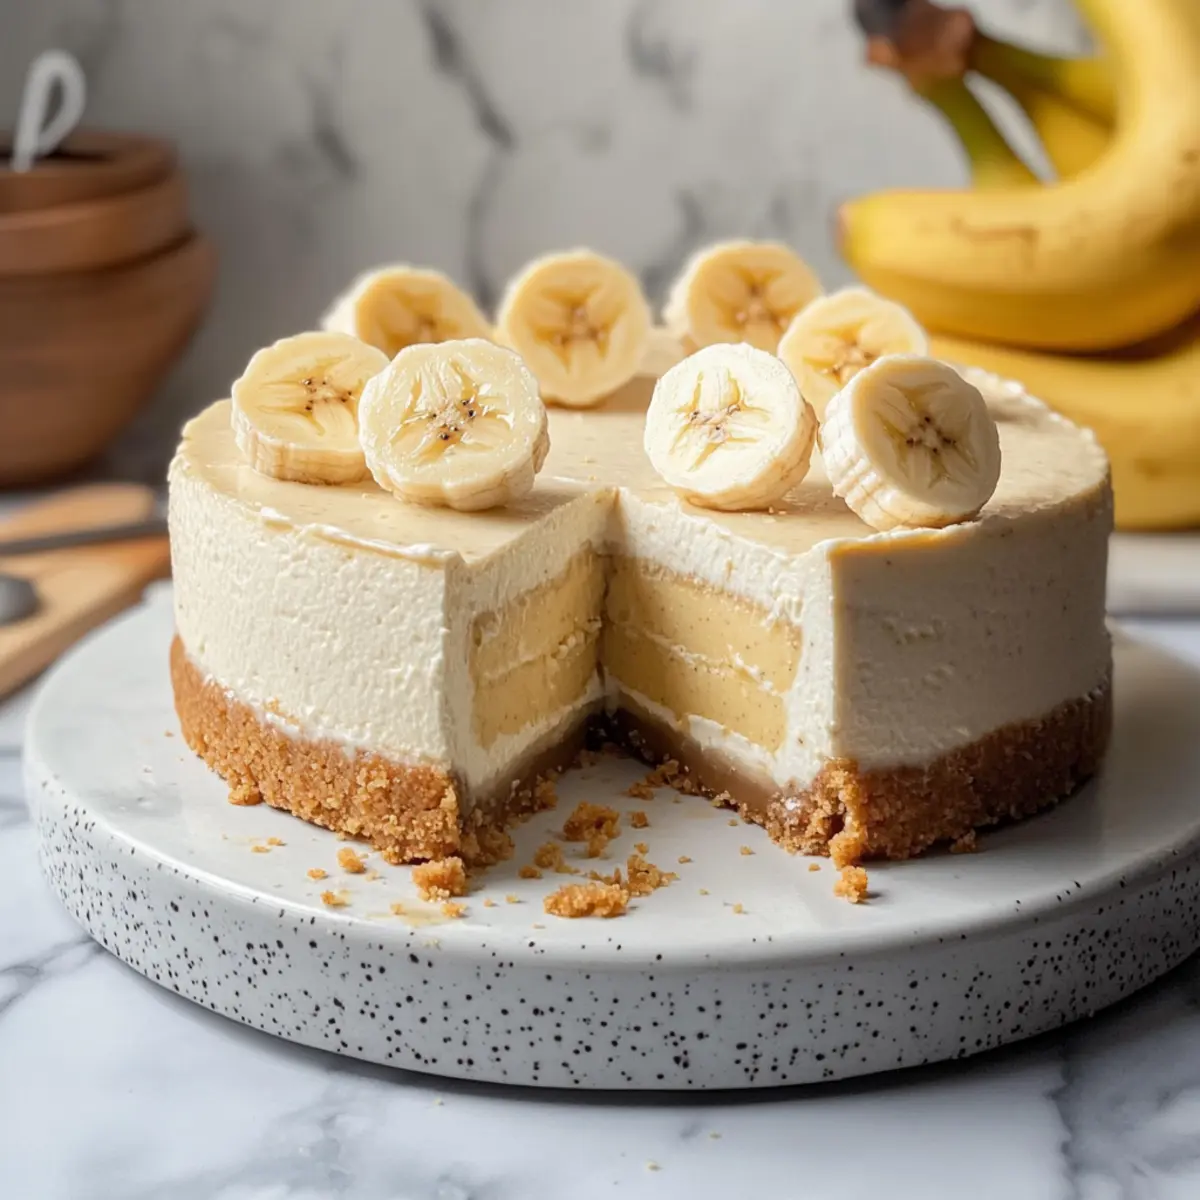
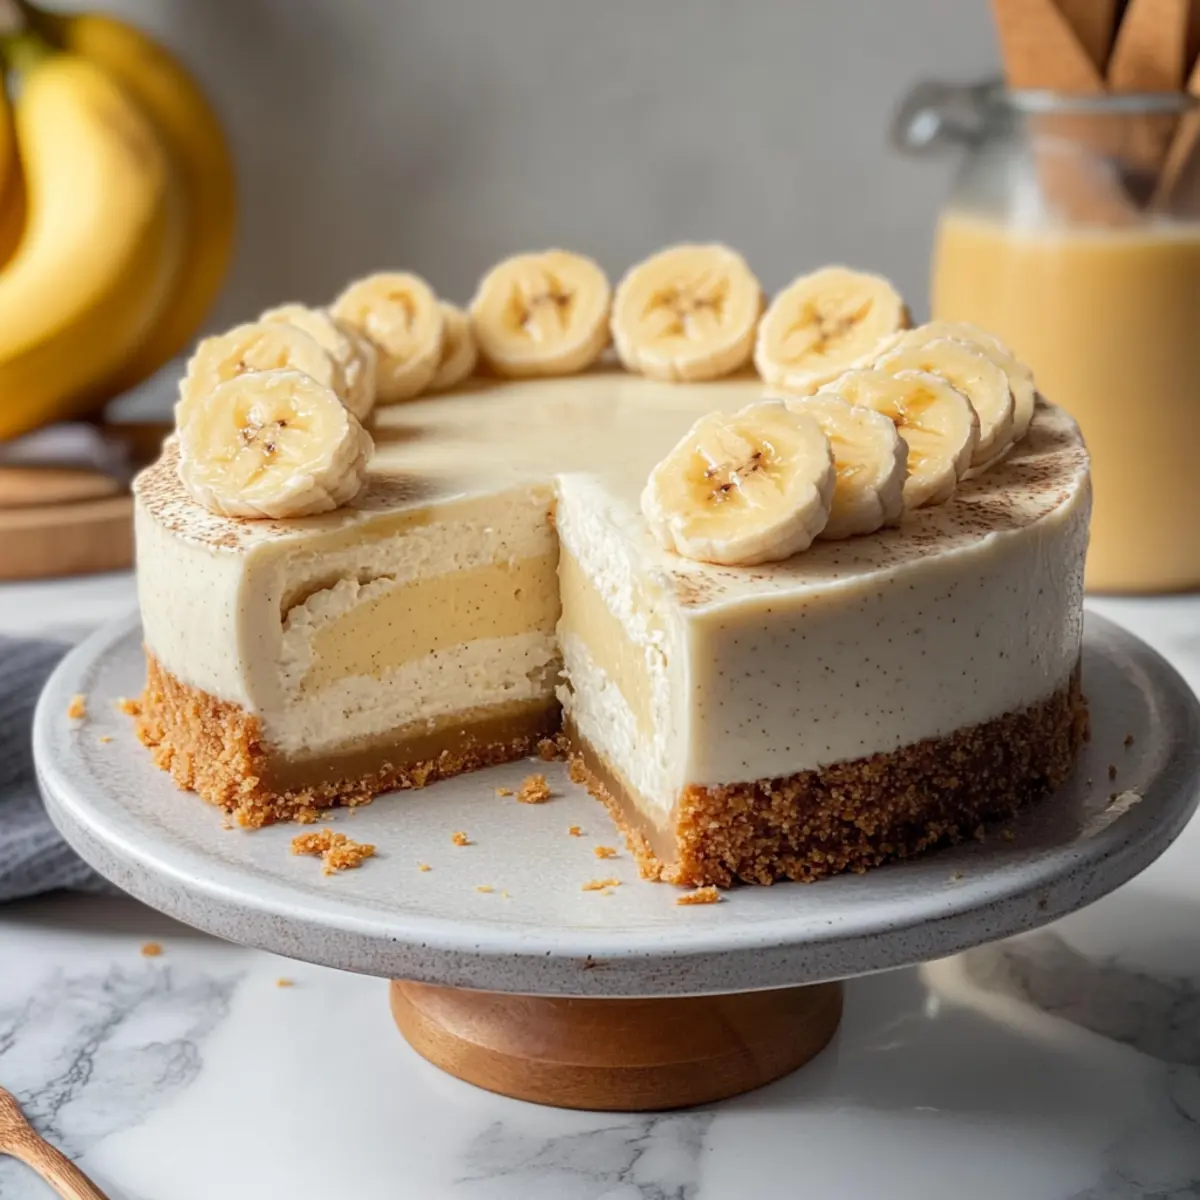
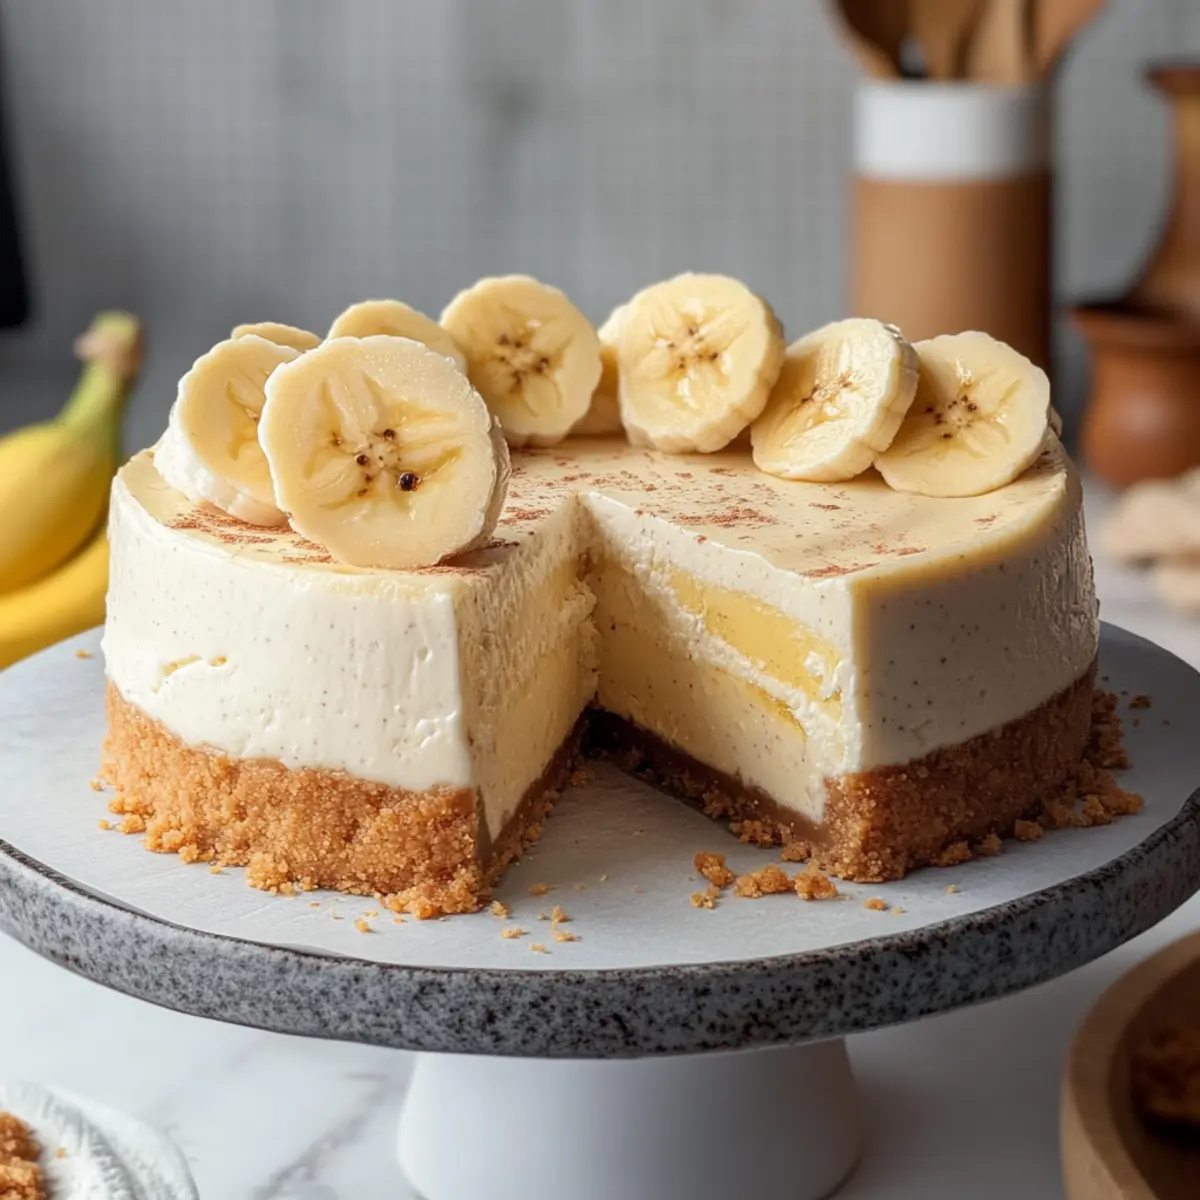
To serve your mouthwatering Banana Pudding Cheesecake, carefully run a knife around the edge to loosen it before releasing the springform. Top with a generous dollop of whipped cream, sliced bananas, and additional Nilla Wafers for a delightful finish. This classic dessert will surely impress your family and friends with its irresistible layers and creamy texture.
Make Ahead Options
These Banana Pudding Cheesecake creations are perfect for busy home cooks looking to save time! You can prepare the crust and filling up to 3 days in advance; simply store them separately in the refrigerator to maintain their freshness. Wrap the crust tightly in plastic wrap to prevent it from drying out, while the filling should be kept in an airtight container. When you’re ready to enjoy this delectable dessert, assemble the cheesecake by pouring the filling over the crust, and bake as instructed. This way, you’ll achieve just as delicious results, all while freeing up precious time when entertaining guests or planning your week!
Banana Pudding Cheesecake Variations & Substitutions
Feel free to get creative with this Banana Pudding Cheesecake and make it your own with these fun variations!
-
Graham Cracker Crust:
Swap Nilla Wafers for crushed graham crackers for a different yet equally delightful taste experience to your crust. -
Chocolate-Banana Twist:
Add chocolate chips or a luscious layer of chocolate ganache on top for those who crave that irresistible chocolate-banana duo. -
Fruit Medley:
Exchange ripe bananas with other fruits like strawberries or peaches for a refreshing twist on classic flavors. Each bite will bring a pop of new fruitiness! -
Nutty Addition:
Incorporate chopped walnuts or pecans into the crust for a crunchy texture and a hint of nutty flavor that complements the creamy filling beautifully. -
Lighter Creaminess:
Substitute full-fat sour cream with Greek yogurt to create a lighter version while maintaining the cheesecake’s rich creaminess. -
Coconut Variation:
Mix in shredded coconut to your filling or crust for a tropical flair that takes this cheesecake to a whole new level of flavor. -
Spicy Kick:
For those who love a bit of heat, a pinch of cayenne pepper in the filling can create a surprising contrast with the sweetness of the bananas.
By experimenting with these variations, you can turn this easily into various delicious interpretations! If you’re in the mood for another unique dessert, check out our indulgent Oreo Cheesecake Indulgence for even more cheesecake magic!
Expert Tips for Banana Pudding Cheesecake
-
Water Bath Magic: Ensure you use a water bath during baking to create a moist environment, preventing cracks in your Banana Pudding Cheesecake.
-
Room Temperature Ingredients: Allow cream cheese, sour cream, and eggs to come to room temperature; this ensures a smoother batter and even mixing.
-
Gentle Mixing: Be cautious when adding eggs—mix just until combined to avoid incorporating excess air, which can lead to cracks.
-
Cool Gradually: After baking, let the cheesecake cool in the oven for an hour before transferring it to a wire rack. This gentle approach minimizes the risk of cracking.
-
Chill for Best Flavor: Refrigerate the cheesecake for at least 5-6 hours, or overnight, to fully develop its rich flavors and creamy texture.
What to Serve with Banana Pudding Cheesecake?
Creating a delightful meal around this creamy dessert can elevate any occasion.
-
Fresh Fruit Salad: A vibrant medley of seasonal fruits adds a refreshing contrast to the rich cheesecake, enhancing every bite. Consider berries, melons, and citrus for a colorful touch.
-
Coffee or Tea: A warm beverage like coffee or a spiced chai pairs beautifully, smoothing over the sweetness of the cheesecake and creating a cozy, inviting experience.
-
Chocolate Ganache: Drizzle a rich chocolate ganache on top to elevate the dessert with a decadent twist. The combination of chocolate and banana is always a crowd-pleaser!
-
Vanilla Ice Cream: A scoop of vanilla ice cream alongside the cheesecake adds delightful creaminess and coolness, making it a luxurious treat perfect for warm days.
-
Caramel Sauce: Offer a drizzle of caramel for a sweet, sticky finish that contrasts wonderfully with the banana flavor, turning each slice into an indulgent experience.
-
Miniature Cheesecake Bites: For a fun twist, serve bite-sized cheesecake portions to guests as an easy, one-bite treat that complements the theme and evokes the classic dessert’s charm.
Surrounding this Banana Pudding Cheesecake with these touches will ensure an unforgettable dining experience!
How to Store and Freeze Banana Pudding Cheesecake
Fridge: Store your Banana Pudding Cheesecake covered in the refrigerator for up to 4 days. This will help maintain its creamy texture and delicious flavor.
Freezer: For longer storage, freeze the cheesecake for up to 3 months. Wrap it tightly in plastic wrap and then in aluminum foil to prevent freezer burn.
Thawing: When ready to enjoy, transfer the cheesecake to the refrigerator and let it thaw overnight. This will restore its deliciously creamy consistency.
Reheating: Serve chilled, and add fresh toppings like whipped cream or sliced bananas just before serving for a delightful presentation!
Banana Pudding Cheesecake Recipe FAQs
What type of bananas should I use?
Absolutely, using overripe bananas will give your cheesecake the best flavor and natural sweetness. Look for bananas with dark spots or a brownish hue, as these indicate they are ripe and bursting with sweetness!
How should I store the cheesecake?
The banana pudding cheesecake can be stored in the refrigerator, covered, for up to 4 days. To keep it fresh, I recommend placing it in an airtight container or using plastic wrap to minimize air exposure. Just make sure to let it sit at room temperature for a few minutes before serving for the best texture!
Can I freeze the banana pudding cheesecake?
Yes, you can freeze your cheesecake for up to 3 months! Wrap it tightly in plastic wrap, followed by aluminum foil to prevent freezer burn. When you’re ready to indulge, let it thaw overnight in the refrigerator and enjoy its creamy goodness once again.
What if my cheesecake cracks during baking?
Fear not! Cracking can happen if the batter has too much air or if it cools too quickly. To avoid this, use a water bath during baking and let your cheesecake cool gradually in the oven after baking. If cracks do occur, a tasty topping of whipped cream or sliced bananas can make it look deliciously intentional!
Is this cheesecake suitable for people with dairy allergies?
While this recipe involves several dairy ingredients, there are alternatives for someone with a dairy allergy. You can utilize non-dairy cream cheese and coconut milk yogurt as substitutes. However, make sure to check the labels for any potential allergens.
How can I make this cheesecake ahead of time?
You can make this banana pudding cheesecake up to 1 day in advance! After preparing and refrigerating it, simply cover it with plastic wrap. This not only enhances the flavors but also saves you time on the day of your gathering, allowing you to enjoy the fun instead of being stuck in the kitchen!
Banana Pudding Cheesecake: A Creamy Dream Dessert You'll Love
Ingredients
Equipment
Method
- Preheat your oven to 325°F (163°C) and line a 9-inch springform pan with parchment paper. Crush 2 cups of Nilla Wafers into fine crumbs.
- Mix the crumbs with granulated sugar and melted butter, then press into the bottom of the pan. Bake for 10 minutes until just set.
- In a mixing bowl, beat softened cream cheese until smooth. Add in mashed banana and sour cream, mixing well.
- Gradually add sugar, pudding mix, and vanilla extract, then mix in the eggs one at a time until just combined.
- Wrap the springform pan in aluminum foil and place it in a larger roasting pan. Pour the filling over the cooled crust.
- Pour boiling water into the roasting pan until it’s about 1 inch deep. Bake for 70-80 minutes until edges set but center jiggles slightly.
- Turn off the oven, crack the door open slightly, and let the cheesecake cool for 1 hour.
- Transfer to a wire rack to cool completely, then refrigerate for at least 5-6 hours or overnight before serving.
- Run a knife around the edge and release the springform. Top with whipped cream, sliced bananas, and Nilla Wafers before serving.
Leave a Reply