
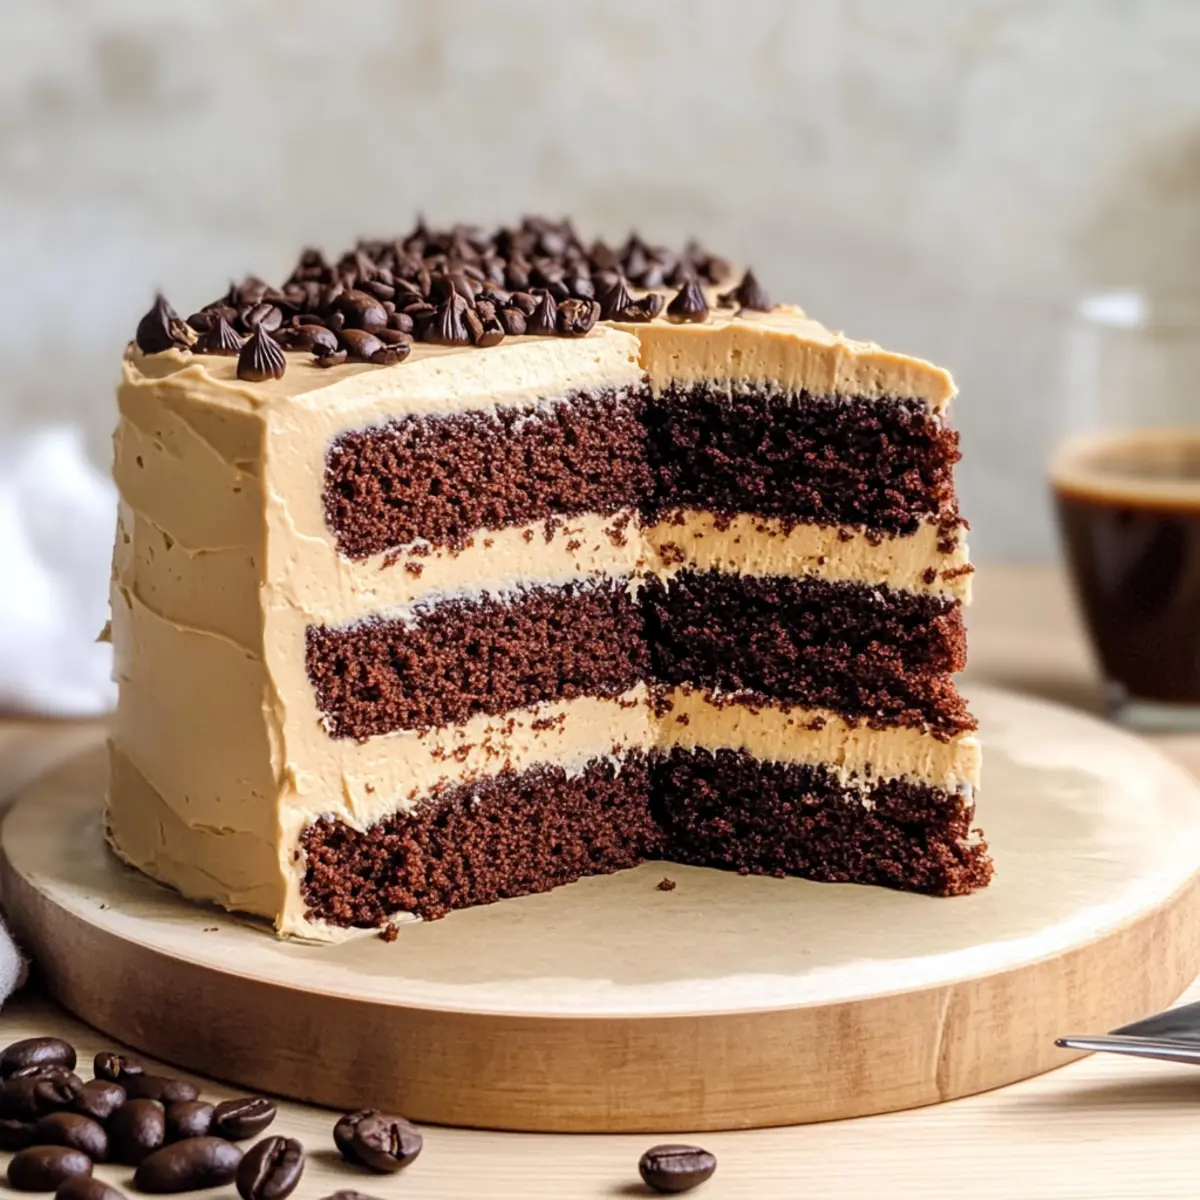
As I took a moment to savor my morning coffee, an idea struck me: why not elevate this beloved beverage into something truly extraordinary? Enter the Ultimate Coffee Chocolate Layer Cake, where deep, rich chocolate meets the robust flavor of freshly brewed coffee in a way that transforms ordinary dessert time into a celebration! The perfect blend of moist chocolate layers paired with a luscious coffee buttercream makes it a showstopper for any occasion. Plus, with a straightforward prep process, you’ll find yourself whipping this up in no time, impressing not just your taste buds but your friends and family too. Ready to make a sweet splash with this delectable cake? Let’s dive in!
Why is this cake a must-try?
Decadent Layers: Each bite offers a symphony of rich chocolate and robust coffee flavors, making it a dreamy delight for dessert lovers.
Easy to Make: With simple steps and common ingredients, this cake is perfect for both novice bakers and seasoned chefs who want a quick yet impressive treat.
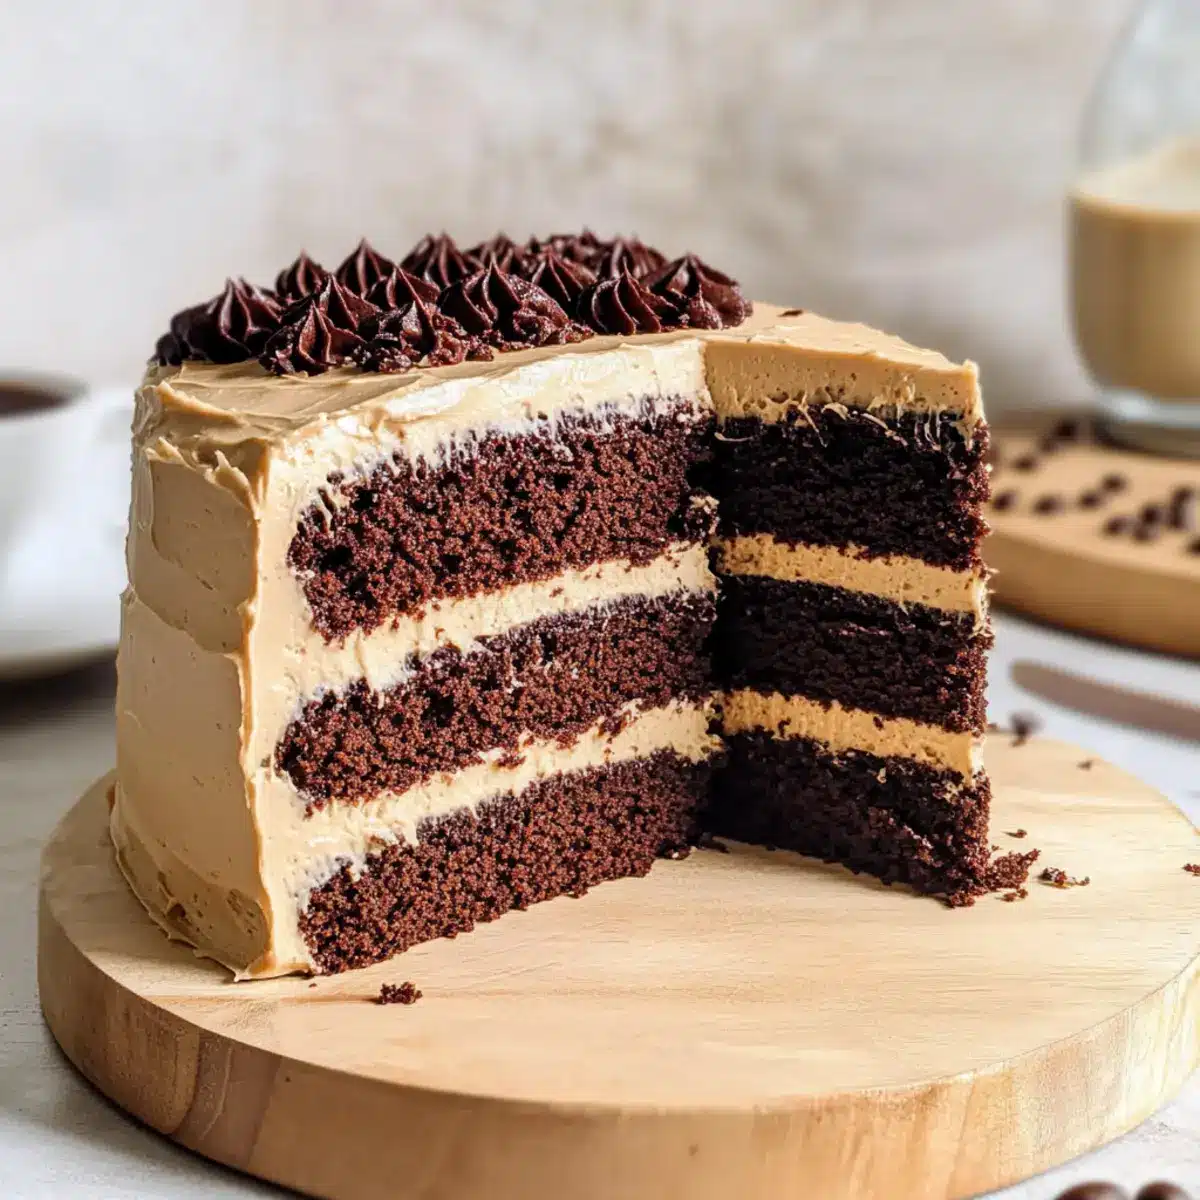
Showstopper Presentation: The three-layer design not only looks stunning but also enhances the experience of enjoying a slice.
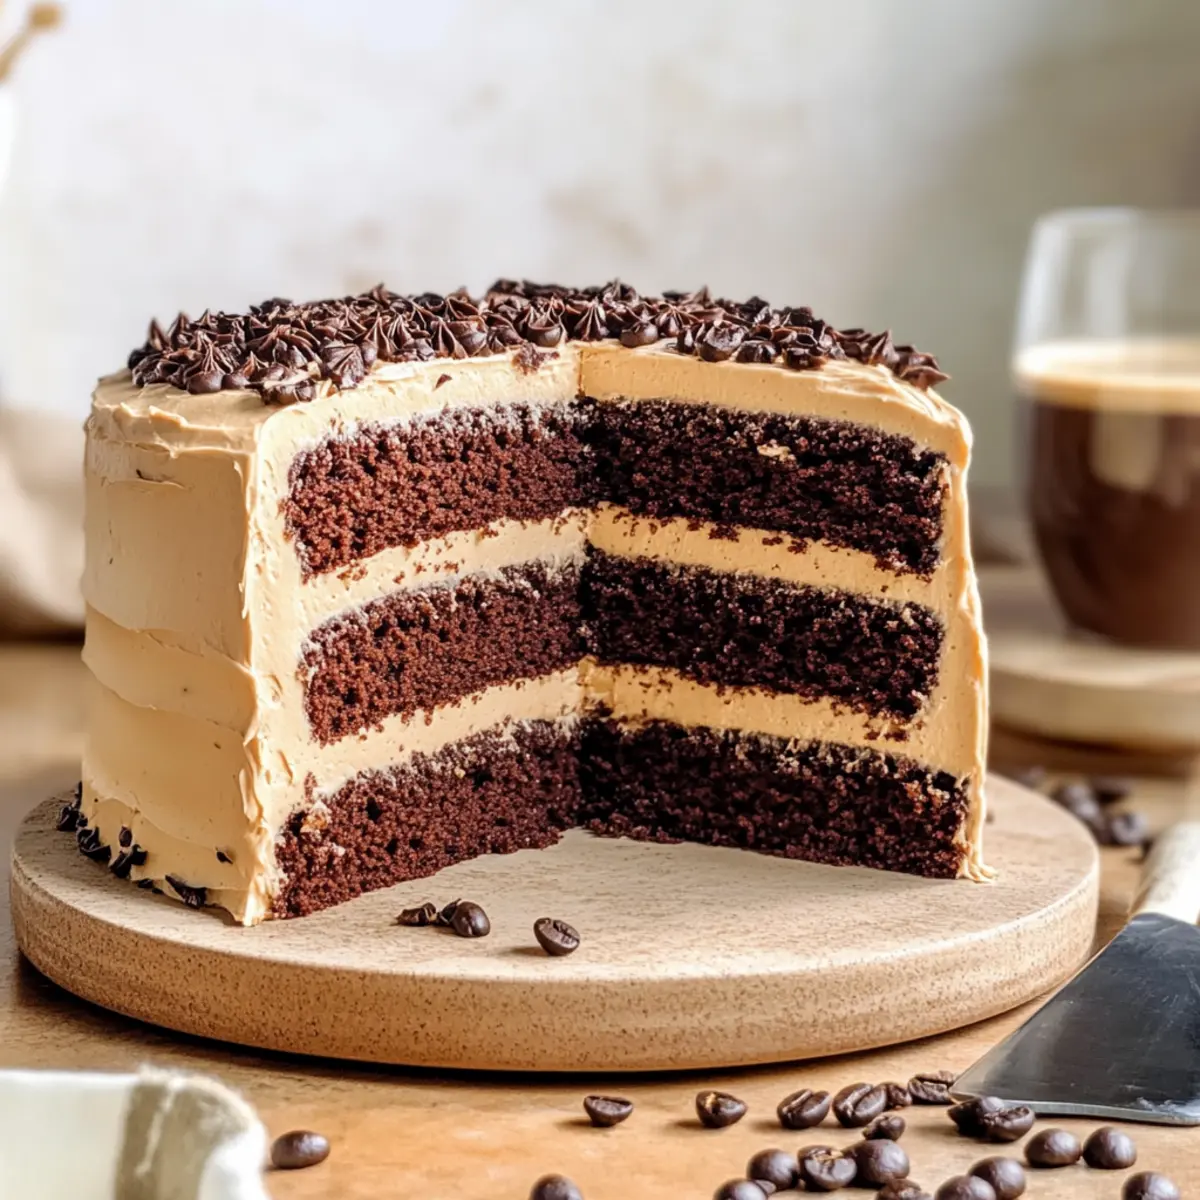
Versatile Pairings: Serve it with a scoop of vanilla ice cream or alongside a cup of espresso for an indulgent treat.
Crowd-Pleasing Flavor: Whether for a birthday, holiday, or just because, this cake will impress family and friends, ensuring you’re the star of dessert time.
Discover even more delightful ideas like our Birthday Cake Batter or Brown Butter Chocolate treats to complement your baking adventures!
Coffee Chocolate Cake Ingredients
For the Cake Layers
- Black Coffee – Enhances the chocolate flavor; for a stronger taste, you can use instant coffee instead.
- All-Purpose Flour – Provides structure; a vital ingredient for the best results.
- Cornstarch – Improves texture and lightens the cake; can be omitted if necessary.
- Granulated Sugar – Sweetens the cake and contributes to its moisture; no substitutes are suggested.
- Dark Brown Sugar – Adds depth and moisture; use light brown sugar as a replacement if needed.
- Unsweetened Dutch Cocoa Powder – Provides the chocolate flavor; Dutch-processed is recommended for optimal smoothness.
- Baking Powder & Baking Soda – Essential leavening agents; ensure they are fresh for best rise.
- Salt – Balances sweetness and enhances flavors; crucial for a balanced taste.
- Vegetable Oil – Adds moisture; can switch to melted butter for a richer flavor.
- Sour Cream – Imparts moisture and a slight tang; Greek yogurt can substitute at a 1:1 ratio.
- Large Eggs – Binds ingredients and adds moisture; use room temperature eggs for easier mixing.
- Vanilla Extract – Deepens the flavor; always opt for pure vanilla extract for best taste.
For the Frosting
- Butter – Creates a creamy texture; ensure it’s at room temperature for easier mixing.
- Powdered Sugar – Sweetens and stabilizes the buttercream; no substitutes are recommended.
- Instant Espresso Powder – Optional; adds an intense coffee flavor to your frosting.
Embrace the rich flavors of this Coffee Chocolate Cake, and elevate your baking game!
Step‑by‑Step Instructions for Coffee Chocolate Cake
Step 1: Preheat and Prepare Pans
Begin by preheating your oven to 170ºC (340ºF). While the oven heats, line three 20 cm (8-inch) round cake pans with parchment paper, ensuring that it covers the bottom and sides. This will help the cake layers release easily once baked, allowing you to create the beautiful Coffee Chocolate Cake with ease!
Step 2: Brew the Coffee and Mix Dry Ingredients
Brew your black coffee and allow it to cool while you prepare the dry ingredients. In a large mixing bowl, sift together the all-purpose flour, cornstarch, granulated sugar, dark brown sugar, unsweetened Dutch cocoa powder, baking powder, baking soda, and salt. Stir these dry ingredients together until thoroughly combined, ensuring even distribution for a perfect bake.
Step 3: Whisk Together Wet Ingredients
In a separate bowl, whisk together the wet ingredients: vegetable oil, sour cream, large eggs, cooled black coffee, and vanilla extract. Mix until the mixture is smooth and uniform, creating a wonderful base for your Coffee Chocolate Cake. Ensuring that your eggs are at room temperature will help with better incorporation and a fluffier texture.
Step 4: Combine Wet and Dry Ingredients
Gradually add the wet ingredients to the dry ingredients, gently mixing them together with a spatula or whisk. Continue to blend until the batter is entirely smooth and free of lumps. This is the moment to embrace the rich aroma of coffee and chocolate as the flavors meld together, creating the perfect batter for your cake layers.
Step 5: Bake the Cake Layers
Divide the batter evenly among the prepared cake pans. Place them in the preheated oven and bake for 28-30 minutes. To check for doneness, insert a toothpick into the center of a cake; it should come out clean when ready. Once baked, transfer the pans to a wire rack to cool for about 10 minutes before gently removing the layers.
Step 6: Prepare the Coffee Buttercream Frosting
While the cake layers cool, prepare the coffee buttercream. In a mixing bowl, beat the room temperature butter until creamy and smooth. Gradually add the sifted powdered sugar and mix well. Then, incorporate the cooled coffee and vanilla extract in two parts, ensuring a fluffy and luscious frosting that will beautifully coat your Coffee Chocolate Cake.
Step 7: Assemble the Cake
Once the cake layers are completely cool, carefully level the tops with a serrated knife for even stacking. Place one layer on a cake stand or a serving plate. Spread three generous scoops of the coffee buttercream between the layers, repeating with the second layer. A crumb coat should then be applied to seal in crumbs before generously frosting the top and sides of the entire cake, making it a stunning centerpiece.

Make Ahead Options
These Ultimate Coffee Chocolate Layer Cakes are perfect for busy home cooks looking to save time! You can bake the cake layers up to 3 days in advance; simply allow them to cool completely before wrapping each layer tightly in plastic wrap and refrigerating. For the coffee buttercream, prepare it up to 24 hours ahead, storing it in an airtight container in the fridge—just give it a quick whip before use to regain its fluffiness. When it’s time to serve, level and frost your chilled cake layers with the buttercream, and you’ll have a stunning dessert that’s just as delicious, saving you precious time on the day you plan to impress your guests!
How to Store and Freeze Coffee Chocolate Cake
Room Temperature: Keep the cake in an airtight container at room temperature for up to 3 days to maintain its freshness and moisture.
Fridge: If you’d like to preserve it longer, store the cake in the refrigerator, wrapped tightly, for up to 5 days. Allow it to come to room temperature before serving for the best flavor experience.
Freezer: To freeze your Coffee Chocolate Cake, wrap individual slices or the whole cake in plastic wrap, then aluminum foil, ensuring no air pockets remain. It can be stored in the freezer for up to 3 months.
Reheating: For a delightful treat, thaw in the fridge overnight, then let it sit at room temperature for about an hour before serving. Enjoy each slice as it maintains its heavenly taste!
What to Serve with Ultimate Coffee Chocolate Layer Cake
Indulging in a slice of this luxurious cake is an experience best paired with delightful accompaniments that elevate your dessert moment.
- Rich Espresso: The bold flavor and acidity of espresso enhance the cake’s chocolate and coffee notes, making each bite even more delightful.
- Vanilla Ice Cream: A scoop of creamy vanilla ice cream melts beautifully over the rich cake, creating a wonderful contrast in temperature and flavor.
- Chocolate Ganache: Drizzling warm chocolate ganache on top adds an extra layer of decadence, perfect for chocolate lovers seeking that indulgent touch.
- Whipped Cream: Light and airy whipped cream balances the richness of the layers, offering a fresh, fluffy texture with each slice.
- Fresh Berries: Bright, tart raspberries or strawberries add a burst of flavor and vibrant color, complementing the cake without overwhelming it.
- Mint Tea: A refreshing cup of mint tea soothes the palate after a slice of cake, creating a harmonious dessert experience that’s perfectly uplifting.
- Coffee Milkshake: For an extra treat, serve a coffee milkshake on the side for a fun twist that echoes the cake’s rich flavors.
- Chocolate-Covered Espresso Beans: These little bites of joy add a crunchy texture and intense coffee flavor that perfectly parallels the cake’s ingredients.
These pairings turn each slice into a memorable moment, ensuring your Ultimate Coffee Chocolate Layer Cake is the star of any gathering!
Expert Tips for Coffee Chocolate Cake
-
Mix Dry Thoroughly: Ensure that all dry ingredients are evenly sifted and combined to avoid any cocoa clumps in your Coffee Chocolate Cake.
-
Check Doneness Wisely: Use a toothpick or cake tester to check for doneness; it should come out clean from the center when the cake is baked just right.
-
Don’t Overmix: When combining wet and dry ingredients, mix gently. Overmixing can lead to a dense cake rather than the light, fluffy layers you desire.
-
Cool Completely: Allow cake layers to cool completely before frosting. This prevents the buttercream from melting and sliding off, ensuring a beautiful presentation.
-
Trim for Perfection: Level the tops of your cake layers with a serrated knife for an even stack, giving your Coffee Chocolate Cake a polished look.
-
Use Room Temp Ingredients: Ensure your ingredients, especially butter and eggs, are at room temperature for easier mixing and a better final texture.
Coffee Chocolate Cake Variations
Feel free to play with the flavors and textures of this delightful cake to make it truly your own!
-
Milk Chocolate: Replace Dutch cocoa with milk chocolate for a sweeter, creamier taste. This adds a lovely richness that pairs perfectly with coffee.
-
Dark Chocolate: Swap in dark chocolate cocoa for a deeper flavor profile, enhancing the cake’s richness without overwhelming it.
-
Whipped Cream Frosting: Mix half of the buttercream with whipped cream for a lighter, fluffier texture that balances the richness of the cake.
-
Chocolate Chips: Fold in semi-sweet chocolate chips into the batter for added texture and surprise bursts of chocolate delight in every bite.
-
Nutty Notes: Add chopped nuts like walnuts or pecans to the batter for a delightful crunch that contrasts beautifully with the soft cake layers.
-
Mocha Twist: Incorporate a tablespoon of espresso powder directly into the batter for an extra punch of coffee flavor that’ll surely excite coffee lovers.
-
Spice It Up: Enhance the layer of flavors by adding a pinch of cinnamon or cayenne pepper into the batter for a subtle kick that pairs magically with chocolate.
-
Vegan Option: Replace eggs with flaxseed meal mixed with water, utilize a plant-based butter substitute, and choose a dairy-free chocolate to make this cake vegan-friendly.
Once you’ve crafted your own variation, why not check out our delightful Chocolate Raspberry Cheesecake or indulge in some buttery goodness with our Brown Butter Chocolate? The options are endless!
Coffee Chocolate Cake Recipe FAQs
How do I know when my coffee is the perfect strength for the cake?
Absolutely! For the best flavor, use strong brewed black coffee. I recommend that if you’re using instant coffee, mix 2 teaspoons of instant coffee granules with 360 grams of hot water to achieve a bold taste that enhances the chocolate.
What’s the best way to store leftover Coffee Chocolate Cake?
To keep your cake fresh, store it in an airtight container at room temperature for up to 3 days. For longer storage, you can refrigerate it, wrapped tightly, for up to 5 days. Always let it return to room temperature before enjoying for the best flavor!
Can I freeze this cake for later?
Yes, you can freeze your Coffee Chocolate Cake! First, wrap each individual slice (or the whole cake) tightly in plastic wrap and then aluminum foil to prevent freezer burn. It will hold its wonderful taste for up to 3 months. When you’re ready to enjoy it, thaw in the fridge overnight, then let it reach room temperature before serving.
What if my cake layers come out uneven?
No worries! If your cake layers aren’t perfectly level, just use a serrated knife to trim the tops once they’ve cooled. This ensures a stable stack and a beautifully presented cake. Plus, it gives you a chance to taste a little bit of the cake before serving!
Are there any dietary restrictions to consider with this recipe?
Yes! If you’re baking for someone with dietary restrictions, be mindful of potential allergies. This cake contains eggs and gluten from flour. For a dairy-free version, use non-dairy substitutes for sour cream, butter, and milk, such as coconut cream or almond milk butter. Always check labels if you’re serving pets, especially chocolate, which should be kept far away from them.
How can I improve the moisture of my cake?
If you find yourself in need of a more moist cake, consider adding an extra tablespoon of sour cream or Greek yogurt to your batter. This small addition can work wonders. Additionally, ensure you don’t overbake the cake—checking with a toothpick for a clean finish at around 28-30 minutes is essential!
Indulgent Coffee Chocolate Cake for Dessert Lovers
Ingredients
Equipment
Method
- Preheat your oven to 170ºC (340ºF) and line three 20 cm (8-inch) round cake pans with parchment paper.
- Brew your black coffee and allow it to cool. Sift together all-purpose flour, cornstarch, granulated sugar, dark brown sugar, cocoa powder, baking powder, baking soda, and salt in a bowl.
- In a separate bowl, whisk together vegetable oil, sour cream, eggs, cooled coffee, and vanilla extract until smooth.
- Gradually mix wet ingredients into dry ingredients until well combined and smooth.
- Divide the batter among the prepared pans and bake for 28-30 minutes. Cool in pans for 10 minutes before removing.
- Beat room temperature butter until creamy. Gradually add powdered sugar and mix well. Add cooled coffee and vanilla extract until fluffy.
- Level the tops of the cooled cake layers, stack them with buttercream in between, and apply a crumb coat before frosting the entire cake.
Leave a Reply