
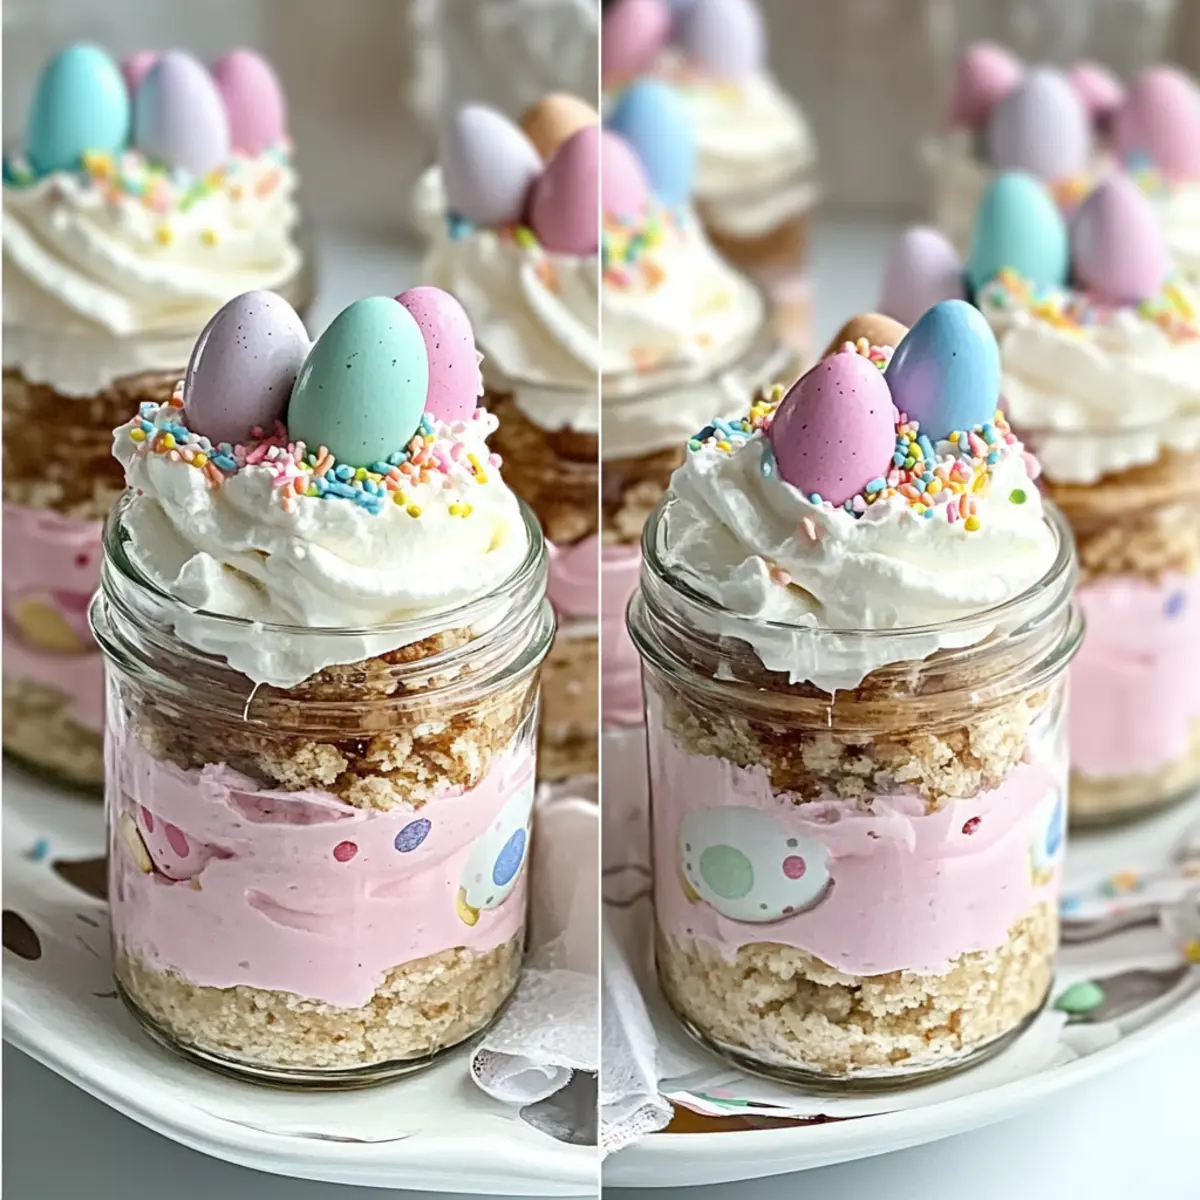
The air is filled with the sweet scent of chocolate and pastel colors—it’s Easter time! This season always calls for treats that bring joy to gatherings, and my Easy No-Bake Easter Egg Cheesecake Jars are just the thing to elevate your celebrations. With their creamy layers of rich cheesecake and a buttery graham cracker crust, these jars are not only incredibly delightful, but they also require minimal effort to whip up. You can easily prepare them in advance, which means less stress in the kitchen and more time to enjoy the festivities with your loved ones. Perfect for both kids and adults, these charming little desserts will surely be the talk of your Easter brunch. Are you ready to create a show-stopping centerpiece that will make everyone smile? Let’s dive into this colorful culinary adventure!
Why Are These Cheesecake Jars a Must-Try?
Delightful Presentation: These jars are not just a treat; they are a visual feast that brings smiles to any gathering.
Easy Preparation: With a simple no-bake recipe, you can spend more time celebrating and less time in the kitchen.
Customizable Flavors: Feel free to experiment! Swap the crust for crushed Oreos or create a lighter version with Greek yogurt.
Kid-Friendly Fun: Kids will love helping to layer the cheesecake, making this a wonderful family activity.
Perfect for Any Occasion: Whether it’s Easter brunch or spring picnics, these jars are versatile enough for any celebration.
Plus, if you enjoy festive desserts, check out my Oreo Cheesecake Indulgence for another crowd-pleaser!
Easter Egg Cheesecake Jars Ingredients
For the Crust
• Graham Cracker Crumbs – Provides structure and crunch for the base; can substitute with crushed Oreos or shortbread cookies for a different flavor.
• Granulated Sugar – Adds sweetness to the crust; no substitutions necessary.
• Unsalted Butter – Binds the crust ingredients together; make sure it’s melted for a uniform texture.
For the Cheesecake Filling
• Cream Cheese – The star ingredient for a creamy, rich filling; remember to soften it beforehand for easy mixing.
• Powdered Sugar – Sweetens the cheesecake layers and helps achieve a smooth consistency; can substitute with a sugar alternative if desired.
• Vanilla Extract – Enhances the flavor profile; always opt for high-quality vanilla for the best results.
• Heavy Cream – Whipped to stiff peaks for a light, airy texture; you can also substitute with coconut cream for a dairy-free version.
• Pink Gel Food Coloring/Freeze-Dried Strawberry Powder (optional) – Adds a fun, vibrant hue to the cheesecake layer; feel free to skip this for a natural look.
For the Toppings
• Whipped Cream – Adds a light and creamy finish; can be made from scratch or purchased ready-made.
• Pastel Candy Eggs – Decorative topping for that festive charm; feel free to use any small candy eggs you like.
• Rainbow or Pastel Sprinkles – Add color and fun to your jars; completely optional but highly recommended for that eye-catching look.
These Easter Egg Cheesecake Jars are not just delicious—they’re a delightful celebration of spring and joy!
Step‑by‑Step Instructions for Easter Egg Cheesecake Jars
Step 1: Prepare the Crust
In a medium bowl, combine graham cracker crumbs, granulated sugar, and melted unsalted butter until the mixture resembles damp sand. Use a fork to ensure all ingredients are well mixed, then evenly press this crumb mixture into the bottom of your jars. Aim for a compact layer, about half an inch thick, so it holds together nicely.
Step 2: Make the Cheesecake Filling
In a large mixing bowl, beat softened cream cheese with an electric mixer on medium speed until it’s smooth and creamy, about 2-3 minutes. Gradually add in powdered sugar and vanilla extract, mixing until the filling is light and fluffy. This step is crucial for the delightful texture of your Easter Egg Cheesecake Jars, so make sure there are no lumps!
Step 3: Whip the Cream
In a separate bowl, whip heavy cream using a hand mixer or stand mixer until stiff peaks form, typically around 3-4 minutes on medium-high speed. This whipped cream will create a light and airy texture in your cheesecake filling. Gently fold the whipped cream into the cream cheese mixture in two additions, ensuring you maintain that fluffy consistency.
Step 4: Color the Filling (Optional)
If you’re aiming for a vibrant look, divide the cheesecake filling into two bowls. Add pink gel food coloring or freeze-dried strawberry powder to one bowl, mixing just until the color is evenly distributed. Adjust the amount according to your desired shade, and feel free to skip this step if you prefer a classic look for your Easter Egg Cheesecake Jars.
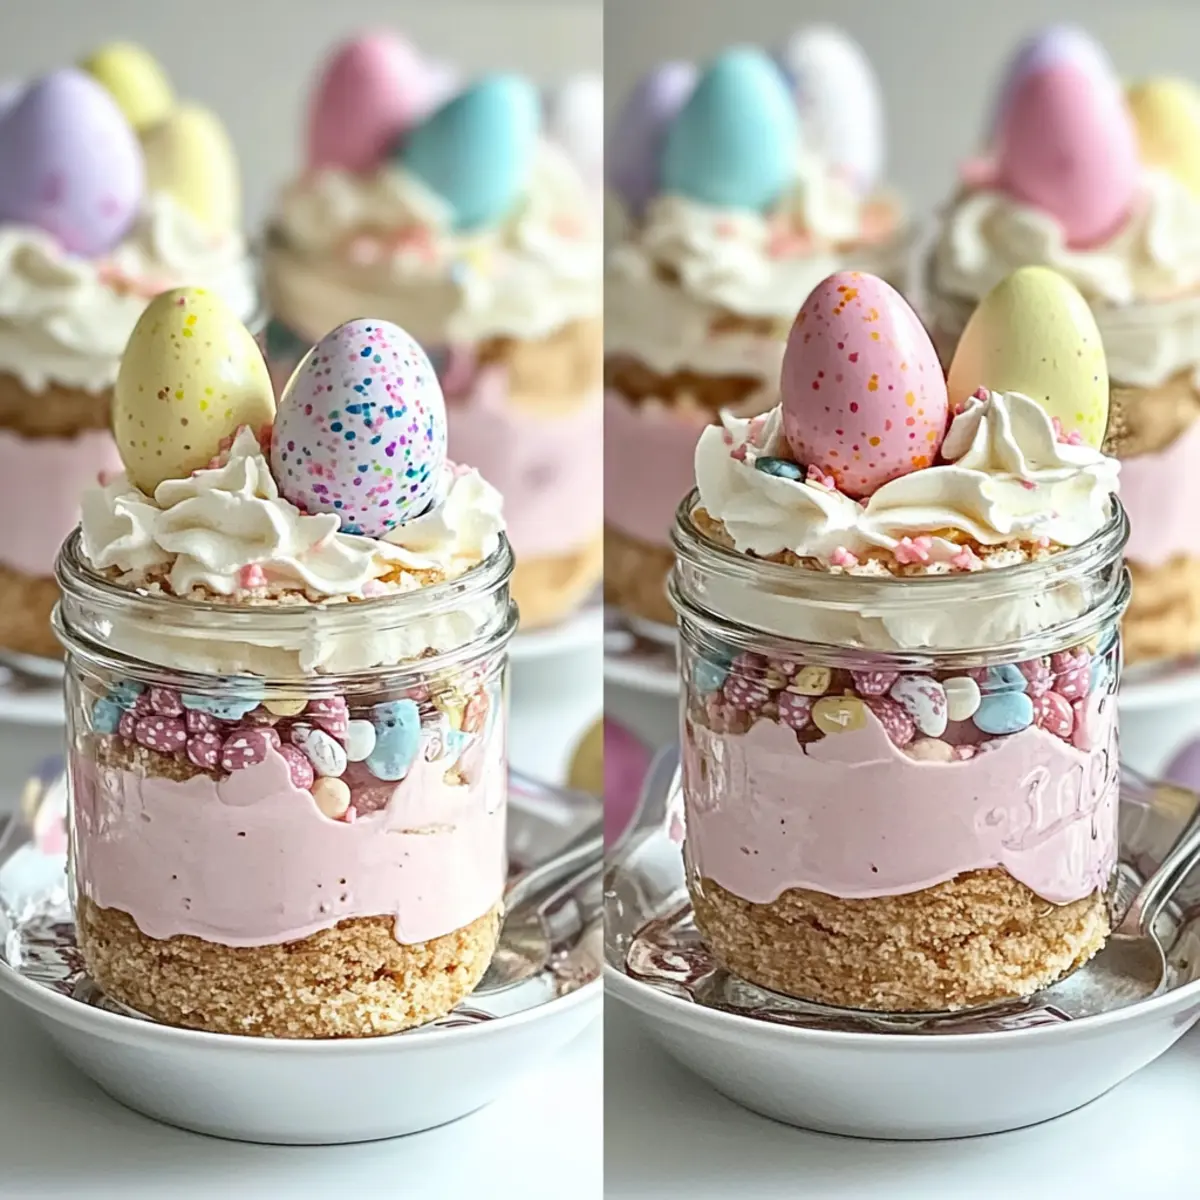
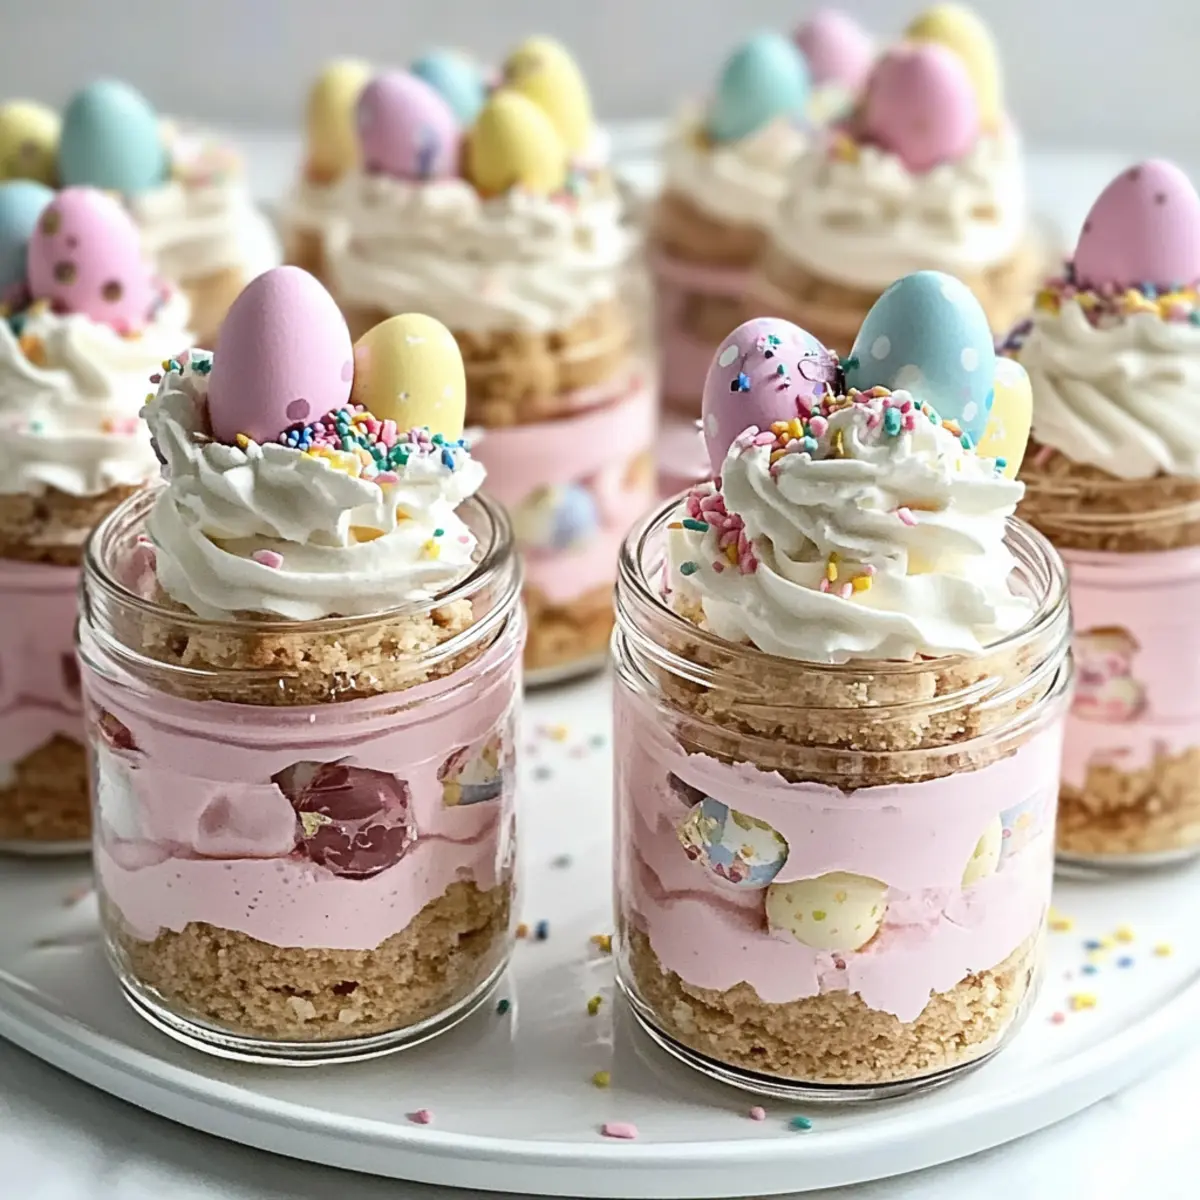
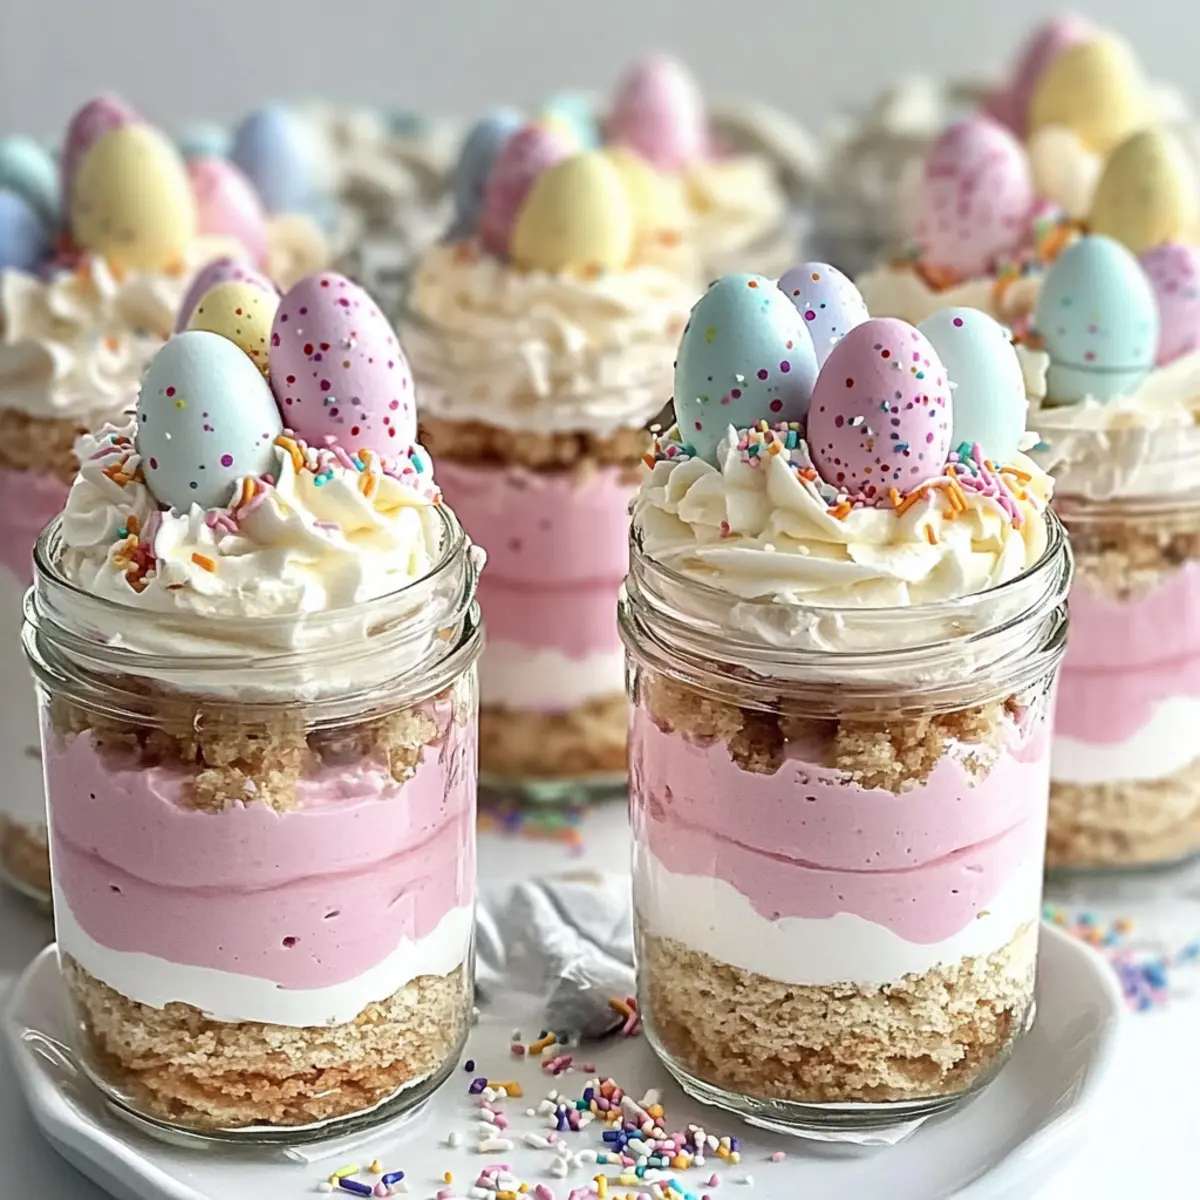
Step 5: Layer the Cheesecake
Using a spoon or a piping bag, start layering the cheesecake filling into the jars. Begin with the pink cheesecake filling, adding a layer about one-third full, followed by plain cheesecake filling. Continue layering until the jars are filled, leaving a little space for toppings. The layered effect not only looks stunning but also adds delightful flavors in each bite.
Step 6: Chill and Serve
Cover the jars with lids or plastic wrap and refrigerate for at least 2 hours to let the cheesecake set properly. Just before serving, remove the jars from the fridge, and top each one with a generous dollop of whipped cream, a few pastel candy eggs, and a sprinkle of rainbow or pastel sprinkles. This final touch makes your Easter Egg Cheesecake Jars a festive centerpiece for your celebration.
Expert Tips for Easter Egg Cheesecake Jars
-
Perfect Texture: Ensure cream cheese is at room temperature before mixing. This prevents lumps and contributes to a smooth, creamy filling in your Easter Egg Cheesecake Jars.
-
Layering Elegance: Use a piping bag for neater filling if you want a professional touch. It allows for cleaner layers and adds an attractive visual appeal to your jars.
-
Chill Time is Key: Don’t skip the chilling step! Refrigerating the jars for at least 2 hours ensures they hold their shape when served and enhances their flavor.
-
Customize Wisely: Got a sweet tooth? Feel free to adjust the sugar levels in the cheesecake filling, but keep in mind that too little may affect texture.
-
Festive Finishing: Top just before serving for a fresh look! Adding whipped cream, candy eggs, and sprinkles right before serving preserves texture and visual appeal.
What to Serve with Easter Egg Cheesecake Jars
These delightful jars are perfect for creating a fun and memorable meal experience with loved ones.
-
Fresh Fruit Salad: Burst of Juicy Flavors: A mixture of strawberries, blueberries, and kiwi adds freshness and a vibrant color contrast to the dessert.
-
Spring Garden Salad: Crisp and Light: Toss together arugula, cherry tomatoes, and a light lemon vinaigrette for a refreshing complement to the richness of the cheesecake.
-
Chocolate-Covered Strawberries: Decadent Treat: The sweetness of strawberries wrapped in rich chocolate offers a delightful pairing with the creamy cheesecake jars.
-
Sparkling Lemonade: Refreshing Beverage: This fizzy drink brings a zesty flavor that enhances the sweetness of your cheesecake without overwhelming the palate.
-
Vanilla Ice Cream: Creamy Indulgence: A scoop of vanilla ice cream served alongside adds an extra layer of creaminess while balancing the flavors.
-
Mini Carrot Cakes: Seasonal Sweet Treat: These moist and spiced cakes echo the Easter flavors and create a charming contrast with the cheesecakes.
-
Coffee or Espresso: Invigorating Beverage: A warm cup of coffee or espresso will help cut through the decadence, providing a balanced end to your festive meal.
Elevate your Easter brunch with these delightful pairings that will leave everyone smiling and satisfied!
How to Store and Freeze Easter Egg Cheesecake Jars
Fridge: Keep the jars in the refrigerator for up to 3 days. Ensure they are covered with lids or plastic wrap to maintain freshness and prevent absorption of odors.
Freezer: For longer storage, you can freeze the jars for up to 2 months. However, avoid freezing toppings like whipped cream and candies, as they may not hold up well once thawed.
Reheating: There’s no need to reheat cheesecake jars; simply remove them from the fridge or freezer and let them thaw in the refrigerator overnight for the best texture. Always add toppings such as whipped cream just before serving for maximum freshness.
Make-Ahead: You can prepare the Easter Egg Cheesecake Jars a day in advance, making them a convenient dessert option for gatherings. Just remember to store them properly until it’s time to serve!
Easter Egg Cheesecake Jars Variations & Substitutions
Feel free to mix things up with these fun variations to make your Easter Egg Cheesecake Jars uniquely yours!
- Dairy-Free: Substitute cream cheese and heavy cream with vegan cream cheese and coconut cream for a rich, dairy-free delight.
- Gluten-Free: Use gluten-free graham cracker crumbs or crushed almond flour cookies for your crust to make this treat gluten-friendly.
- Fruit Flavored: Add pureed fruit, like strawberries or raspberries, to the cheesecake mixture for a pop of delicious flavor and color.
- Chocolate Lovers: Mix in cocoa powder to half of the cheesecake filling for a decadent chocolate layer that contrasts perfectly with the vanilla.
- Nutty Twist: Incorporate crushed nuts, such as almonds or walnuts, into the crust for an earthy crunch that complements the creamy layers.
- Add some Zing: A hint of lemon or lime zest in the cheesecake filling brings a refreshing brightness to balance the sweetness.
- Decadent Drizzle: Top with a swirl of chocolate or caramel sauce for an indulgent finish that adds extra sweetness and visual appeal.
- Individual Portions: Instead of jars, layer the filling in dessert cups or cups for smaller, portable servings perfect for picnics or parties.
These delightful swaps and twists ensure that your Easter Egg Cheesecake Jars celebrate your personal taste and creativity. If you’re in the mood for more cheesecake inspiration, dive into my “Oreo Cheesecake Indulgence” or check out the decadent “Ultimate Chocolate Cheesecake” for some extra creamy goodness!
Make Ahead Options
These Easy No-Bake Easter Egg Cheesecake Jars are a fantastic solution for busy home cooks looking to save time! You can prepare the crust and cheesecake filling up to 24 hours in advance—just store them separately in airtight containers in the refrigerator to maintain freshness. When you’re ready to assemble, layer the crust and filling in the jars and chill for at least 2 hours before serving. To keep the toppings fresh and fluffy, add the whipped cream, pastel candy eggs, and sprinkles right before serving. This way, you can enjoy a delicious and festive dessert with minimal efforts on the day of your celebration!
Easter Egg Cheesecake Jars Recipe FAQs
What kind of graham cracker crumbs should I use?
You can use store-bought graham cracker crumbs for convenience, or crush whole graham crackers in a food processor or zip-top bag. If you’re feeling adventurous, try using crushed Oreos or shortbread cookies for a unique flavor twist!
How should I store leftover Easter Egg Cheesecake Jars?
Store your cheesecake jars in the refrigerator covered with lids or plastic wrap. They will stay fresh for up to 3 days. This is a great way to enjoy the deliciousness later!
Can I freeze Easter Egg Cheesecake Jars?
Absolutely! You can freeze the jars without toppings for up to 2 months. Just make sure to wrap them well in plastic wrap or place them in airtight containers. When you’re ready to eat, thaw them overnight in the fridge, and add your toppings just before serving for the best results!
What should I do if my cheesecake filling is lumpy?
If you notice lumps in your filling, it’s likely due to the cream cheese not being softened completely. Always make sure to bring cream cheese to room temperature before mixing. If it does happen, you can blitz the filling with a mixer for a minute or two until smooth, or strain it through a fine mesh sieve for a creamy texture.
Are these cheesecake jars safe for kids or those with allergies?
Yes, these jars are generally safe for kids; however, if anyone has allergies, make sure to use substitutions as needed. For a nut-free option, avoid any nuts in the crust or toppings, and check that your sprinkles and candy eggs don’t contain any allergens. Always read labels when using pre-packaged ingredients!
Can I make these jars vegan?
Yes, you can! Swap the cream cheese for a similar vegan alternative, use coconut cream instead of heavy cream, and choose vegan-friendly graham crackers. This way, you can enjoy the Easter Egg Cheesecake Jars while accommodating dietary preferences!
Easter Egg Cheesecake Jars that Delight the Senses
Ingredients
Equipment
Method
- In a medium bowl, combine graham cracker crumbs, granulated sugar, and melted unsalted butter until the mixture resembles damp sand. Press into jars for a compact layer.
- In a large mixing bowl, beat softened cream cheese until smooth. Gradually add powdered sugar and vanilla extract, mixing until fluffy.
- In a separate bowl, whip heavy cream until stiff peaks form. Gently fold into the cream cheese mixture.
- If desired, divide filling into two bowls. Add pink gel food coloring or freeze-dried strawberry powder to one bowl and mix.
- Layer cheesecake filling into jars, starting with colored filling followed by plain filling, leaving space for toppings.
- Cover and refrigerate for at least 2 hours. Before serving, top each jar with whipped cream, candy eggs, and sprinkles.
Leave a Reply