
As I sank my teeth into a warm, gooey cookie fresh from the oven, memories of childhood bliss washed over me. There’s something truly magical about the aroma of chocolate chip cookies wafting through the air! My ultimate chewy chocolate chip cookies are the perfect blend of soft centers and slightly crisp edges, making them a go-to for home bakers like you and me. Not only is this recipe quick to prepare, but it’s also a guaranteed crowd-pleaser for any occasion—or just a cozy night in. Whether you’re looking to impress guests or simply need a little sweet indulgence after a long day, these cookies will bring joy to your kitchen and a smile to your face. So, are you ready to bring back those warm, nostalgic moments with me? Let’s dive into the deliciousness!
Why Are These Cookies So Irresistible?
Warm, Nostalgic Aromas: As these cookies bake, your kitchen fills with an enchanting scent that takes you back to carefree childhood days.
Perfect Texture: Enjoy the magic of a soft, chewy center paired with slightly crisp edges—each bite is a delightful textural experience.
Quick & Easy: Made with simple ingredients, this recipe is perfect for busy home bakers looking for a speedy treat!
Customizable: Mix it up by adding nuts, oats, or even swapping in your favorite chocolate—endless possibilities await!
Crowd-Pleaser: Whether you serve them at a gathering or indulge solo, these cookies are sure to impress. Try pairing them with a glass of milk or ice cream for a heavenly experience!
Ready for more culinary adventures? Check out my Avocado Toast Crunchy or whip up some Vegan Quesadillas Avocado for delightful variations of flavor in your kitchen!
Chocolate Chip Cookie Ingredients
• For the Dough
- All-purpose flour – Provides structure and density; for a gluten-free option, use a gluten-free flour blend.
- Baking soda – Acts as a leavening agent for lift; make sure it’s fresh for the best cookie rise.
- Salt – Enhances the overall flavor; you can reduce it for a lower sodium version if desired.
- Unsalted butter – Adds richness and moisture; coconut oil or margarine are great dairy-free substitutes.
- Brown sugar – Contributes to chewiness and a delightful caramel flavor; opt for white sugar for a firmer cookie.
- Granulated sugar – Adds sweetness and helps with spreading during baking.
- Egg – Binds all ingredients together; for a vegan alternative, replace it with a flax egg.
- Vanilla extract – Infuses depth of flavor into the cookies; use pure for the most authentic taste.
- Chocolate chips – The star of these cookies; choose semi-sweet or dark chocolate, or try dairy-free chips for a vegan spin.
Feel free to bake up a batch of these chocolate chip cookies and enjoy the happy memories they create!
Step‑by‑Step Instructions for Ultimate Chewy Chocolate Chip Cookies
Step 1: Preheat the Oven
Begin by preheating your oven to 350°F (175°C). This step is crucial as it allows for even baking and ensures your cookies develop that perfect golden hue. While the oven heats, get your baking sheet ready by lining it with parchment paper, making cleanup a breeze while preventing any sticky situations.
Step 2: Cream the Butters and Sugars
In a large mixing bowl, combine softened unsalted butter, brown sugar, and granulated sugar. Use a hand mixer or stand mixer on medium speed to cream these ingredients together for about 2-3 minutes until the mixture is light and fluffy. This process incorporates air, setting the stage for a chewy texture in your chocolate chip cookies.
Step 3: Mix in the Wet Ingredients
Next, beat in one large egg and 1 teaspoon of vanilla extract into the creamed mixture. Continue mixing until these ingredients are fully incorporated, and the batter appears smooth. This step adds moisture and flavor, giving your cookies that deliciously rich taste—just what you need for your ultimate chewy chocolate chip cookies!
Step 4: Combine Dry Ingredients
In a separate bowl, whisk together 2 ½ cups of all-purpose flour, 1 teaspoon of baking soda, and ½ teaspoon of salt. Mixing these dry ingredients ensures a consistent rise and enhances the flavor throughout the dough. Gradually add this dry mixture to your wet ingredients, mixing on low speed until just combined—be careful not to over-mix at this stage.
Step 5: Fold in the Chocolate Chips
Once the dough is combined, gently fold in 2 cups of chocolate chips using a spatula or wooden spoon. This step ensures your cookies have ample chocolate goodness in every bite, creating that rich, melty chocolate experience as they bake. The visual cue here is the evenly distributed chocolate throughout the dough, which should look inviting and ready to bake.
Step 6: Scoop the Dough
Using a tablespoon or cookie scoop, scoop generous portions of the dough and place them onto the prepared baking sheet, leaving about 2 inches of space between each scoop. This spacing allows the cookies to spread properly without merging together. For consistency, try to keep each cookie mound similar in size to achieve even baking.
Step 7: Bake the Cookies
Slide the baking sheet into the preheated oven and bake the cookies for 9-11 minutes. Keep a close eye on them—the edges should start to turn golden brown while the centers will still look soft. This contrast is key for achieving the perfect chewy texture in your ultimate chocolate chip cookies.
Step 8: Cool on the Baking Sheet
Once baked, remove the cookies from the oven and let them cool on the baking sheet for about 5 minutes. This helps them set and makes transferring to a wire rack easier. You’ll notice the aroma lingering around your kitchen, inviting everyone to come and indulge in these delightful treats.
Step 9: Transfer and Enjoy
After cooling slightly, carefully transfer the cookies to a wire rack to cool completely. As they cool, they’ll firm up while maintaining that delicious chewiness. Once cooled, these ultimate chewy chocolate chip cookies are ready to be enjoyed—feel free to savor them warm, or store them for later in an airtight container at room temperature.
Expert Tips for Ultimate Chewy Chocolate Chip Cookies
Butter Temperature: Ensure your unsalted butter is at room temperature for optimal creaming, which contributes to a light, airy texture.
Mixing Caution: Be careful not to over-mix once the dry ingredients are added; this prevents tough cookies. Gently combine for that perfect chewy chocolate chip cookie texture.
Chill for Flavor: For an extra flavor boost, consider chilling the dough for about an hour prior to baking. This develops a deeper taste and enhances chewiness.
Uniform Sizes: Use a cookie scoop to ensure consistent sizes for even baking. This will help each cookie bake evenly and create that beautiful golden edge.
Watch Baking Time: Keep a close eye on the cookies while baking; remove them when the edges are golden brown but the centers still look slightly underbaked for that perfect texture.
Storage Tips: Store your cookies in an airtight container at room temperature for up to 5 days to maintain freshness and enjoy the best of these chewy delights!
How to Store and Freeze Chocolate Chip Cookies
Room Temperature: Keep your cookies in an airtight container at room temperature for up to 5 days for optimal freshness and flavor.
Fridge: If you prefer a longer shelf life, store them in the fridge for up to 1 week. Make sure they are tightly wrapped to avoid drying out.
Freezer: For best preservation, freeze cookies in a single layer, then transfer to an airtight container. They can last up to 3 months in the freezer.
Reheating: To enjoy your chocolate chip cookies warm again, reheat in the microwave for about 10-15 seconds or pop them in a preheated oven at 350°F (175°C) for a few minutes.
What to Serve with Ultimate Chewy Chocolate Chip Cookies
As you indulge in these warm, delightful cookies, consider pairing them with complementary dishes that enhance the sweetness and satisfy your cravings.
-
Cold Glass of Milk:
The classic duo! A refreshing glass of milk balances the rich, sweet flavors of the cookies and adds a comforting touch. -
Vanilla Ice Cream:
Serve these cookies warm alongside a scoop of creamy vanilla ice cream for a delicious melting experience that’s pure heaven. -
Fresh Berries:
Bright and juicy berries such as strawberries or raspberries provide a burst of freshness, cutting through the richness of the cookies beautifully. -
Chocolate Sauce Drizzle:
Elevate your cookie experience with a warm drizzle of chocolate sauce. It adds indulgent extra chocolate goodness and makes each bite more decadent. -
Espresso or Coffee:
The robust flavors of a strong espresso or freshly brewed coffee pair perfectly with the sweetness of the cookies, creating a delightful contrast. -
Nutty Trail Mix:
A crunchy nutty trail mix on the side can provide an enjoyable texture contrast while enhancing the flavors with earthy notes. -
Salted Caramel Sauce:
Drizzling these cookies with warm salted caramel sauce introduces a buttery sweetness that pairs brilliantly with the chocolate chips. -
Flavored Herbal Tea:
A calming cup of herbal tea adds a relaxing element to your cookie indulgence, offering different flavor profiles to complement the sweetness. -
Frozen Yogurt:
For a lighter twist, pair your cookies with a scoop of frozen yogurt. The tanginess balances the cookie’s richness, creating a delightful treat. -
S’mores Dip:
Serve alongside a warm s’mores dip filled with melted chocolate and marshmallows for a fun, shareable dessert that’s sure to delight!
Make Ahead Options
These Ultimate Chewy Chocolate Chip Cookies are perfect for meal prep enthusiasts! You can prepare the cookie dough up to 72 hours in advance by refrigerating it in an airtight container. For longer storage, consider freezing the dough for up to 3 months. Simply scoop the dough onto a baking sheet lined with parchment paper and freeze until solid, then transfer the individual dough balls to a zip-top bag. When you’re ready to bake, you can either let them thaw in the refrigerator overnight or bake them straight from frozen, adding an extra minute to the baking time. This way, you’ll enjoy warm cookies with minimal effort, all while maintaining that signature chewiness and flavor!
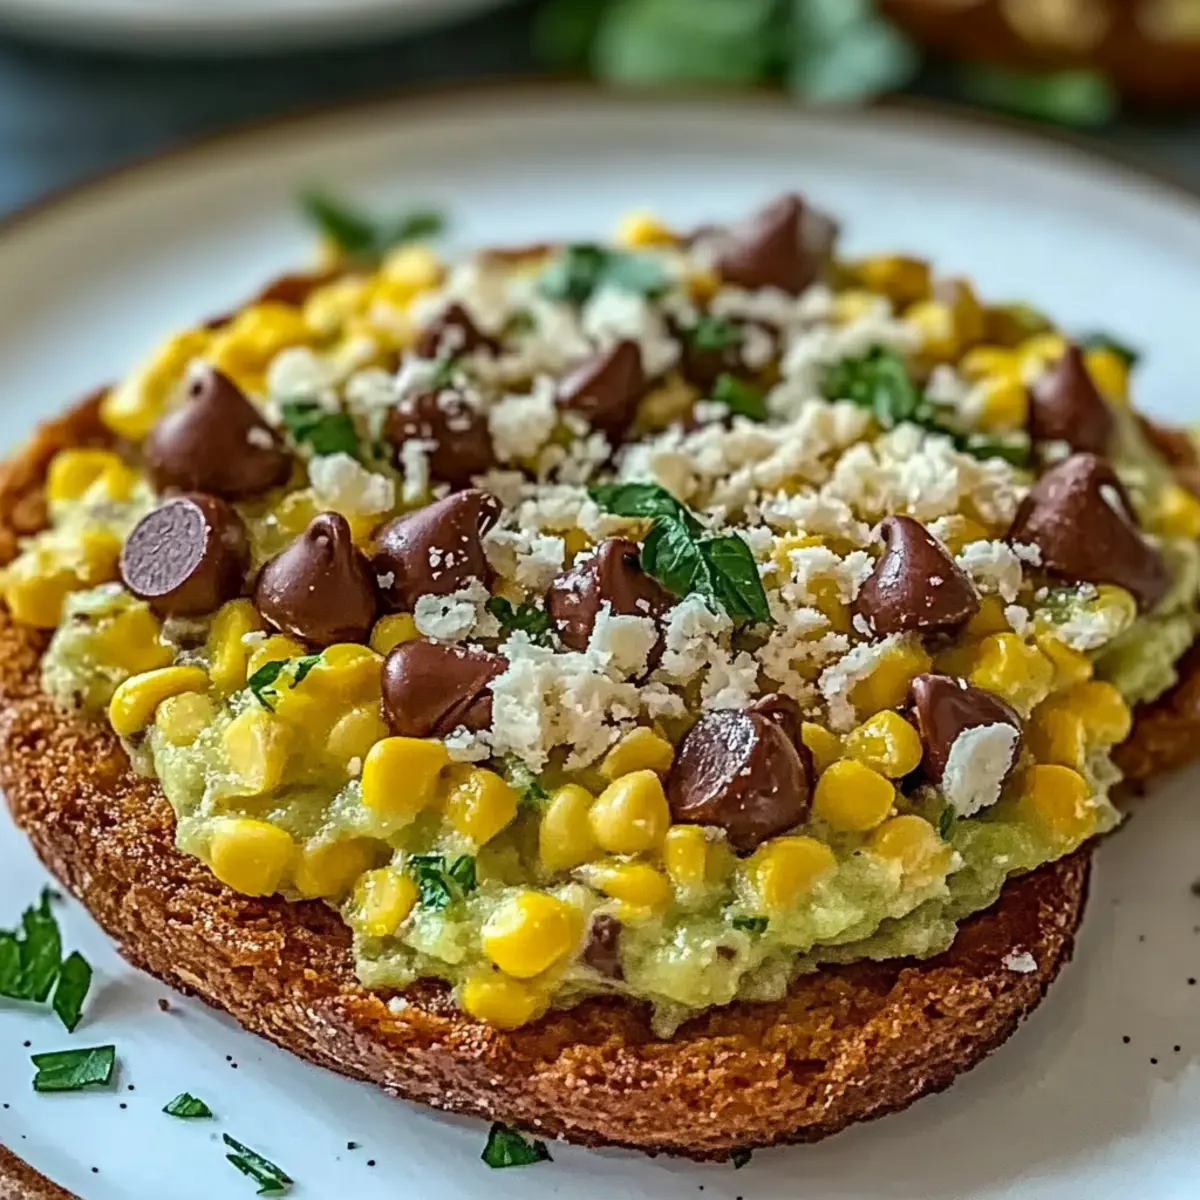
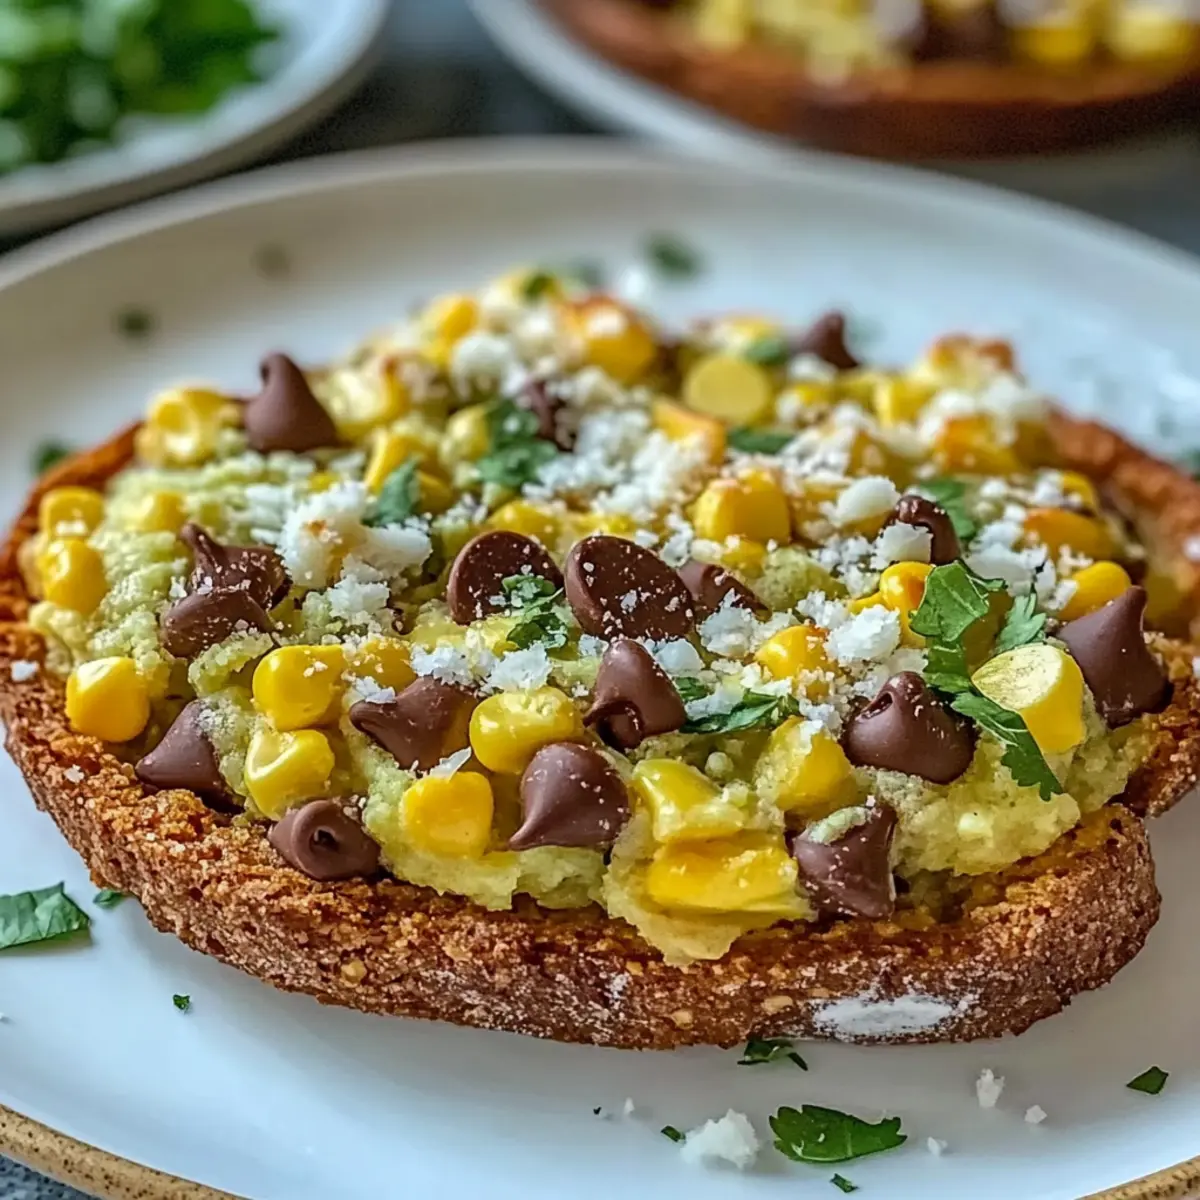
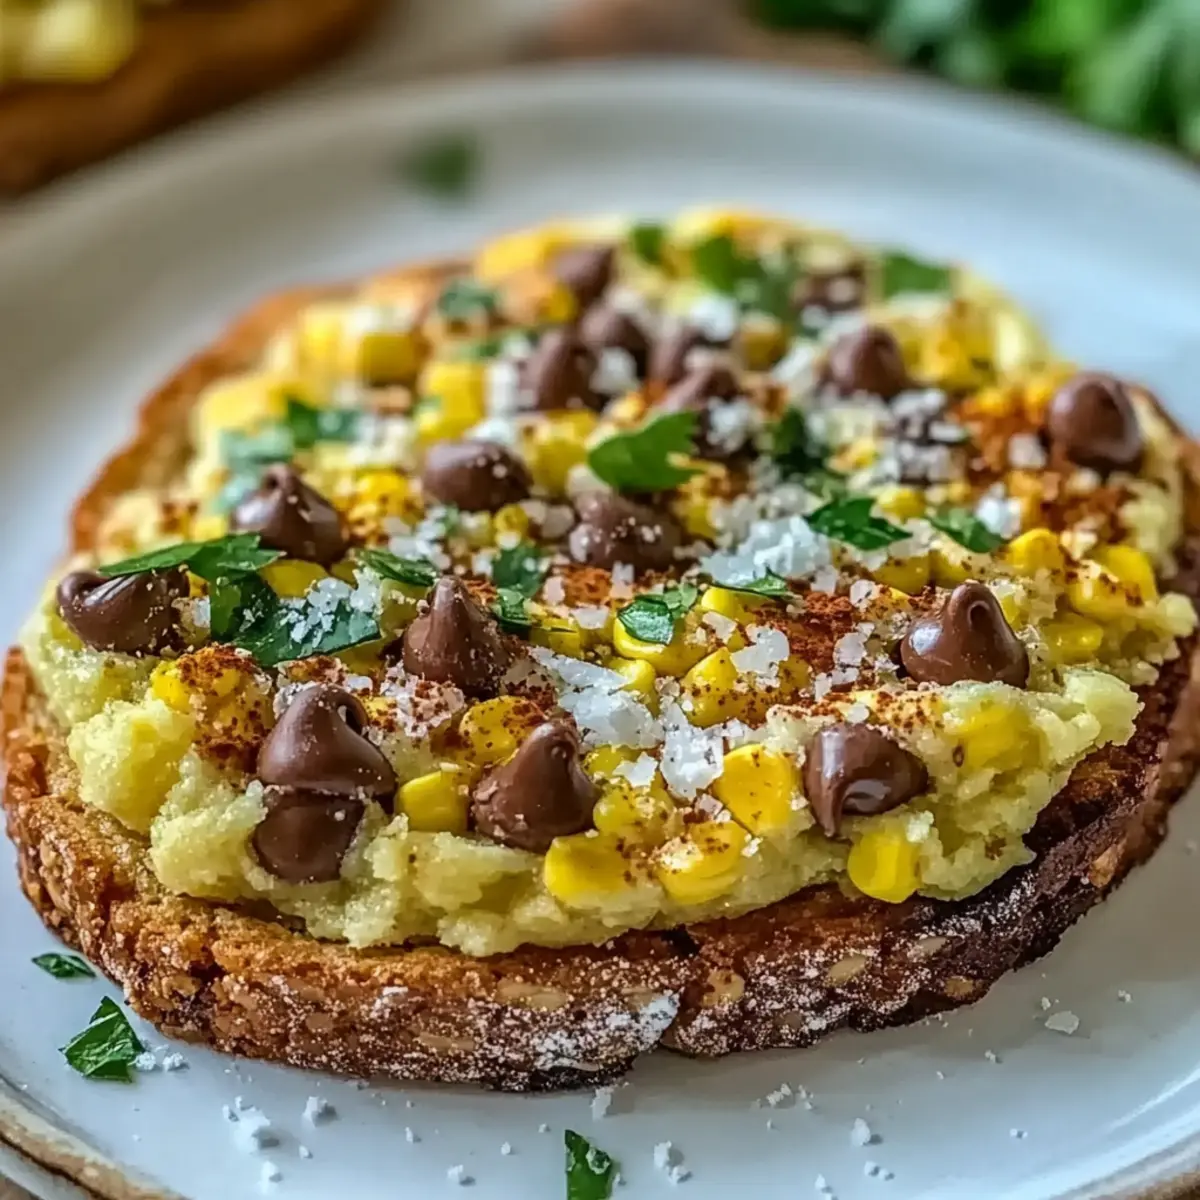
Mexican Street Corn Avocado Toast Variations
Get ready to elevate your avocado toast with endless possibilities that tickle your taste buds and warm your heart!
- Spicy Twist: Add a pinch of cayenne pepper or chopped jalapeños for a delightful kick; this will wake up the flavors and bring some heat.
- Creamy Feta: Crumble feta cheese on top for a tangy dimension; the creaminess pairs beautifully with the corn and avocado, adding richness.
- Herb Infusion: Sprinkle fresh cilantro or chopped green onions; these herbs provide an aromatic freshness that brightens every bite.
- Zesty Lime: Squeeze fresh lime juice over your toast for a burst of acidity; it balances the richness and enhances the overall flavor explosion.
- Nutty Crunch: Top with toasted pumpkin seeds or chopped walnuts for an unexpected texture; the crunch gives a satisfying contrast to the creamy base.
- Chili Lime Mayo: Spread a thin layer of chili lime mayonnaise on the toast for an extra zing; it brings a creamy, spicy element that complements the corn perfectly.
- Pico de Gallo: Add a spoonful of fresh pico de gallo on top to introduce a refreshing crunch; the tomatoes and onions add color and flavor, making it even more vibrant.
- Smoky Flavor: Incorporate smoked paprika into the corn mixture for a deeper flavor profile; this subtle smokiness will take your toast to a whole new level.
Feel inspired? Don’t forget to check out my recipes for a tasty Brulee French Toast or mix things up with some Chickpea Feta Avocado for more delicious ideas!
Ultimate Chewy Chocolate Chip Cookies Recipe FAQs
What type of flour should I use for the cookies?
Absolutely! For the best results, all-purpose flour is recommended as it provides the perfect structure and density. If you’re looking for a gluten-free option, you can substitute it with a gluten-free flour blend. Just ensure that the blend includes xanthan gum for the best texture.
How should I store the cookies, and how long do they last?
These delicious cookies can be stored in an airtight container at room temperature for up to 5 days. If you want them to last longer, consider keeping them in the fridge for up to a week. Just make sure they’re tightly wrapped to keep them from drying out—nobody wants a stale cookie!
Can I freeze the cookie dough?
Yes, you sure can! To freeze the cookie dough, scoop it into balls as if you’re about to bake them, and place them on a baking sheet lined with parchment paper. Freeze for 1-2 hours until firm, then transfer the dough balls to an airtight container or freezer bag. They can last up to 3 months! When you’re ready to bake, just add a couple of extra minutes to the baking time.
What should I do if my cookies are too flat?
If your cookies end up too flat, it could be due to using melted butter instead of softened butter or not having enough flour. Make sure your butter is at room temperature and measure your flour correctly—spoon it into your measuring cup and level it off for accuracy. If they spread too much during baking, try chilling the dough for about 30 minutes before baking to help firm them up.
Can these cookies be made vegan or for someone with allergies?
The answer is a resounding yes! You can easily swap out the regular butter for coconut oil or dairy-free margarine for a delicious dairy-free version. For the egg, use a flax egg (1 tablespoon of ground flaxseed mixed with 2.5 tablespoons of water—let it sit for 5 minutes to thicken) for a vegan substitute. Always remember to check for chocolate chips that are labeled as dairy-free for those avoiding animal products!

Savor This Mexican Street Corn Avocado Toast Delight
Ingredients
Equipment
Method
- Preheat the oven to 350°F (175°C). Line a baking sheet with parchment paper.
- Cream together butter, brown sugar, and granulated sugar until light and fluffy.
- Mix in egg and vanilla extract until smooth.
- In another bowl, whisk together flour, baking soda, and salt. Gradually add to wet ingredients.
- Fold in chocolate chips until evenly distributed.
- Scoop the dough onto the prepared baking sheet, spacing them 2 inches apart.
- Bake for 9-11 minutes, until edges are golden and centers look soft.
- Cool on the baking sheet for 5 minutes before transferring to a wire rack.
- Enjoy warm or store in an airtight container at room temperature.
Leave a Reply