
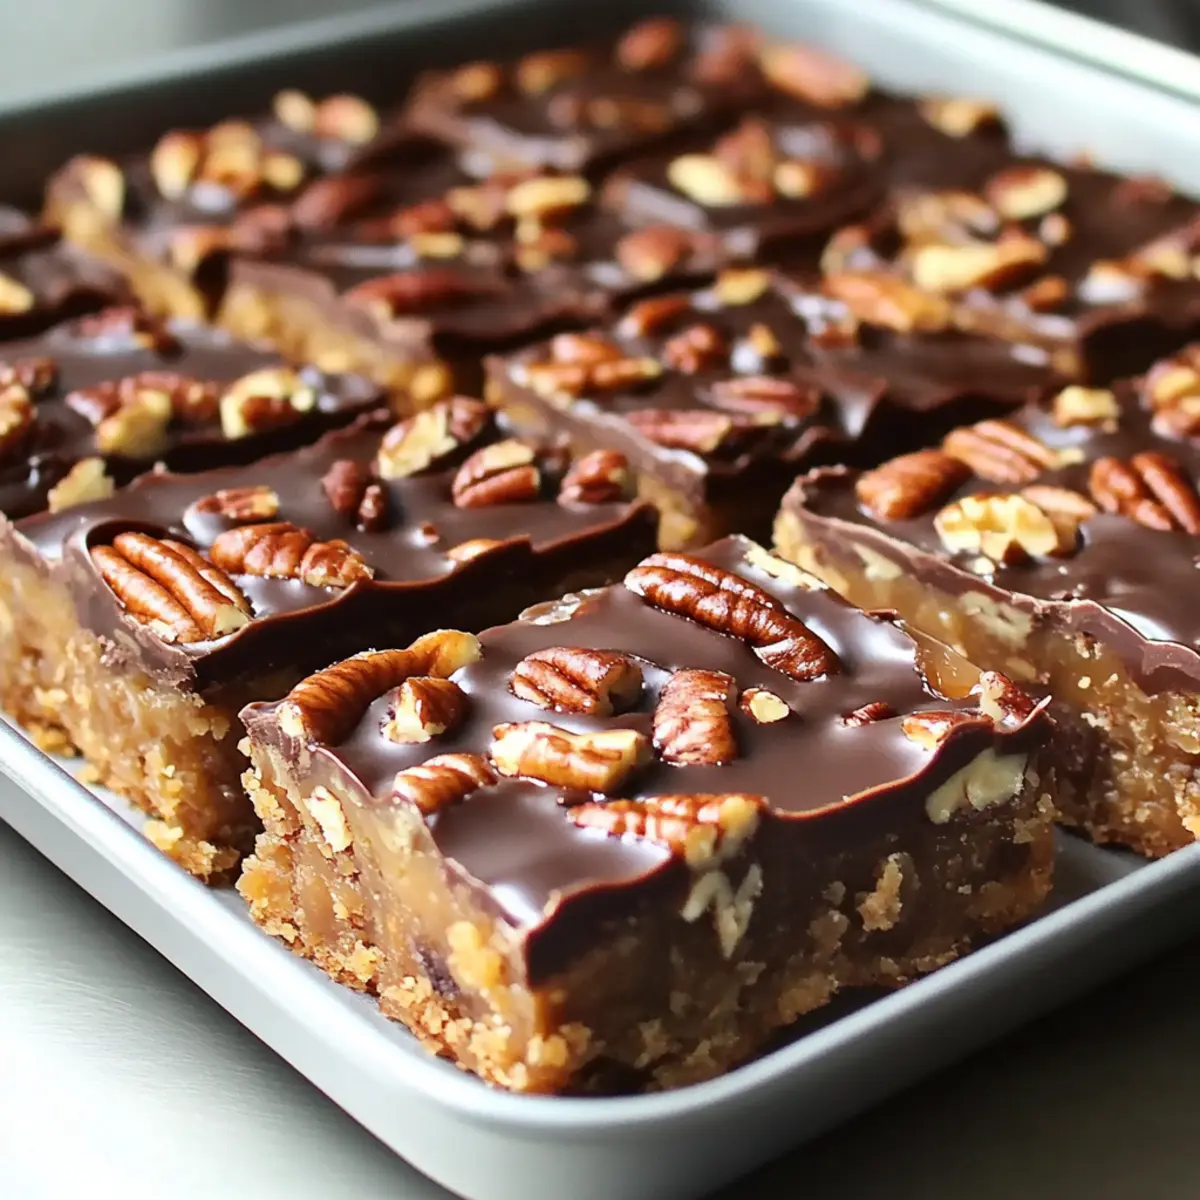
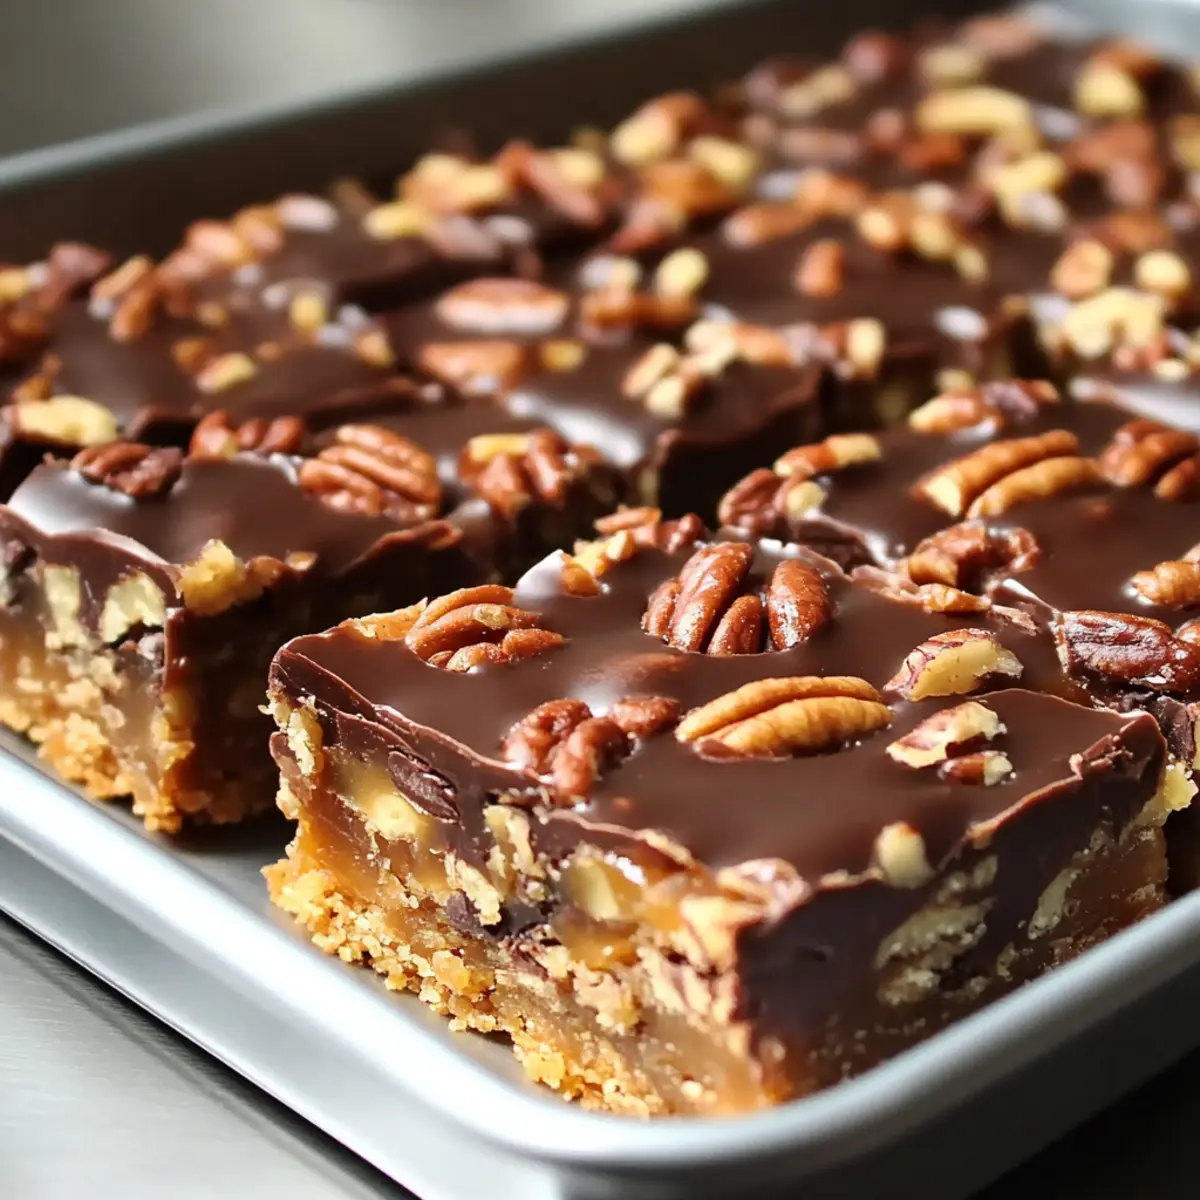
As I stood in my kitchen, the rich aroma of melted caramel teasing my senses, a wave of nostalgia washed over me. These Easy Turtle Bars have a way of reminding me of cozy gatherings filled with laughter and indulgence. With a buttery shortbread crust and a gooey caramel layer topped with toasted pecans, this recipe is not only easy to make but also sure to impress everyone at the table. Decadent yet simple, these bars are perfect for both novice bakers and seasoned pros looking for a delightful treat. Plus, they can be prepped ahead of time, making them an ideal sweet addition to any occasion. Curious what makes these bars a foolproof crowd-pleaser? Let’s dive into the deliciousness!
Why Are Easy Turtle Bars So Irresistible?
Indulgent Flavors: The rich blend of chocolate, caramel, and pecans creates a taste reminiscent of beloved turtle candies.
Deceptively Easy: Perfect for all bakers, this recipe requires minimal skills and offers maximum impact.
Make Ahead Magic: Prepare them a day ahead for the flavors to meld beautifully—great for busy hosts!
Versatile Variations: Want to mix it up? Try different nuts or swap caramel for peanut butter for a unique twist.
Crowd-Pleasing Delight: Whether at a party or for a cozy night in, these bars are sure to impress, much like my Chocolate Peanut Bars.
These bars not only satisfy cravings but also bring a nostalgic touch to any gathering!
Easy Turtle Bars Ingredients
• Get ready to make the perfect indulgent dessert!
For the Crust
- Butter – Use cold butter for a rich and flaky crust texture.
- Granulated Sugar – Sweetens the crust; brown sugar can substitute for a deeper flavor.
- All-Purpose Flour – Forms the base; gluten-free flour is a great alternative for a gluten-free version.
For the Caramel Layer
- Caramel Sauce – Creates the delicious gooey layer; opt for store-bought for convenience or homemade for a special touch.
- Pecans – Adds a lovely crunch; feel free to substitute with walnuts or almonds if you prefer.
For the Topping
- Chocolate Chips – Use semi-sweet or dark chocolate chips for a melt-in-your-mouth finish.
- Optional Toppings (e.g., sea salt) – Sprinkle on top just before serving to enhance the flavor contrast of these Easy Turtle Bars.
Step‑by‑Step Instructions for Easy Turtle Bars
Step 1: Prep Crust
Preheat your oven to 350°F (175°C). In a large mixing bowl, combine cold butter, granulated sugar, and all-purpose flour. Use a pastry cutter or your fingers to mix until the mixture resembles coarse crumbs. Line an 8×8-inch baking pan with parchment paper, allowing some overhang for easy removal, then firmly press the crumb mixture into the bottom of the pan.
Step 2: Bake Crust
Place the baking pan in the preheated oven and bake the crust for 15-20 minutes, or until it’s lightly golden and fragrant. Keep an eye on it to prevent over-baking. Once baked, remove the pan from the oven and set it aside to cool slightly while you prepare the gooey caramel layer for the Easy Turtle Bars.
Step 3: Make Caramel Layer
In a medium saucepan over low heat, melt the caramel sauce until it becomes smooth and pourable, stirring constantly to avoid burning. Once melted, remove the saucepan from the heat and stir in the chopped pecans until evenly coated. Pour this buttery, nutty mixture over the pre-baked crust, spreading it evenly to create a luscious layer.
Step 4: Add Chocolate Topping
In a microwave-safe bowl, melt the chocolate chips in increments of 20 seconds, stirring in between, until fully melted and smooth. Once melted, gently spread the chocolate over the caramel and pecan layer, ensuring it covers every inch. The rich chocolate topping will form a delightful finish for your Easy Turtle Bars.
Step 5: Cool Completely
Allow the bars to cool at room temperature for about 30 minutes. Then, refrigerate them for at least 1 hour to set completely. This chilling time helps the layers meld together and ensures clean cuts. Once chilled, remove the bars from the pan using the parchment overhang and slice them into squares for serving.

What to Serve with Easy Turtle Bars
Indulging in decadent Easy Turtle Bars is just the beginning—make it a delightful experience with perfect pairings!
-
Vanilla Ice Cream: A classic pairing that adds a creamy contrast to the rich bars; the cold ice cream balances the warm chocolate topping beautifully.
-
Espresso: The bold flavor of espresso complements the sweetness of the bars, creating a beautifully balanced dessert experience that awakens the senses.
-
Fresh Berries: Juicy strawberries or raspberries add a refreshing tartness that cuts through the richness of the caramel and chocolate, offering a vibrant color contrast too.
-
Whipped Cream: Light and airy, whipped cream enhances the indulgence of the Easy Turtle Bars while providing a lovely, fluffy texture that melts in your mouth.
-
Chocolate Milkshake: For a fun twist, serve alongside a thick chocolate milkshake; its creamy consistency pairs perfectly with the crunchy pecans and gooey caramel.
For a refreshing finish, consider serving a fruit salad on the side. The bright flavors of seasonal fruits will cleanse the palate and leave everyone feeling satisfied after these delightful bars.
Storage Tips for Easy Turtle Bars
- Room Temperature: Store your Easy Turtle Bars in an airtight container at room temperature for up to 3 days. This keeps them fresh while maintaining that delightful gooey texture.
- Fridge: For longer freshness, refrigerate the bars in an airtight container where they can last up to a week without losing flavor.
- Freezer: Freeze the bars for up to 3 months. Wrap them tightly in plastic wrap followed by aluminum foil to prevent freezer burn; simply thaw at room temperature when ready to enjoy.
- Reheating: Enjoy the bars at room temperature or slightly warmed in the microwave for a few seconds to relive that melty chocolate goodness!
Make Ahead Options
These Easy Turtle Bars are perfect for meal prep enthusiasts! You can prepare the crust up to 24 hours in advance by mixing the ingredients and pressing it into the baking pan, then refrigerate it. Additionally, the caramel layer can be made ahead and kept refrigerated for up to 3 days; just warm it slightly before pouring over the crust to keep it smooth. When you’re ready to finish the bars, assemble the layers by adding the caramel, melting the chocolate chips, and spreading them on top. Allow the bars to chill after assembly for the best results—this approach not only saves you time on busy days but helps the flavors meld together beautifully, ensuring they are just as delicious as if made fresh!
Expert Tips for Easy Turtle Bars
-
Cold Butter Magic: Using cold butter is crucial for achieving the perfect crumbly crust that holds together beautifully.
-
Stir, Don’t Rush: Stir caramel continuously on low heat to prevent burning. A little patience goes a long way in achieving that silky texture.
-
Chill for Success: Allow the Easy Turtle Bars to cool completely before cutting. This helps achieve neat squares and the perfect bite.
-
Flavor Boost: For an enhanced flavor experience, consider letting the bars sit overnight after cooling; the flavors meld together beautifully!
-
Nutty Substitutions: If pecans aren’t your favorite, feel free to swap them out for walnuts or almonds; just keep the total amount the same for best results.
Easy Turtle Bars Variations & Substitutions
Feel free to get creative and make these Easy Turtle Bars your own with delightful twists and substitutions!
-
Nut Options: Swap pecans for walnuts or almonds for a different crunchy texture. Each nut brings its unique flavor that can change the vibe of the bars entirely.
-
Vegan Version: Use plant-based butter and dairy-free chocolate chips for a delicious vegan take. You’ll still achieve that fantastic gooey and rich taste!
-
Gluten-Free: Substitute all-purpose flour with a 1:1 gluten-free blend for a gluten-free version everyone can enjoy. This option ensures that the bars remain just as indulgent.
-
Peanut Butter Layer: Replace the caramel sauce with creamy peanut butter for a unexpected salty-sweet combination. This twist appeals to peanut butter lovers and adds a lovely nutty flavor!
-
Spiced Chocolate: Add a pinch of cayenne or cinnamon to your melted chocolate topping for a little kick. This subtle spice can elevate the flavors and give your bars a unique twist.
-
Sea Salt Finish: Sprinkle coarse sea salt over the chocolate layer before it sets for that sweet and salty combo that’s irresistible. Just like the finishing touch on a gourmet dessert!
Want to take these bars to the next level? Serve them alongside coffee or pair them with a scoop of ice cream for decadence that rivals my Chocolate Chip Cookies. The combinations are endless!
Easy Turtle Bars Recipe FAQs
What kind of butter should I use for the crust?
Always use cold butter for the best results with your Easy Turtle Bars. Cold butter helps to create a crumbly and flaky crust that holds up beautifully while baking, giving you that perfect base to hold in all the gooey goodness.
How long can I store Easy Turtle Bars, and what’s the best method?
You can store your Easy Turtle Bars in an airtight container at room temperature for up to 3 days. If you want them to last longer, refrigerate them, where they’ll stay fresh for up to a week. Just make sure to keep the container sealed to maintain their great texture!
Can I freeze Easy Turtle Bars? If so, how?
Absolutely! You can freeze the Easy Turtle Bars for up to 3 months. To do this, wrap them tightly in plastic wrap, followed by aluminum foil to prevent freezer burn. When you’re ready to enjoy, simply thaw them at room temperature for a few hours or warm them up slightly in the microwave for a melty treat.
What should I do if the caramel burns while melting?
If your caramel sauce begins to burn, it’s essential to remove it from the heat immediately. Stir it constantly over low heat for a smooth texture. If you encounter burnt bits, I recommend straining the mixture through a fine mesh sieve to remove any burnt chunks before pouring it over the crust.
Are there any nut-free alternatives for Easy Turtle Bars?
Yes, you can enjoy Easy Turtle Bars without nuts! Simply omit the pecans entirely or substitute them with crispy rice cereal for a crunchy texture. Additionally, using sunflower seed butter mixed into the caramel layer can offer a nutty flavor without using actual nuts—great for those with allergies!
Can I make Easy Turtle Bars gluten-free?
Definitely! To make these bars gluten-free, you can easily substitute the all-purpose flour with your favorite gluten-free flour blend. Just ensure the blend contains xanthan gum or another binding agent to mimic the structure of traditional flour, helping your Easy Turtle Bars turn out just as delicious!

Easy Turtle Bars That Will Wow Your Taste Buds
Ingredients
Equipment
Method
- Preheat your oven to 350°F (175°C). In a large mixing bowl, combine cold butter, granulated sugar, and all-purpose flour. Use a pastry cutter or your fingers to mix until the mixture resembles coarse crumbs. Line an 8x8-inch baking pan with parchment paper, allowing some overhang for easy removal, then firmly press the crumb mixture into the bottom of the pan.
- Place the baking pan in the preheated oven and bake the crust for 15-20 minutes, or until it’s lightly golden and fragrant. Once baked, remove the pan from the oven and set it aside to cool slightly while you prepare the gooey caramel layer.
- In a medium saucepan over low heat, melt the caramel sauce until it becomes smooth and pourable, stirring constantly to avoid burning. After melted, stir in the chopped pecans until evenly coated. Pour this buttery, nutty mixture over the pre-baked crust.
- In a microwave-safe bowl, melt the chocolate chips in increments of 20 seconds, stirring in between until fully melted and smooth. Spread the chocolate over the caramel and pecan layer.
- Allow the bars to cool at room temperature for about 30 minutes. Then, refrigerate them for at least 1 hour to set completely. Once chilled, remove the bars from the pan using the parchment overhang and slice them into squares for serving.
Leave a Reply