
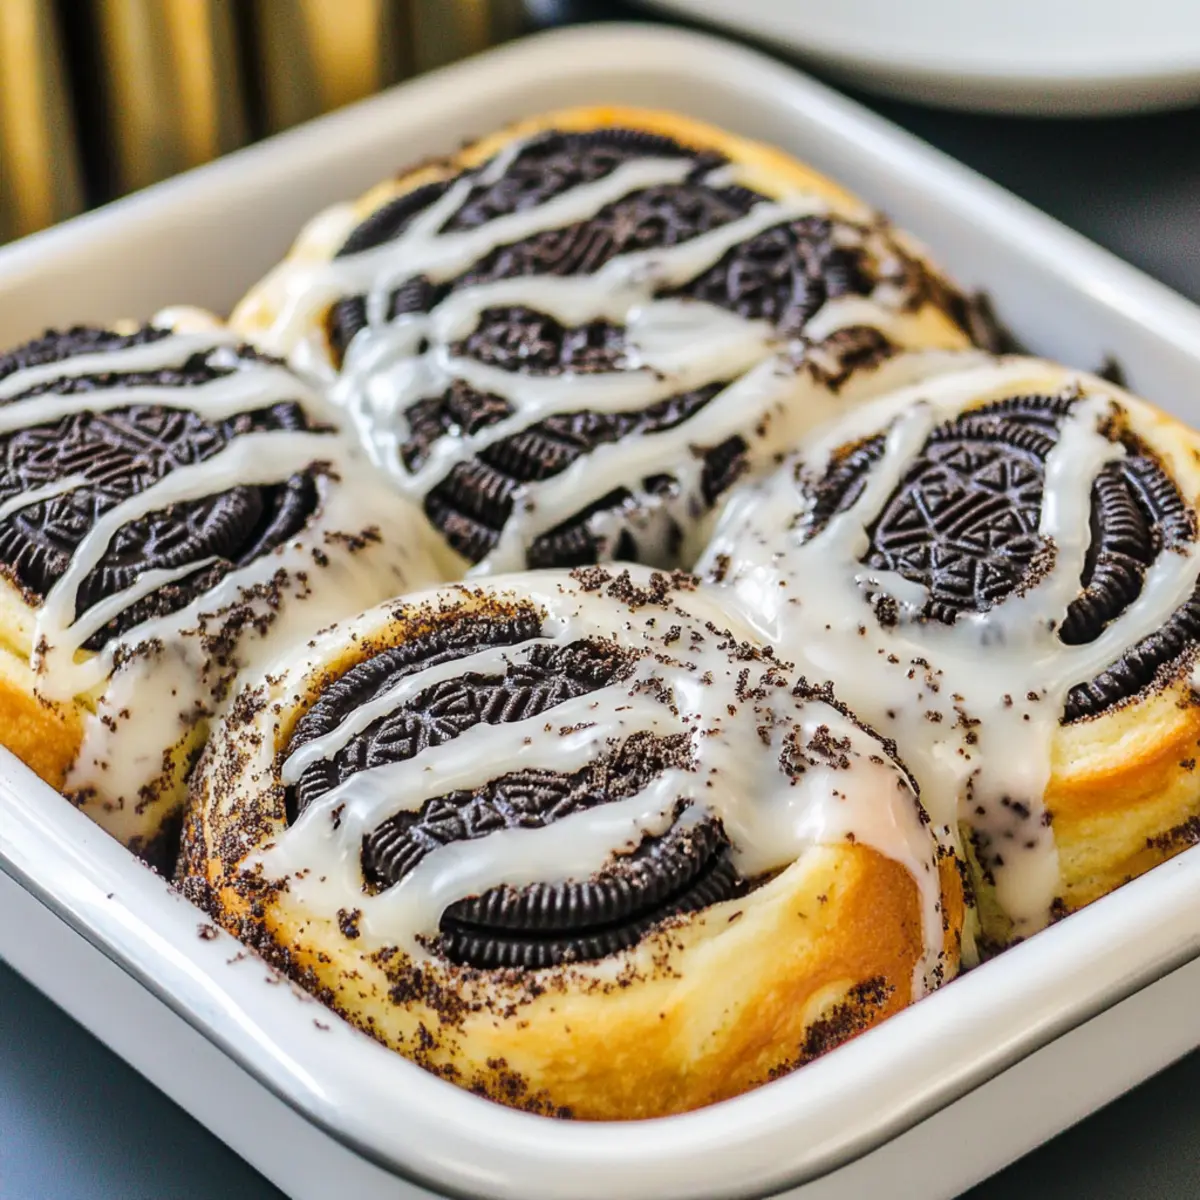
As I flipped through my favorite recipe book one lazy weekend morning, a thought struck me: what if I combined two of life’s greatest pleasures—Oreos and cinnamon rolls? The result is pure magic—Oreo Cinnamon Rolls with a luscious vanilla glaze. This delightful indulgence packs all the flavors of a classic cinnamon roll but with a rich, chocolatey twist that will make your taste buds dance. Perfect for those cozy brunch gatherings or a sweet treat for yourself, these rolls are incredibly quick to whip up and can be made ahead of time, ensuring you can savor them at your own pace. Ready to bring a little joy to your kitchen? Let’s dive into this delicious recipe that will surely become a family favorite!
Why Will You Love These Rolls?
Irresistible combination: Oreo and cinnamon come together to create an indulgent treat that’s hard to resist. Quick preparation: These rolls are a breeze to whip up, perfect for spontaneous cravings. Decadent glaze: The sweet vanilla glaze elevates the flavors, making each bite a delight. Versatile serving: Enjoy them warm for breakfast or brunch, or even as a dessert. Meal prep friendly: Make-ahead options mean you can enjoy these delightful rolls without the hassle. Trust me, your mornings will never be the same! For more delicious treats, check out my Chocolate Cinnamon Rolls or Oreo Cheesecake Indulgence.
Oreo Cinnamon Rolls Ingredients
Here’s everything you need to create your delicious Oreo cinnamon rolls!
For the Filling
- Light Brown Sugar – Adds sweetness and moisture; substitute with granulated sugar if necessary.
- Black Cocoa Powder – Provides a unique chocolate flavor akin to Oreos; if unavailable, use dark cocoa powder.
- Ground Cinnamon – Adds warmth and spice to the filling; no direct substitution needed.
- Unsalted Butter (for filling) – Used to spread on the dough for rich flavor; can substitute with margarine or coconut oil.
- Crushed Oreos (for filling and topping) – Gives a signature Oreo flavor; use any Oreo variation, but ensure they are crushed well.
For the Dough
- All-Purpose Flour – Forms the base of the dough; may require 3.5-4.5 cups total for desired texture.
- Instant Dry Yeast – Used for leavening; instant yeast preferred for quick rising; active dry yeast can be used but needs longer rising time.
- Fine Salt – Enhances flavor; no substitutes recommended.
- Whole Milk – Provides moisture and richness; can substitute with non-dairy milk.
- Granulated Sugar – Sweetens the dough; can reduce amount if desired.
- Unsalted Butter (for dough) – Adds fat for richness; similar substitutions apply as above.
- Large Egg – Binds ingredients and adds richness; can substitute flax egg for vegan option.
For the Glaze
- Powdered Sugar – Used for the glaze; no substitutes recommended.
- Whole Milk (for glaze) – Thins out the glaze; can use non-dairy alternatives as a substitute.
- Artificial Vanilla Extract – Adds flavor to glaze; pure vanilla extract is a suitable swap.
Now you’re ready to start baking these mouth-watering Oreo cinnamon rolls!
Step‑by‑Step Instructions for Oreo Cinnamon Rolls
Step 1: Prepare Filling
In a medium bowl, mix together light brown sugar, black cocoa powder, and ground cinnamon until well combined. This tantalizing mixture will serve as your filling, capturing that signature Oreo flavor. Set it aside so it’s ready when your dough is prepared.
Step 2: Make Dough
In a large mixing bowl, combine all-purpose flour, instant dry yeast, and fine salt. In a saucepan, heat whole milk, granulated sugar, and unsalted butter until just warm to the touch, around 110°F. Gradually add this warm mixture to the dry ingredients, stirring until a dough starts to form—this will be the base for your Oreo cinnamon rolls.
Step 3: Knead Dough
Transfer the dough to a lightly floured surface and knead it for about 5-7 minutes, adding extra flour, one tablespoon at a time, until the dough is elastic and slightly tacky but not sticky. You want the dough to be soft and smooth. This step is crucial for achieving that fluffy texture.
Step 4: Incorporate Oreos
Once your dough is nicely kneaded, gently fold in the crushed Oreos, ensuring they are evenly distributed throughout the dough. This step adds delightful chocolatey bursts to every bite of the Oreo cinnamon rolls. Allow the dough to rest briefly while you prepare to shape it.
Step 5: Rest Dough
Cover your mixing bowl with plastic wrap or a clean kitchen towel and let the dough rest in a warm area for about 10-15 minutes. During this time, the dough will relax, making it easier to roll out later. Stick around and enjoy that heavenly aroma as it develops!
Step 6: Shape Dough
On a clean, floured surface, roll the rested dough into a large rectangle measuring about 12×18 inches. Spread softened unsalted butter evenly across the surface, followed by a generous sprinkle of your earlier filling mixture and any remaining crushed Oreos. This layer will create luscious flavor throughout your rolls.
Step 7: Roll and Cut
Carefully roll the dough tightly from one long side to the other, creating a log shape. Using dental floss for a clean cut, slice the log into 9 equal pieces. Place each piece in a greased baking pan, ensuring they have enough space to rise and spread as they bake.
Step 8: Proof
Cover the baking pan with aluminum foil and let the rolls rise in a warm oven for approximately 30 minutes. Then, while keeping the rolls covered, preheat your oven to 350°F. This gentle rising will make them beautifully fluffy and airy—just like your favorite bakery-style rolls!
Step 9: Bake
Once your oven is preheated, remove the foil from the pan and bake the Oreo cinnamon rolls for 26-30 minutes, or until they are golden brown and puffed up. Keep an eye on them! You want that perfect caramelized top that signals they are irresistibly ready to indulge.
Step 10: Prepare Glaze
While the rolls are baking, make your sweet vanilla glaze. In a medium bowl, whisk together powdered sugar, melted unsalted butter, whole milk, and artificial vanilla extract until smooth and creamy. This glaze will add a delightful touch to your warm Oreo cinnamon rolls once they come out of the oven.
Step 11: Glaze Rolls
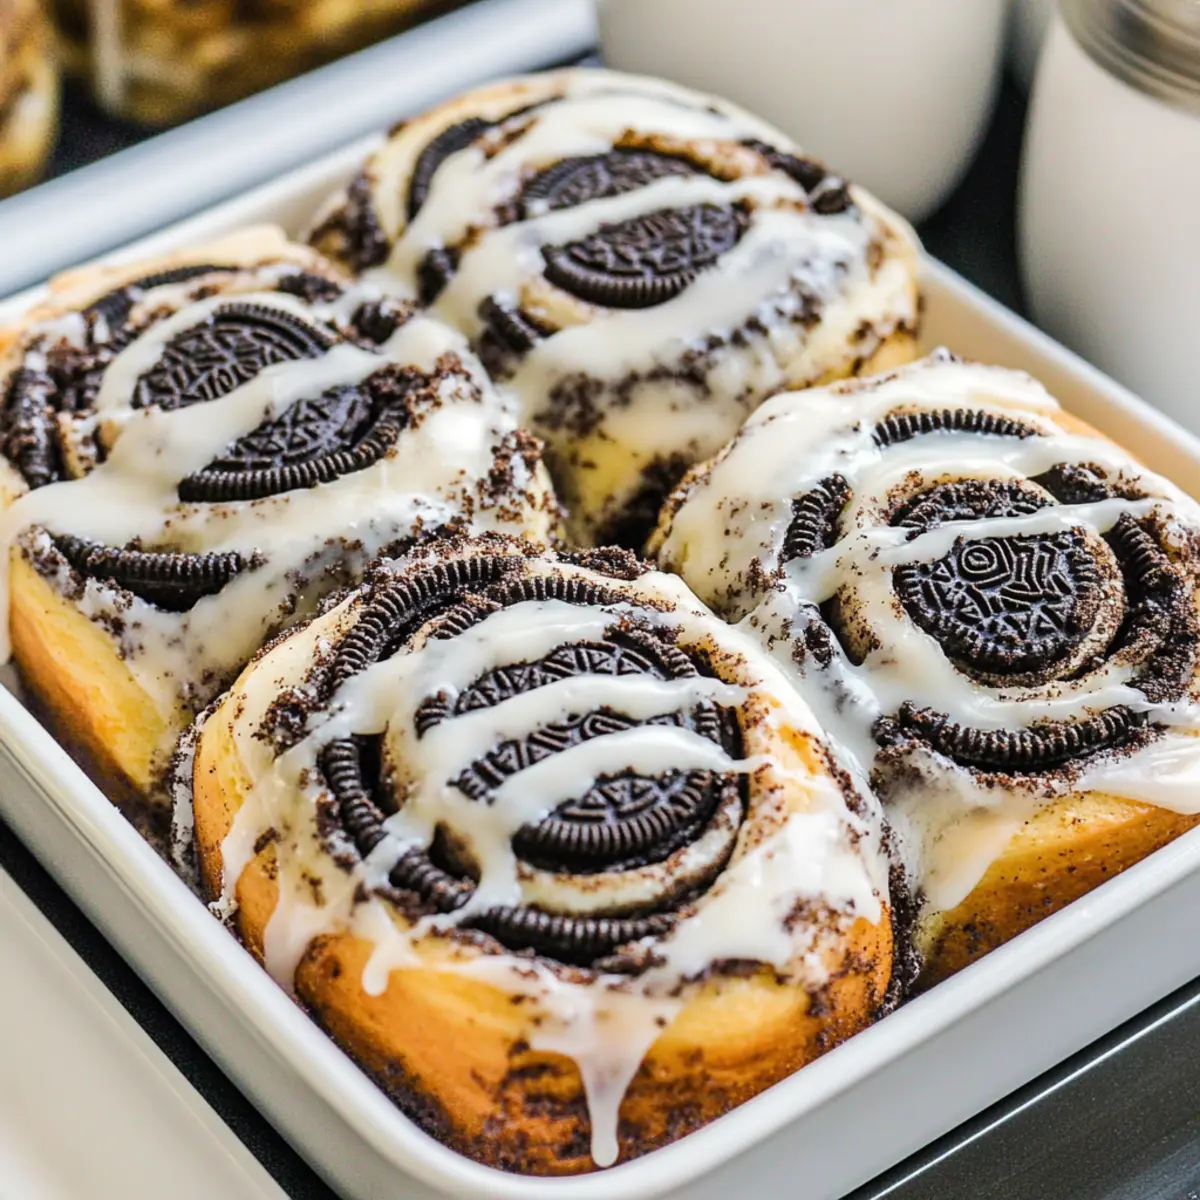
As soon as the Oreo cinnamon rolls are out of the oven, let them cool for about 5 minutes. Drizzle your luscious vanilla glaze generously over the warm rolls. The glaze will melt slightly, coating them in a beautiful sheen, creating a deliciously sweet finish to your homemade treat!
How to Store and Freeze Oreo Cinnamon Rolls
Room Temperature: Keep leftover Oreo cinnamon rolls in an airtight container at room temperature for up to 2 days to maintain their softness and flavor.
Fridge: For longer storage, refrigerate your rolls in an airtight container for up to 5 days. Reheat them in the microwave for a warm treat!
Freezer: To enjoy your Oreo cinnamon rolls later, freeze them individually in plastic wrap followed by a layer of foil for up to 2 months. Thaw overnight in the fridge before reheating.
Reheating: Reheat rolls in the microwave for 15-30 seconds or warm in the oven at 350°F for 5-10 minutes. Enjoy the delightful flavors all over again!
What to Serve with Oreo Cinnamon Rolls
Delight in creating a feast that elevates your Oreo cinnamon rolls to the next level, making breakfast feel extra special.
- Fresh Fruit Salad: Bright, juicy berries and melons provide a refreshing contrast, balancing the sweetness of the rolls beautifully.
- Scrambled Eggs: Fluffy, buttery eggs add a savory aspect to your meal, creating a perfect brunch spread for family and friends.
- Crispy Bacon: The smoky, salty crunch of bacon complements the sweet cinnamon rolls, creating a delightful harmony of flavors.
- Vanilla Ice Cream: For a decadent dessert twist, serve your warm rolls with a scoop of vanilla ice cream that melts into sweet bliss.
- Maple Syrup Drizzle: A light drizzle of maple syrup enhances the flavors of the rolls, intensifying the overall experience with its rich sweetness.
- Iced Coffee: Sip on a chilled, creamy iced coffee alongside your rolls, adding a refreshing element that perfectly pairs with their warmth.
- Whipped Cream Topping: Light and airy, whipped cream adds a lovely finishing touch to your warm rolls, creating a delightful and indulgent bite.
- Chocolate Milk: This nostalgic beverage adds a fun twist, echoing the Oreo flavor while providing a refreshing, sweet contrast.
- Cinnamon Sugar Doughnuts: Create a fun doughnut pairing—these add another layer of cinnamon goodness and playful texture to your brunch table.
- Sparkling Water with Lime: A fizzy and refreshing drink option that cleanses the palate between bites, enhancing the overall flavor experience.
Expert Tips for Oreo Cinnamon Rolls
-
Even Rolling: Use a ruler to ensure you roll your dough to the perfect size, making it easier to achieve uniform rolls.
-
Chill for Cutting: If you’re having trouble cutting your dough, refrigerate the rolled log for about 10 minutes. Cold dough slices much cleaner!
-
Cool Before Glazing: Allow your rolls to cool slightly before adding the vanilla glaze. This ensures the glaze melts beautifully and doesn’t run off.
-
Yeast Activation: If using active dry yeast, make sure to activate it in warm water first. This helps achieve the best texture for your Oreo cinnamon rolls.
-
Storage Guidance: Store leftover rolls in an airtight container at room temperature, reheating in the microwave before serving to bring back that fresh-baked chewiness.
Oreo Cinnamon Rolls Variations & Substitutions
Feel free to mix things up and make these Oreo cinnamon rolls uniquely yours with these delightful variations!
-
Mocha Twist: Substitute black cocoa with regular cocoa and a touch of espresso powder for a rich mocha flavor.
-
Nutty Delight: Add a handful of chopped nuts or chocolate chips to the filling for a satisfying crunch. Walnuts or pecans work wonders!
-
Graham Cracker Crumble: Swap crushed Oreos for crushed graham crackers for a totally different texture and flavor vibe—perfect for a s’mores-inspired roll.
-
Gluten-Free Option: Use a gluten-free all-purpose flour blend to make these rolls gluten-free. Your family will love the taste just as much!
-
Dairy-Free Delight: Replace whole milk and butter with non-dairy alternatives like almond milk and coconut oil for a dairy-free version perfect for sensitive tummies.
-
Spicy Kick: Add a pinch of cayenne pepper or a dash of ground ginger to the filling for a surprising warmth that will tingle your taste buds.
-
Fruit Infusion: Incorporate some finely chopped fruits like ripe bananas or berries into the filling for a fresh twist that pairs beautifully with the chocolate.
-
Double Chocolate: Use chocolate-flavored Oreos in both the filling and as a topping for a decedent, double chocolate experience that any chocolate lover would adore.
These variations are a great way to personalize your baking experience! And if you’re interested in trying other delicious recipes, consider making my Cinnamon Banana Bread or Pepperoni Pizza Rolls. Enjoy your culinary creativity!
Make Ahead Options
These Oreo Cinnamon Rolls are perfect for meal prep, allowing you to enjoy a delightful treat with ease! You can prepare the dough and filling up to 24 hours in advance. Simply follow the recipe until Step 7, then cover the rolls tightly with plastic wrap and refrigerate. This will help them rise slowly overnight, maintaining their fluffy texture. When you’re ready to bake, just let them come to room temperature for about 30 minutes, then proof as directed in Step 8 before baking. This way, you’ll have fresh, warm Oreo Cinnamon Rolls ready for a cozy breakfast or brunch with minimal effort, just as delicious as if you made them fresh!
Oreo Cinnamon Rolls Recipe FAQs
What type of Oreos should I use?
You can use any Oreo variation for these cinnamon rolls, but standard Oreos are perfect for achieving that classic flavor. If you’re feeling adventurous, consider using flavored Oreos, like Double Stuff or Mint, for a unique twist!
How do I know when my dough has risen enough?
Your dough should double in size for best results, which usually takes about 30 minutes in a warm environment. A good visual cue is to gently poke the dough with your finger; if the indentation remains and doesn’t spring back, it’s ready to go!
How should I store leftover Oreo cinnamon rolls?
Store any leftovers in an airtight container at room temperature for up to 2 days. For longer storage, you can refrigerate them for up to 5 days. Just remember to reheat in the microwave for 15-30 seconds to revive their warmth and softness.
Can I freeze Oreo cinnamon rolls?
Absolutely! To freeze, wrap each roll individually in plastic wrap, then in foil, and store in the freezer for up to 2 months. To enjoy, simply thaw them overnight in the fridge and reheat, ensuring they retain that beautiful flavor and fluffy texture.
What if my rolls turn out too dense?
If your cinnamon rolls come out dense, it’s often due to over-kneading the dough or not letting it rise long enough. For the perfect fluffy texture, knead just until elastic, and allow the dough to proof until it doubles in size. Consistency is key!
Are there any dietary considerations for these rolls?
If you’re concerned about allergies, these Oreo cinnamon rolls contain dairy, eggs, and gluten. For a vegan alternative, use non-dairy milk, coconut oil instead of butter, and replace the egg with a flax egg (1 tablespoon flaxseed meal + 2.5 tablespoons water, mixed and allowed to sit for 5 minutes). Enjoy your baking adventure!
Indulge in Soft Oreo Cinnamon Rolls with Sweet Vanilla Glaze
Ingredients
Equipment
Method
- In a medium bowl, mix together light brown sugar, black cocoa powder, and ground cinnamon until well combined. Set aside.
- In a large mixing bowl, combine all-purpose flour, instant dry yeast, and fine salt. In a saucepan, heat whole milk, granulated sugar, and unsalted butter until just warm. Gradually add this mixture to the dry ingredients.
- Transfer the dough to a floured surface and knead for about 5-7 minutes until elastic. Add flour one tablespoon at a time if too sticky.
- Gently fold in the crushed Oreos into the kneaded dough and allow it to rest.
- Cover the mixing bowl and let the dough rest for about 10-15 minutes.
- Roll the rested dough into a large rectangle, spread butter, sprinkle the filling mixture, and any remaining crushed Oreos.
- Roll the dough tightly from one long side and cut into 9 equal pieces with dental floss.
- Cover the baking pan with foil and let the rolls rise in a warm oven for approximately 30 minutes.
- Preheat your oven to 350°F while the rolls rise. Bake for 26-30 minutes until golden brown.
- For the glaze, whisk together powdered sugar, melted butter, milk, and vanilla extract until smooth.
- Let rolls cool for 5 minutes and drizzle the glaze generously over the warm rolls.
Leave a Reply