
As I rummaged through my pantry one afternoon, the sight of a half-opened pack of Oreos sparked a delightful idea: why not combine them with protein powder for a quick, energizing snack? Enter the Oreo Protein Balls, a tasty treat that delivers a boost of protein without the fuss. These no-bake delights are not just simple to whip up; they’re also completely customizable, allowing you to adapt them to fit your dietary needs. Imagine the joy of having a rich, sweet flavor paired with the benefits of protein, perfect for post-workout recovery or a midday pick-me-up. Are you ready to dive into this indulgent yet nutritious sweet that will make you rethink your snack choices? Let’s get started!

Why make Oreo Protein Balls?
Quick and Easy: These no-bake Oreo protein balls are a breeze to whip up, making them perfect for busy days or spontaneous cravings.
Nutritious Boost: Packed with protein and creamy goodness, they provide the energy you need without sacrificing taste.
Customize Your Way: Whether you prefer whey or plant-based protein, you can tweak the recipe to suit your dietary preferences.
Crowd-Pleaser: These treats are sure to impress friends and family, whether enjoyed as a post-workout snack or a sweet addition to a party platter.
Decadent Flavor: Indulge in the rich taste of Oreos wrapped in chocolate while embracing a healthier twist, proving that you can indulge without guilt.
Try pairing them with your favorite Protein Pudding Customizable for a balanced snack!
Oreo Protein Balls Ingredients
For the Base
• Crushed Oreos – This is the primary flavor base; substitute with gluten-free cookies for a gluten-free version.
• Cream Cheese – Adds moisture and richness; you can use vegan cream cheese for a dairy-free option.
• Protein Powder – Provides a protein boost; both chocolate and vanilla work well, and each lends a different twist to these Oreo protein balls.
For the Coating
• Melted Chocolate – Enhances flavor and decadence; opt for dark chocolate for a richer taste.
• Coconut Oil – Used in the chocolate coating for a glossy finish; omit it for a lower-fat version.
For Moisture
• Almond Milk – Adjust the moisture content of your mixture; any nut milk or water can be used as a substitute.
Make these delicious Oreo protein balls your new go-to snack for a quick pick-me-up or post-workout treat!
Step‑by‑Step Instructions for Oreo Protein Balls
Step 1: Prepare the Baking Sheet
Begin by lining a baking sheet with wax paper. This will prevent the Oreo protein balls from sticking and allow for easy removal later. Choose a flat surface that fits in your refrigerator or freezer to accommodate the baking sheet. Preparing this step ahead of time ensures a smooth transition into the mixing process.
Step 2: Mix Dry Ingredients
In a large mixing bowl, combine your preferred protein powder, coconut flour, and any sweetener you desire. Using a whisk or fork, blend these dry ingredients until they are evenly incorporated. This should take about 1-2 minutes. Look for a uniform texture, as this will help your Oreo protein balls maintain a consistent flavor throughout.
Step 3: Add Wet Ingredients
Next, blend the cream cheese into the dry mixture, followed by the crushed Oreos and a splash of almond milk. Use a spatula or your hands to combine everything thoroughly, ensuring no dry pockets remain. This may take another 2-3 minutes. The mixture should become cohesive and slightly sticky, similar to cookie dough, making it the perfect base for your Oreo protein balls.
Step 4: Form the Protein Balls
Once your mixture is well-combined, start rolling it into 20g balls using your hands. Lightly coat your palms with coconut oil to prevent sticking while you work. Place each formed ball on the lined baking sheet, ensuring there’s ample space between them for the chocolate coating later on. This step should only take about 5-7 minutes.
Step 5: Coat with Chocolate
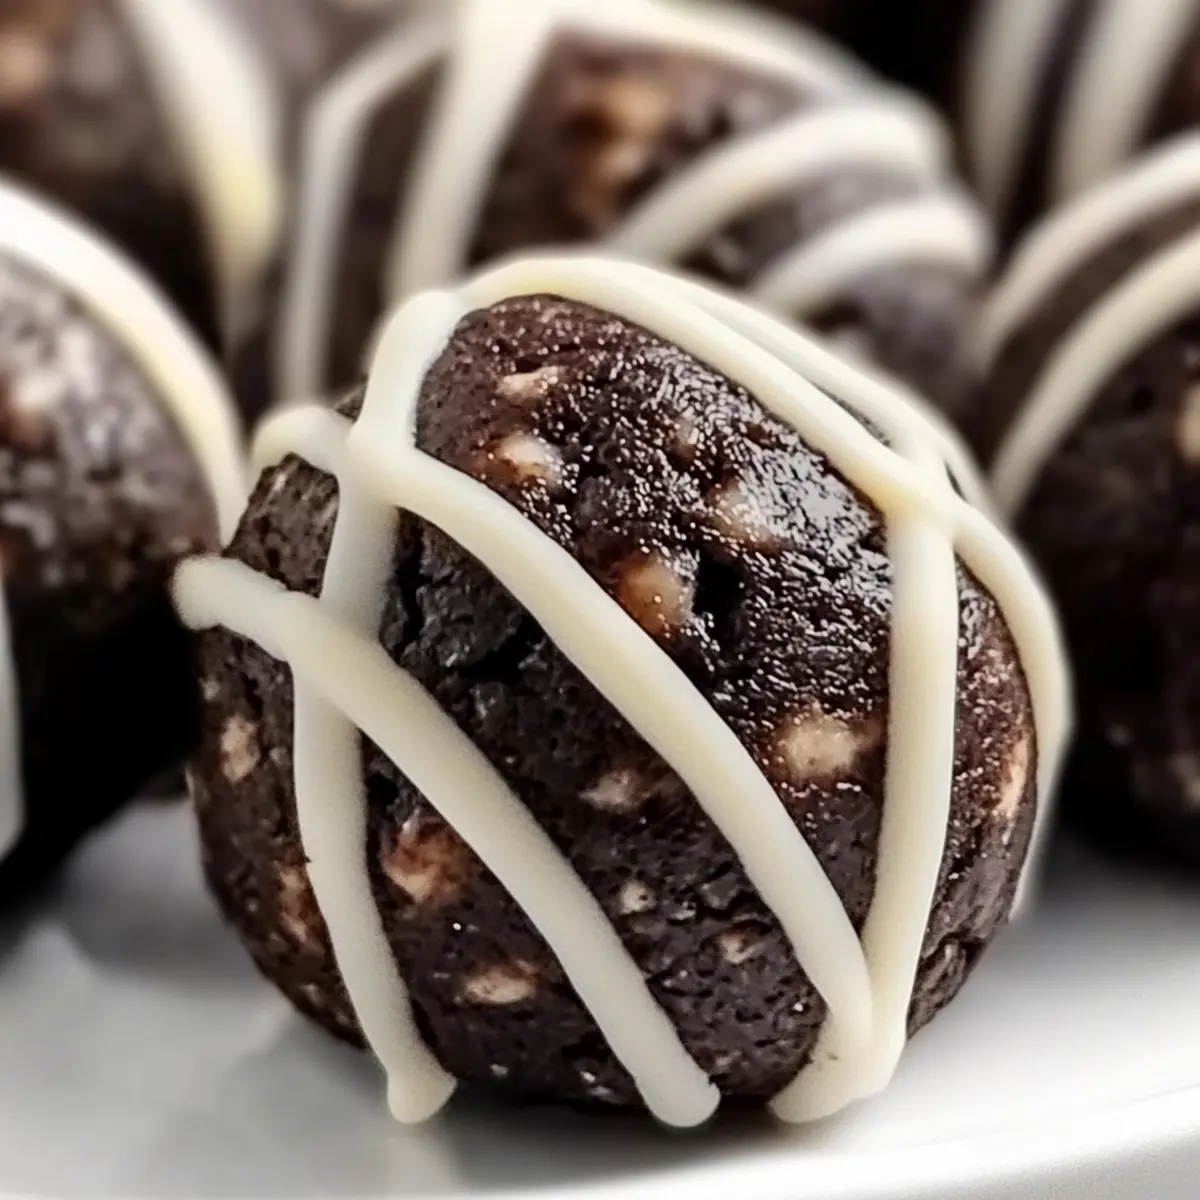
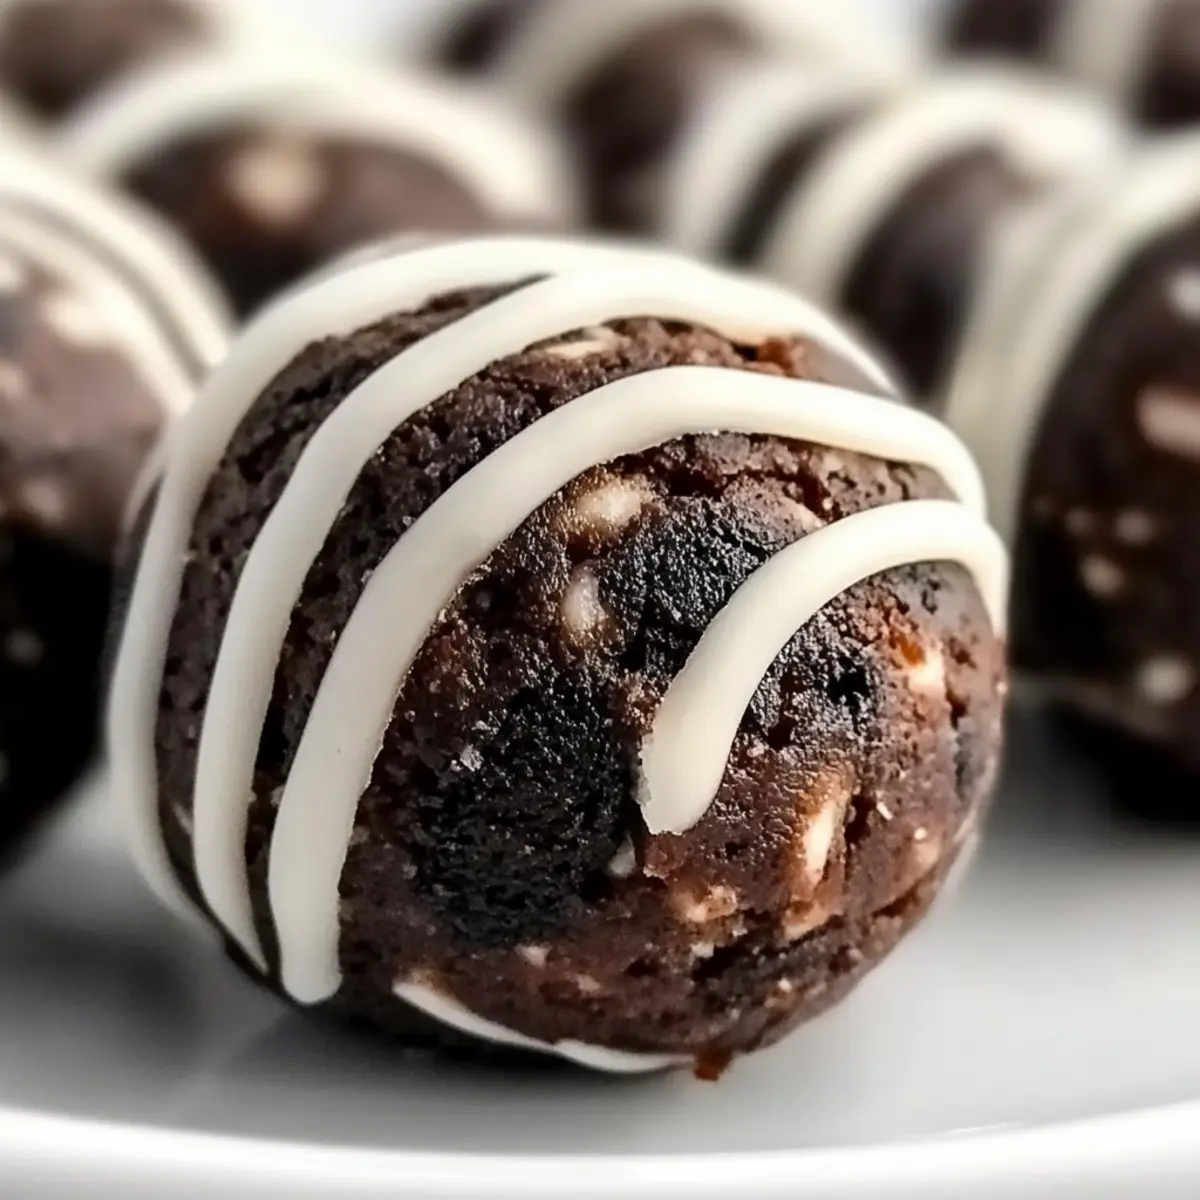
For the coating, melt chocolate with coconut oil in a microwave-safe bowl. Heat in 30-second intervals, stirring in between, until smooth and glossy. Drizzle or dip each Oreo protein ball in the melted chocolate, allowing any excess to drip off before returning them to the baking sheet. This step adds both flavor and visual appeal to your delicious creations.
Step 6: Chill to Set
Place the baking sheet in the refrigerator or freezer for about 10 minutes to allow the chocolate coating to set firmly. You’ll know they’re ready when the chocolate has hardened and the protein balls feel solid to the touch. This chilling step is crucial for achieving that lovely, glossy finish on your Oreo protein balls.
Step 7: Store for Later
Once set, transfer the Oreo protein balls to an airtight container for storage. You can keep them in the refrigerator for up to a week or freeze them for up to three months. Thaw in the fridge or at room temperature when ready to enjoy these scrumptious treats, ensuring you always have a delicious snack on hand!
What to Serve with Oreo Protein Balls?
Imagine a delightful spread that complements the rich, chocolatey goodness of these no-bake treats, enhancing every bite.
- Creamy Yogurt Parfait: Layer Greek yogurt with fresh berries for a balanced snack that contrasts the sweetness of the protein balls.
- Nutty Granola: Add a crunch with a sprinkle of granola, bringing texture and wholesome flavor to your dessert platter.
- Fruity Smoothie: Blend up a refreshing fruit smoothie for a fruity burst of flavor that pairs well with the indulgence of the Oreo protein balls.
- Crisp Rice Cakes: Offer these on the side for a light and airy crunch that complements their soft, chewy texture.
- Herbal Tea: Enjoy with a soothing cup of herbal tea, providing a calming contrast to the sweet treats while enhancing your overall snack experience.
- Chilled Almond Milk: Serve these protein balls alongside a glass of lush almond milk for a creamy refreshment that ties in flawlessly with the chocolate flavor.
- Peanut Butter Dip: Create a quick peanut butter dip to accompany your protein balls, adding a nutty richness that elevates the taste experience even further.
- Fruit Skewers: Incorporate fresh fruit skewers for a delightful burst of color and natural sweetness, balancing the richness of the Oreo protein balls perfectly.
How to Store and Freeze Oreo Protein Balls
Fridge: Store your Oreo protein balls in an airtight container in the fridge for up to 1 week. This keeps them fresh, chewy, and ready to grab whenever a craving hits.
Freezer: For longer storage, freeze the protein balls in a single layer on a baking sheet before transferring them to an airtight container. They will last for up to 3 months in the freezer.
Thawing: When you’re ready to indulge, simply thaw the frozen Oreo protein balls in the fridge overnight or leave them at room temperature for about 30 minutes before enjoying.
Reheating (Optional): Although they are best enjoyed chilled, you can microwave them for about 10-15 seconds if you prefer a slightly warmed treat.
Make Ahead Options
These Oreo Protein Balls are perfect for meal prep, allowing you to whip up a batch ahead of time for busy days! You can prepare the mixture and roll the balls up to 24 hours in advance; simply cover them tightly and refrigerate. Alternatively, you can freeze the pre-formed balls for up to three months. To prevent the chocolate coating from sticking, place parchment paper between layers in your storage container. When you’re ready to enjoy your protein balls, melt the chocolate, coat the balls, and chill for about 10 minutes until set. This way, you’ll have delicious, energizing snacks ready to go whenever you need them!
Oreo Protein Balls Variations & Substitutions
Feel free to explore these creative twists to make the recipe your own and treat your taste buds!
- Gluten-Free: Replace crushed Oreos with your favorite gluten-free cookies to keep it safe for gluten-sensitive friends.
- Vegan Delight: Use vegan cream cheese and your favorite plant-based protein powder for a completely dairy-free treat. It’ll still taste amazing!
- Flavor Boost: Swap in peanut butter or almond butter for extra creaminess and nutty flavor.
- Chocolate Lovers: Incorporate cocoa powder into the mixture for a double chocolate experience, or use dark chocolate for coating.
- Nutty Texture: Add in chopped nuts or seeds to bring a delightful crunch alongside the smoothness of the dough.
- Fruity Twist: Stir in dried fruits like cranberries or cherries for a touch of natural sweetness and chewy texture that balances the rich flavor.
- Spicy Variation: If you’re feeling adventurous, sprinkle in a dash of cinnamon or cayenne pepper for a heat kick that complements the sweetness.
- Seasonal Flavor: Substitute in pumpkin puree instead of applesauce during fall for a festive flavor – add some pumpkin spice for that cozy touch!
These easy adaptations make these Oreo protein balls versatile; enjoy experimenting! If you’re also in the mood for a protein-packed dessert, don’t forget to check out my delicious Peanut Butter Balls or the indulgent Oreo Cheesecake Indulgence for more snacking options!
Expert Tips for Oreo Protein Balls
Perfect Consistency: Start with less almond milk to achieve the right texture, then gradually add more as needed for your Oreo protein balls.
Ingredient Temperatures: Make sure all ingredients, especially cream cheese, are at room temperature to ensure smooth mixing and a creamy consistency.
Taste Before Rolling: If using a protein powder with added sweeteners, taste the mixture before forming balls to adjust the sweetness to your liking.
Prevent Sticking: Lightly coat your hands with coconut oil while rolling the balls; this helps prevent sticking and makes the process easier.
Make Ahead: These Oreo protein balls store well in the fridge for up to a week or can be frozen for three months. Always have a nutritious snack ready!

Oreo Protein Balls Recipe FAQs
What type of Oreo cookies should I use?
You can use any flavor of Oreos, but standard chocolate Oreos work best for that classic flavor. If you’re aiming for a gluten-free version, opt for gluten-free cookie alternatives.
How should I store leftover Oreo protein balls?
Store your Oreo protein balls in an airtight container in the fridge for up to 1 week. This keeps them fresh, chewy, and ready to grab whenever a craving hits.
Can I freeze Oreo protein balls?
Absolutely! For longer storage, freeze the protein balls in a single layer on a baking sheet. Once frozen, transfer them to an airtight container where they will last for up to 3 months. Thaw in the fridge overnight or at room temperature for about 30 minutes before enjoying.
What should I do if my mixture is too dry?
If you find that the mixture is too dry to form into balls, simply add a splash more almond milk, one tablespoon at a time. Mix well after each addition until the mixture reaches a slightly sticky, doughy consistency.
Can dogs eat Oreo protein balls?
It’s best to keep these Oreo protein balls away from your pets. Chocolate and certain protein powders can be harmful to dogs. Always check with your vet if you’re unsure about ingredients in human snacks.
What variations can I try with this recipe?
There are so many fun ways to customize your Oreo protein balls! You can swap out Oreos for different chocolate cookies, add a tablespoon of peanut butter for richness, or incorporate shredded coconut or nuts for added texture. Let your creativity run wild!
Oreo Protein Balls: Easy No-Bake Treats for Every Craving
Ingredients
Equipment
Method
- Prepare the baking sheet by lining it with wax paper.
- Mix dry ingredients: Combine your preferred protein powder, coconut flour, and any sweetener in a large mixing bowl.
- Add wet ingredients: Blend the cream cheese, crushed Oreos, and almond milk into the dry mixture until well combined.
- Form the protein balls: Roll the mixture into 20g balls and place them on the lined baking sheet.
- Coat with chocolate: Melt chocolate and coconut oil, then drizzle or dip each protein ball in the mixture.
- Chill to set: Place the baking sheet in the refrigerator or freezer for about 10 minutes.
- Store for later: Transfer the protein balls to an airtight container for storage.
Leave a Reply