
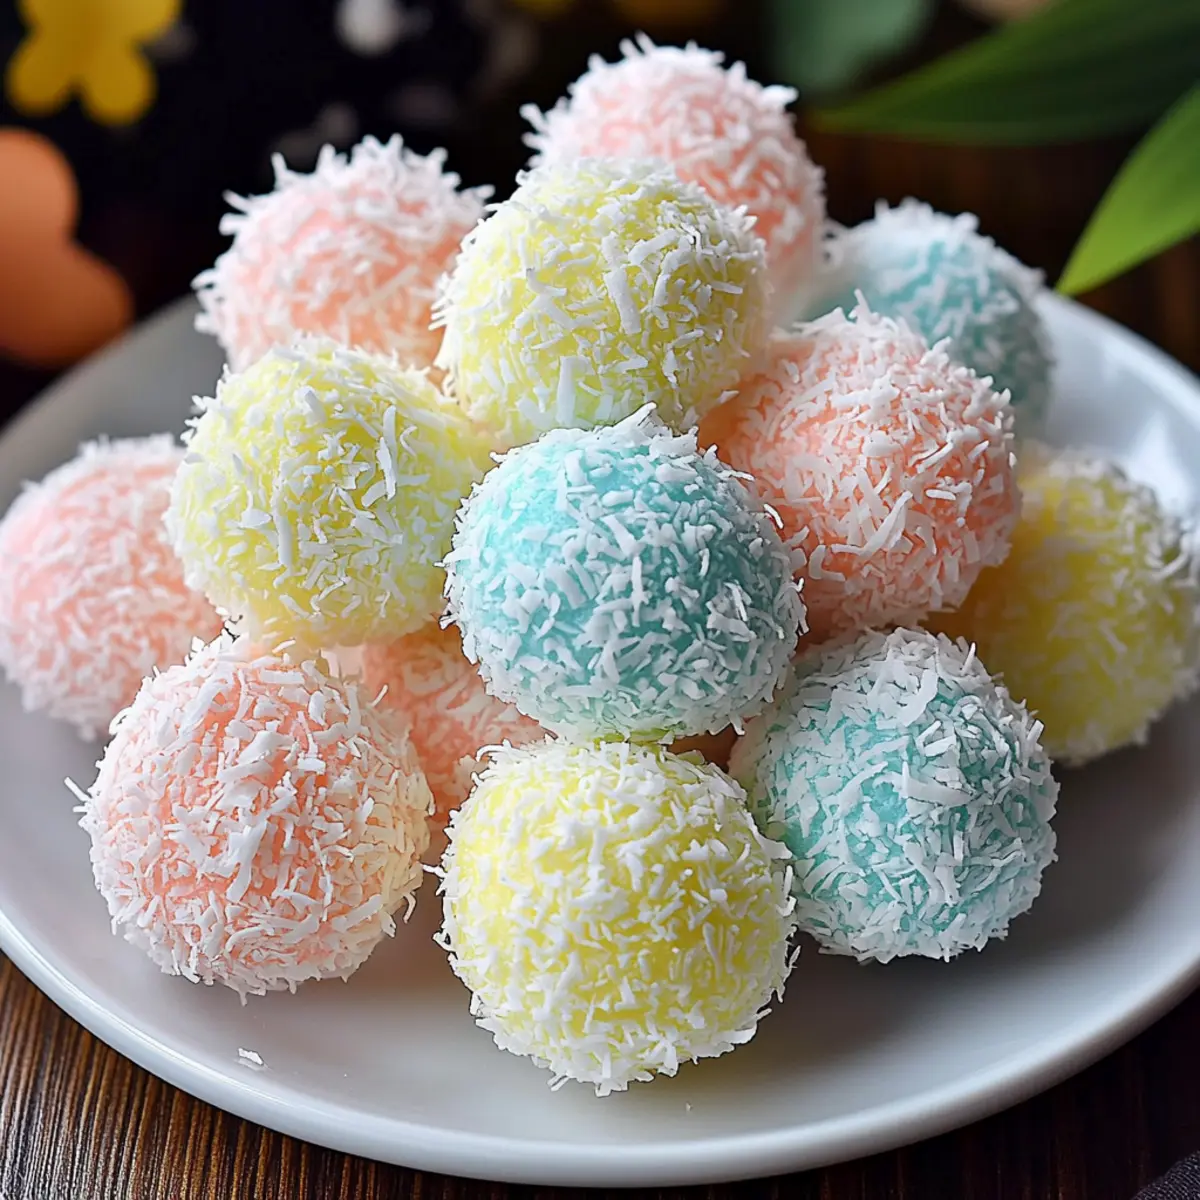
As the sweet aroma of coconut wafts through the air, I can’t help but smile—these Easter Bunny Coconut Tails are a delightful way to bring a touch of whimsy to your holiday celebrations! This fun no-bake treat is not just easy to whip up but also an exciting project for kids to get involved in, transforming your kitchen into a festival of colors and creativity. Packed with chewy goodness, these festive delights can easily be customized to suit your preferences, making them a perfect addition to any Easter gathering. Plus, they’re vegan-friendly, so everyone can enjoy a delicious bite! Are you ready to dive into this coconut-packed adventure that will brighten up your holiday table?
Why are Easter Bunny Coconut Tails a Must-Make?
Kid-Friendly Fun: The no-bake aspect makes them a perfect activity for kids, allowing little ones to unleash their creativity in the kitchen.
Easy to Customize: Tailor the flavors and colors to your family’s taste—swap in sweetened coconut or experiment with various food coloring for a personal touch.
Crowd-Pleasing Treat: These vibrant, chewy delights are sure to brighten up any Easter gathering and please guests of all ages.
Quick and Convenient: With minimal prep time, these treats offer instant gratification—just mix, roll, and chill!
Vegan-Friendly Options: Enjoy peace of mind knowing everyone can indulge by using dairy-free ingredients, making them accessible for those with dietary restrictions.
These coconut tails aren’t just a recipe; they’re an experience! Dive into the fun and make your Easter deliciously memorable.
Easter Bunny Coconut Tails Ingredients
For the Coconut Mixture
• 5 cups medium shredded coconut – Adds delightful texture and coconut flavor; substitute with sweetened coconut for a sweeter treat.
• 14 oz sweetened condensed milk – Acts as a binding agent, providing sweetness and moisture; choose dairy-free condensed milk for a vegan option.
• 2 tbsp butter, melted & cooled – Adds richness and helps bind the mixture; use plant-based butter for a vegan alternative.
• 1 tsp vanilla extract – Enhances flavor; can be omitted for a more neutral taste.
• ¼ cup confectioner’s sugar – Provides additional sweetness and binding; consider reducing this if using sweetened coconut.
For the Coating
• 2 cups fine shredded coconut – Used for coating the balls, enhancing their visual appeal; feel free to color it with liquid food coloring.
• Liquid food coloring – Creates vibrant pastel colors for visual appeal; gel food coloring works great if diluted with a bit of water.
Let’s get ready to create these enchanting Easter Bunny Coconut Tails! They’re not just a treat but a fun way to celebrate with everyone.
Step‑by‑Step Instructions for Easter Bunny Coconut Tails
Step 1: Prepare the Mixture
In a large mixing bowl, whisk together 14 oz of sweetened condensed milk, 2 tablespoons of melted and cooled butter, and 1 teaspoon of vanilla extract until the mixture is smooth and cohesive. This should take about 2-3 minutes. The creamy texture will provide a deliciously sweet base for your Easter Bunny Coconut Tails.
Step 2: Combine Ingredients
Next, fold in 5 cups of medium shredded coconut and ¼ cup of confectioner’s sugar until everything is well blended. Make sure no dry patches remain and the coconut is evenly distributed throughout the mixture. After combining, cover the bowl and chill in the refrigerator for about 15 minutes to firm up slightly, making it easier to shape later.
Step 3: Color the Coconut
While the mixture chills, divide 2 cups of fine shredded coconut into several small bowls. Add liquid food coloring to each bowl, mixing until you achieve the desired pastel shades. This vibrant coating will bring your Easter Bunny Coconut Tails to life! Allow the colored coconut to sit for a few minutes so the colors can set beautifully.
Step 4: Form the Coconut Balls
After chilling, take a small cookie scoop or measuring spoon and scoop out about 1½ teaspoons of the chilled mixture. Roll each scoop between your palms to form smooth balls. The coolness of the mixture will help you shape them easily, giving a perfect form to your delightful Easter Bunny Coconut Tails.
Step 5: Coat the Balls
Once rolled, gently roll each ball in the colored coconut until completely covered. Give it a light press to ensure an even coating, making these treats as visually appealing as they are delicious. Place each coated ball on a parchment-lined baking sheet, spacing them apart so they don’t stick together.
Step 6: Chill and Set
Finally, refrigerate the coated Easter Bunny Coconut Tails for at least 1 hour to allow them to set. This refrigeration time ensures they hold their shape and develop a delightful chewy texture. Keep them chilled until you’re ready to serve and enjoy these festive, no-bake treats!
Make Ahead Options
These Easter Bunny Coconut Tails are ideal for busy home cooks looking to save time! You can prepare the coconut mixture up to 24 hours in advance; simply cover the mixing bowl and refrigerate it. As for the colored coconut for coating, that can also be done ahead of time—just store it in airtight containers for up to 3 days. When you’re ready to serve, roll the chilled mixture into balls and coat them in the colorful coconut. Refrigerate the finished treats for at least 1 hour to set. This way, you ensure each Easter Bunny Coconut Tail is just as delicious as if made fresh, providing a fun and vibrant treat when you need it!
Easter Bunny Coconut Tails Variations
Feel free to get creative with these delightful Easter Bunny Coconut Tails, making them even more fun and personalized to your taste!
-
Dairy-Free: Substitute sweetened condensed milk with dairy-free versions to ensure everyone can enjoy these treats. Vegan butter works great too!
-
Chocolate Twist: For a chocolatey flavor, mix in cocoa powder with the coconut mixture. Roll in chocolate shavings or sprinkles for added indulgence.
-
Nutty Delight: Add ½ cup of finely chopped nuts, like almonds or walnuts, to the coconut mixture for a crunchy texture that complements the chewiness.
-
Fruit Infusion: Incorporate dried fruit pieces, such as cranberries or raisins, into the mixture for a chewy burst of flavor. Kids will love the surprise in every bite!
-
Coconut Variety: Experiment with different types of coconut, like using toasted coconut flakes instead of fine shredded coconut for a unique flavor and crunch.
-
Flavor Enhancements: Swap vanilla for almond or coconut extract to give your treats a distinctly different flavor profile. A little zest of lime can also elevate the taste!
-
Spicy Kick: Add a dash of cayenne pepper or chili powder to the coconut mixture for an unexpected but delightful heat that pairs brilliantly with the sweetness.
-
Colorful Coating: Don’t shy away from alternative colorings! Use natural food dyes from beet juice or matcha powder for a more eco-friendly approach to decorating your treats.
Get inspired and make these Easter Bunny Coconut Tails a true reflection of your culinary creativity, turning them into a delicious canvas for flavor and fun!
What to Serve with Easter Bunny Coconut Tails?
Elevate your holiday gathering with delightful pairings that enhance these whimsical coconut treats.
-
Fresh Fruit Salad: A medley of juicy fruits offers a refreshing contrast to the sweetness of the coconut tails. Think strawberries, kiwi, and mandarin slices that bring vibrancy and balance to your dessert table.
-
Chocolate Dipping Sauce: Rich, velvety chocolate sauce creates a delightful indulgence. Guests can dip their coconut tails for an extra layer of flavor, enhancing the festive experience!
-
Vanilla Ice Cream: A scoop of creamy vanilla ice cream complements the chewy texture of the tails, providing a cool and sweet counterpoint that’s irresistible.
-
Coconut Milk Smoothies: Whip up some coconut milk smoothies for playful drinks! Blend with a touch of vanilla and fresh berries for a tropical balance that embraces the coconut theme.
-
Carrot Cake: As a nod to the Easter holiday, a slice of moist carrot cake pairs perfectly with the festive spirit. Its spice and sweetness harmonize beautifully with the coconut flavor.
-
Sparkling Lemonade: Refreshing and light, a sparkling lemonade serves as the perfect drink to cleanse the palate, brightening up any gathering while enhancing the joyous occasion.
-
Coffee or Tea: For a cozy touch, serve freshly brewed coffee or herbal tea. Both offer a comforting warmth that complements the sweetness of the Easter Bunny Coconut Tails.
These pairings not only enhance the flavors but also create a festive atmosphere that celebrates the joy of sharing delicious treats!
Expert Tips for Easter Bunny Coconut Tails
Consistency Check: Ensure the coconut mixture is well-blended before chilling; a lumpy mixture can lead to unevenly shaped tails.
Roll Smoothly: When forming the balls, keep your hands slightly damp; this helps prevent sticking and creates smooth surfaces for your Easter Bunny Coconut Tails.
Coating Coverage: For an even color, press the colored coconut into the balls lightly to avoid gaps in coverage.
Chill Fully: Don’t skip the chilling step; this is key to making the balls easier to handle and ensuring they set properly.
Storage Strategy: Layer the coconut tails with parchment paper in between when storing; this will help prevent them from sticking together.
These tips will help you create irresistible Easter Bunny Coconut Tails that are a hit at any gathering!
How to Store and Freeze Easter Bunny Coconut Tails
Fridge: Store your Easter Bunny Coconut Tails in an airtight container for up to 1 week. Layer them with parchment paper to prevent sticking.
Freezer: For longer storage, freeze the coconut tails for up to 3 months. Place them in a single layer on a baking sheet to freeze, then transfer to a zip-top bag or airtight container.
Reheating: These treats are best enjoyed cold or at room temperature. If they feel too firm after freezing, let them sit at room temperature for about 15 minutes before serving.
Make Ahead: These delightful no-bake treats can be made a week in advance, making them a convenient option for your holiday celebrations!
Easter Bunny Coconut Tails Recipe FAQs
What type of coconut should I use for the Easter Bunny Coconut Tails?
You can use both medium shredded coconut for the mixture and fine shredded coconut for coating. I recommend using medium shredded coconut to provide a delightful texture. If you would like a sweeter treat, substitute with sweetened coconut!
How long can I store the Easter Bunny Coconut Tails?
These delightful treats can be stored in an airtight container in the refrigerator for up to 1 week. If layered with parchment paper to prevent sticking, they’ll maintain their fabulous texture and flavor!
Can I freeze Easter Bunny Coconut Tails?
Absolutely! To freeze, place the coconut tails in a single layer on a baking sheet for about 2 hours, then transfer them to a zip-top bag or airtight container. They can be frozen for up to 3 months. Just thaw them at room temperature for about 15 minutes before enjoying!
How can I ensure the colored coconut is even?
For even coloring, make sure to press the colored coconut into the balls lightly when coating them. This will help to eliminate any gaps and give your Easter Bunny Coconut Tails a uniform look. Plus, it adds a fun visual touch!
Are there any dietary considerations for this recipe?
Yes, if anyone in your family has dairy restrictions, you can easily make these vegan-friendly by using dairy-free sweetened condensed milk and plant-based butter. This way, everyone can indulge in these festive treats without worry!
What should I do if my coconut mixture is too dry or crumbly?
If your mixture feels too dry, try adding a little more sweetened condensed milk, about 1 tablespoon at a time, until you reach a smooth consistency. You want it to hold together well but still be easy to roll. Don’t hesitate to mix well to combine those extra ingredients evenly!
These FAQs should help you navigate your way to delicious Easter Bunny Coconut Tails while enjoying the experience!
Easter Bunny Coconut Tails for a Fun No-Bake Treat Experience
Ingredients
Equipment
Method
- In a large mixing bowl, whisk together 14 oz of sweetened condensed milk, 2 tablespoons of melted and cooled butter, and 1 teaspoon of vanilla extract until smooth and cohesive.
- Fold in 5 cups of medium shredded coconut and ¼ cup of confectioner’s sugar until well blended. Chill in the refrigerator for about 15 minutes.
- Divide 2 cups of fine shredded coconut into several bowls. Add liquid food coloring to each bowl for desired pastel shades.
- Take a small cookie scoop and scoop out about 1½ teaspoons of the chilled mixture. Roll between palms to form smooth balls.
- Gently roll each ball in the colored coconut until completely covered, ensuring an even coating.
- Refrigerate the coated Easter Bunny Coconut Tails for at least 1 hour to set.
Leave a Reply