
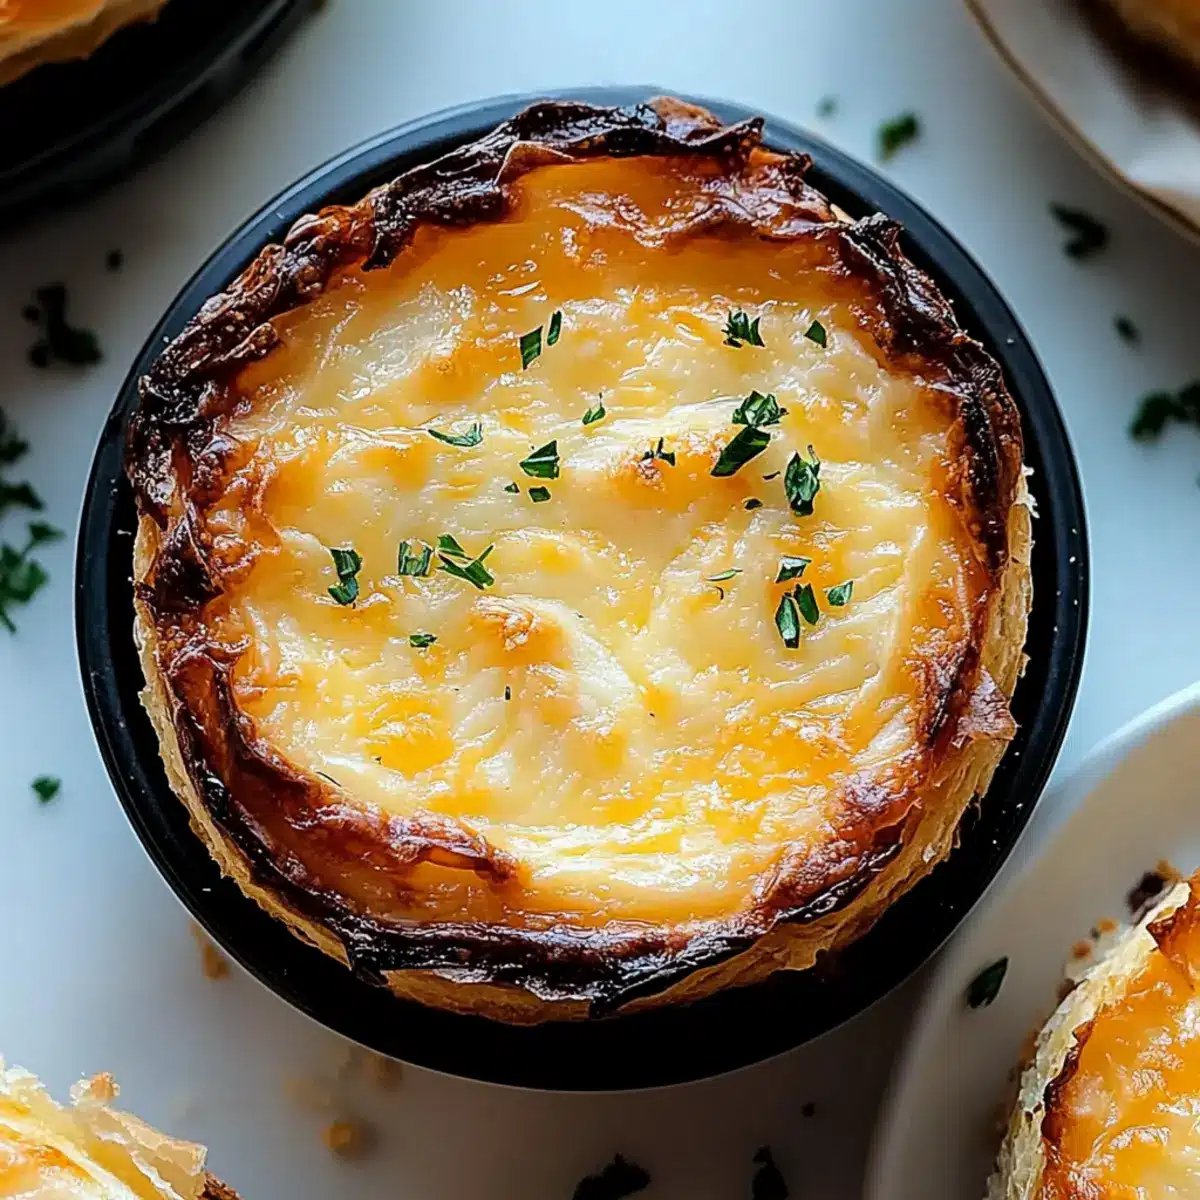
There’s something magical about the aroma of freshly baked bread wafting through the kitchen, isn’t there? This Cheesy Garlic Cruffin recipe is my go-to when I crave a savory snack that impresses without the fuss. With its flaky layers enveloping ooey-gooey cheese and fragrant garlic butter, you’ll find it’s more than just a baked good—it’s a warm hug in snack form. Not only is this easy baking recipe perfect for a quick bite during your busy day, but it also shines at gatherings as a crowd-pleaser that everyone will rave about. Are you ready to elevate your baking game and fill your kitchen with those irresistible scents? Let’s get started!

Why are Cheesy Garlic Cruffins a must-try?
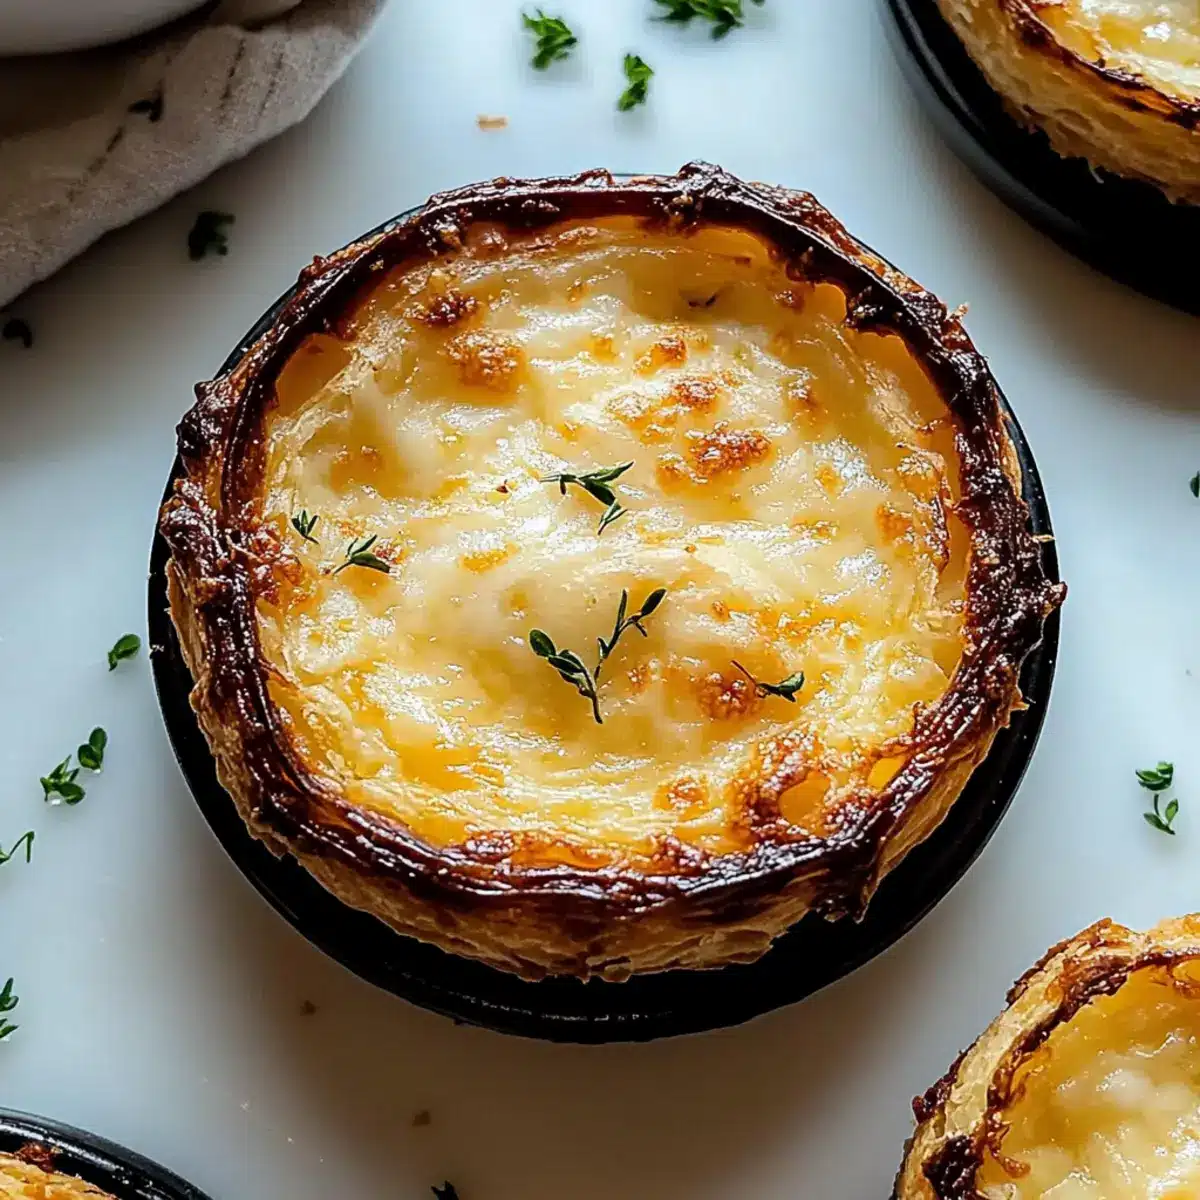
Flaky Layers: Each bite of these cruffins reveals delicate, airy layers that melt in your mouth. Savory Goodness: The combination of rich cheeses and aromatic garlic provides a flavor explosion that will leave you wanting more. Easy Baking: This straightforward recipe requires minimal effort, making it perfect for both seasoned bakers and beginners. Versatile Snack: Enjoy them as a standalone treat, or pair them with your favorite Garlic Bread Sloppy for an unforgettable meal. Crowd Favorite: Serve these at your next gathering, and watch them vanish in an instant! You’ll never be bored with snacks again!
Cheesy Garlic Cruffin Ingredients
Get ready to bake some delightful Cheesy Garlic Cruffins!
For the Dough
• All-Purpose Flour – Provides structure and a base for the dough; can use bread flour for a chewier texture.
• Granulated Sugar – Adds a hint of sweetness; can be replaced with brown sugar for a richer taste.
• Salt – Enhances overall flavor; essential for yeast activation.
• Instant Yeast – Leavening agent for dough rise; ensure it’s fresh for best results.
• Warm Milk – Hydrates the dry ingredients and activates yeast; almond milk works for a dairy-free option.
• Unsalted Butter (melted) – Adds richness to the dough; can use coconut oil for a dairy-free version.
• Warm Water – Activates the yeast and mixes with other ingredients.
• Large Egg – Binds the dough and enriches texture; a flax egg can be used for vegan options.
For the Filling
• Minced Garlic – Gives the cruffins their garlicky punch; adjust the amount for a milder flavor.
• Unsalted Butter (softened) – Adds moisture and richness to the garlic filling.
• Fresh Parsley (chopped) – Adds a fresh note; dried parsley can be used in smaller amounts.
For the Cheesy Goodness
• Grated Parmesan Cheese – Adds sharp, salty flavor; Pecorino Romano offers a similar profile.
• Shredded Mozzarella Cheese – Provides stretch and creaminess; cheddar or gouda can be used for different tastes.
Step‑by‑Step Instructions for Cheesy Garlic Cruffin
Step 1: Mix Dry Ingredients
In a large mixing bowl, combine 3 cups of all-purpose flour, 2 tablespoons of granulated sugar, 1 teaspoon of salt, and 1 packet of instant yeast. Use a whisk to blend the dry ingredients thoroughly, ensuring even distribution, which will promote a uniform rise.
Step 2: Combine Wet Ingredients
Create a well in the center of your dry mixture, then pour in 1 cup of warm milk, 1/4 cup of melted unsalted butter, 1/4 cup of warm water, and 1 large egg. Use a spatula to gently fold the mixture until it starts to come together, forming a shaggy dough that pulls away from the sides of the bowl.
Step 3: Knead Dough
Transfer the shaggy dough onto a lightly floured surface and knead for 8-10 minutes until it becomes smooth and elastic. You should see a slight sheen develop, and when stretched, the dough should not easily tear. This step builds the structure, ensuring your Cheesy Garlic Cruffin will have those delightful flaky layers.
Step 4: First Rise
Place the kneaded dough in a lightly greased bowl, covering it with a clean kitchen towel. Allow it to rise in a warm place for about 1 hour, or until it has doubled in size. This fermentation process activates the yeast, creating the airy texture you’ll love in every bite.
Step 5: Prepare Garlic Filling
While the dough is rising, create the flavorful garlic filling by combining 3 tablespoons of minced garlic, 1/4 cup of softened unsalted butter, and 2 tablespoons of chopped fresh parsley in a small bowl. Mix until fully combined; the aromatic garlic will shine in your Cheesy Garlic Cruffin.
Step 6: Shape Dough
After the dough has risen, punch it down and transfer it to a floured surface. Roll it out into a large rectangle, about 12×16 inches. Spread the prepared garlic mixture evenly across the surface, leaving a small border around the edges. Sprinkle 1/2 cup of grated Parmesan and 1 cup of shredded mozzarella cheese on top, enticing flavors waiting to blend.
Step 7: Roll and Slice
Starting from one long edge, carefully roll the dough into a tight log, ensuring the filling doesn’t spill out. Once rolled, slice the log into 8-10 equal pieces with a sharp knife. Each piece will become an individual Cheesy Garlic Cruffin that will bake to perfection.
Step 8: Second Rise
Place the sliced dough spirals into a greased muffin tin, allowing them to touch slightly for that lovely cruffin shape. Cover the tin with a towel and let the dough rise again for about 20 minutes. You should see the pieces puff up, creating extra fluffiness.
Step 9: Bake
Preheat your oven to 375°F (190°C). Once preheated, bake the cruffins for 20-25 minutes, or until they’re golden brown and deliciously puffed up. The aroma of baked garlic and cheese will fill your kitchen, making it hard to resist peeking!
Step 10: Cool and Serve
After baking, remove the cruffins from the oven and let them cool in the muffin tin for a few minutes. This brief cooling will help them set before you transfer them onto a wire rack. Serve warm for the best cheesy, garlicky experience with your Cheesy Garlic Cruffin!

Cheesy Garlic Cruffin Variations
Feel free to get creative with your Cheesy Garlic Cruffins—these delicious variations will inspire your baking!
-
Cheese Swap: Use cheddar or gouda instead of mozzarella for a different flavor profile. The body and richness will add extra comfort to each bite.
-
Spicy Kick: Add crushed red pepper flakes to the garlic butter for an inviting heat. This twist transforms your cruffin into a taste sensation that warms the soul!
-
Herb Infusion: Mix in fresh herbs like rosemary or thyme with the garlic filling for a fragrant, tasteful layer. You’ll find the aroma adds a delightful freshness, enhancing your cruffin experience.
-
Decadent Bacon: Incorporate cooked bacon crumbles into your cheese mixture for added savory depth. It blends beautifully with the garlic, creating a cruffin that will be a showstopper at any gathering.
-
Nut-Free Version: Swap almond milk for your preferred nut milk or regular dairy to keep it nut-free. This simple change expands your audience while keeping the base flavors intact.
-
Vegan Delight: Replace the egg with a flax egg and switch to dairy-free cheese. This makes your Cheesy Garlic Cruffin an inclusive treat for everyone to enjoy!
-
Extra Texture: Consider mixing in toasted pine nuts into your filling for an unexpected crunch. This will add a delightful bite and elevate the overall flavor profile of the cruffin.
-
Garlic Lovers: If you adore garlic, amp up the flavor by adding roasted garlic instead of minced garlic into your filling. This creates a sweeter, more complex flavor that any garlic aficionado would adore.
Feel free to experiment with these ideas and savor the delightful results! If you’re looking for more recipes, don’t forget to try out my Garlic Butter Tofu or serve these cruffins alongside some Garlic Bread Sloppy for an extraordinary meal pairing!
Expert Tips for Cheesy Garlic Cruffins
• Warm Ingredients: Use warm, not hot, liquids to mix with the dough, as hot temperatures can kill the yeast and prevent your Cheesy Garlic Cruffin from rising properly.
• Knead with Care: Knead the dough just enough to achieve a smooth and elastic texture. Over-kneading can make your cruffins tough, while under-kneading could lead to a dense outcome.
• Watch the Bake: Keep an eye on your cruffins as they bake. Ovens can vary, and checking them a few minutes earlier will help you avoid over-browning.
• Let Them Rest: Allow the cruffins to cool slightly after baking. This rest period enhances flavors and helps set the layers, making your snack even more delightful.
• Experiment with Fillings: Don’t hesitate to get creative! You can add different cheeses or herbs to the filling for a unique twist on the classic Cheesy Garlic Cruffin.
How to Store and Freeze Cheesy Garlic Cruffins
- Room Temperature: Store leftover cruffins in an airtight container for up to 2 days. Keep them away from direct sunlight to maintain their flakiness.
- Fridge: For longer storage, refrigerate cruffins in an airtight container for up to 5 days. Reheat in the oven at 350°F (175°C) for about 5-10 minutes for best results.
- Freezer: Freeze cruffins in a freezer-safe bag or container for up to 2 months. Ensure they’re well-wrapped to prevent freezer burn.
- Reheating: To enjoy frozen cruffins, thaw in the fridge overnight and reheat in the oven for about 15 minutes or until warmed through, ensuring those cheesy layers are delightful again.
Make Ahead Options
These Cheesy Garlic Cruffins are perfect for meal prep, saving you time during busy weeknights! You can prepare the dough and let it rise completely up to 24 hours in advance. After shaping the cruffins, simply cover and refrigerate them overnight. To maintain their quality, store them in an airtight container to prevent drying out. When you’re ready to bake, just let the cruffins sit at room temperature for about 30 minutes before baking, which helps them rise better in the oven. In no time, you’ll enjoy warm, flaky Cheesy Garlic Cruffins with minimal effort—just a sprinkle of cheese and a dash of garlic aroma to bring it all together!
What to Serve with Cheesy Garlic Cruffin
Elevate your meal experience by pairing these delightful treats with complementary flavors and textures that dance on your palate.
- Creamy Tomato Soup: The tangy brightness of tomato soup balances the rich, savory goodness of the cruffins, making for a cozy meal.
- Fresh Garden Salad: Crisp greens with a zesty vinaigrette add a refreshing contrast, enhancing both flavor and nutrition.
- Garlic Herb Butter Spaghetti: This pasta dish echoes the garlic flavors of the cruffins, creating a deliciously cohesive dining experience.
- Savory Vegetable Platter: Roasted or grilled veggies bring earthiness that beautifully complements the cheesy, flaky layers.
- Wine Pairing: A glass of crisp Sauvignon Blanc or a light Chardonnay enhances the meal while providing a delightful refreshment.
- Herb-Infused Olive Oil: Drizzling this over the cruffins opens up aromatic flavors; it’s a simple yet elegant addition.
- Creamy Spinach Dip: Rich and indulgent, a dip served alongside adds a creamy texture that’s hard to resist.
Cheesy Garlic Cruffin Recipe FAQs
How do I select the right cheese for my Cheesy Garlic Cruffins?
Absolutely! For the best flavor profile, I recommend using a combination of grated Parmesan for sharpness and shredded mozzarella for that delightful stretch. If you’re looking for alternatives, consider using Pecorino Romano if you prefer a stronger cheese or even cheddar or gouda for a different taste.
What’s the best way to store leftover cruffins?
You can store leftover Cheesy Garlic Cruffins in an airtight container at room temperature for up to 2 days. If you’d like to keep them longer, refrigerate them for up to 5 days. Just remember, they’ll need a quick reheat in the oven at 350°F (175°C) for about 5-10 minutes to regain their lovely texture!
Can I freeze Cheesy Garlic Cruffins?
Absolutely! To freeze, allow the cruffins to cool completely, then place them in a freezer-safe bag or container, ensuring they’re tightly sealed to prevent freezer burn. They can be stored in the freezer for up to 2 months. When you’re ready to enjoy, simply thaw them in the fridge overnight and reheat in the oven for about 15 minutes.
What should I do if my cruffins are too dense?
If your Cheesy Garlic Cruffins turn out dense, it may be due to under-kneading or not allowing enough time for the dough to rise. Knead the dough until it’s smooth and elastic, and ensure you let it rise in a warm place for about 1 hour, or until it’s doubled in size. Trust me, this makes all the difference!
Can I make these cruffins vegan or dairy-free?
Very much so! You can substitute the large egg with a flax egg (1 tablespoon ground flaxseed mixed with 2.5 tablespoons water, let it sit for 5 minutes). For the butter and milk, coconut oil and almond milk work wonders as dairy-free options. You won’t lose any of the deliciousness with these modifications!
Are Cheesy Garlic Cruffins suitable for my pet?
As tempting as they look, it’s best to keep these treats away from pets. The butter, cheese, and garlic, while delightful for us, can be harmful to dogs and cats in significant amounts, particularly garlic. Always prioritize their health by offering pet-safe snacks instead!
Cheesy Garlic Cruffin: Flaky Goodness for Every Snack Time
Ingredients
Equipment
Method
- In a large mixing bowl, combine 3 cups of all-purpose flour, 2 tablespoons of granulated sugar, 1 teaspoon of salt, and 1 packet of instant yeast. Use a whisk to blend thoroughly.
- Create a well in the center of the dry mixture, then pour in 1 cup of warm milk, 1/4 cup of melted unsalted butter, 1/4 cup of warm water, and 1 large egg. Fold gently until it forms a shaggy dough.
- Transfer the shaggy dough onto a lightly floured surface and knead for 8-10 minutes until smooth and elastic.
- Place the kneaded dough in a lightly greased bowl, cover with a towel, and let it rise in a warm place for about 1 hour, or until doubled in size.
- Prepare the garlic filling by combining 3 tablespoons of minced garlic, 1/4 cup of softened unsalted butter, and 2 tablespoons of chopped parsley. Mix until fully combined.
- After the dough has risen, punch it down and roll it out into a rectangle, about 12x16 inches. Spread the garlic mixture, sprinkle Parmesan, and shredded mozzarella on top.
- Starting from one edge, roll the dough into a tight log and slice into 8-10 equal pieces.
- Place the sliced dough in a greased muffin tin, letting them touch slightly. Cover and let rise for about 20 minutes.
- Preheat the oven to 375°F (190°C). Bake the cruffins for 20-25 minutes, or until golden brown.
- After baking, let cool slightly in the muffin tin before transferring to a wire rack. Serve warm.
Leave a Reply