
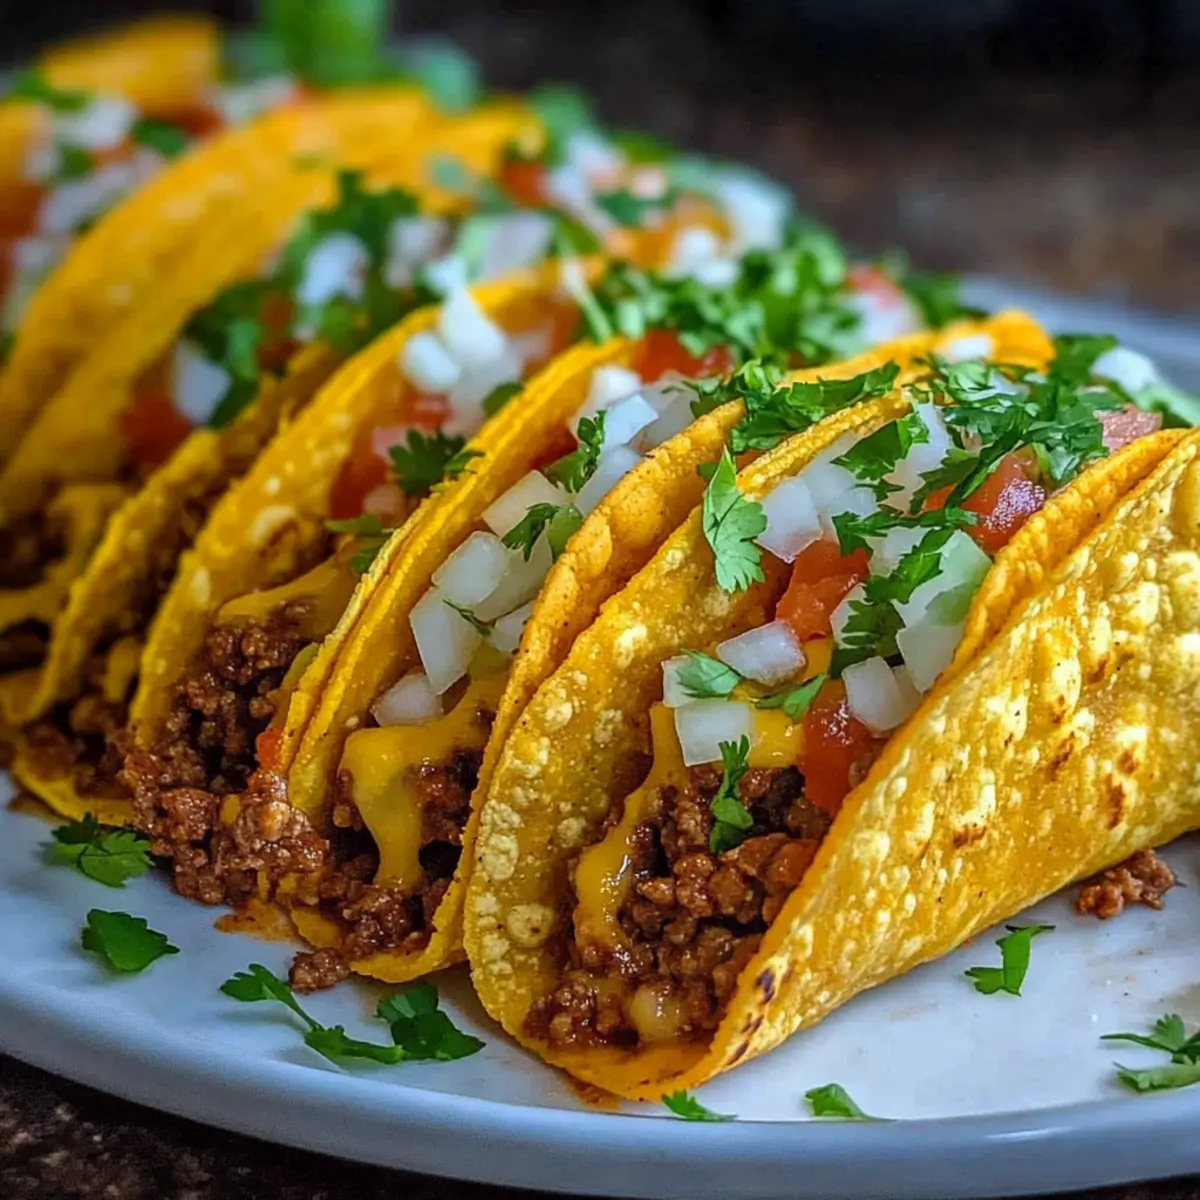
Imagine the delightful crunch of a taco shell filled to the brim with gooey cheese and your choice of savory fillings. This is what you’ll get with my Oven-Baked Cheesy Tacos—a recipe that transforms taco night into an effortless feast! Whether you’re rushing home after a long day or hosting a casual gathering with friends, these oven-baked tacos are your secret weapon. Quick to prepare, customizable for even the pickiest eaters, and perfect for satisfying a crowd, they deliver all the deliciousness you crave without the hassle of frying. With crispy shells and warm, melted cheese in every bite, who could resist? Are you ready to elevate your taco game? Let’s dive into this scrumptious recipe together!
Why Are Oven-Baked Cheesy Tacos Perfect?
Convenience at Its Finest: This recipe allows you to whip up a delicious meal in under 30 minutes, perfect for busy weeknights.
Customizable Ingredients: Choose from a variety of fillings like ground beef, shredded chicken, or even sautéed veggies. Your family will love the personalization!
Crowd-Pleasing Delight: Whether it’s a family dinner or a gathering with friends, these cheesy tacos will have everyone coming back for more.
No-Mess Cooking: Baking means lesser cleanup compared to frying, letting you enjoy your meal worry-free.
Flavor Explosion: With warm, gooey cheese and seasoned fillings in every crunchy bite, you’ll savor the rich flavors that redefine taco night!
Transform your family dinners with these oven-baked cheesy tacos—learn how to make the best version for your household!
Oven-Baked Cheesy Tacos Ingredients
For the Taco Shells
• Taco Shells – Choose corn, flour, or whole wheat shells for that perfect crunchy exterior.
For the Filling
• Ground Beef/Shredded Chicken/Beans – Your protein source; shredded chicken and beans are excellent for adding variety.
• Onion – Enhances flavor; diced onions can easily be adjusted or omitted based on personal preference.
• Taco Seasoning – Infuses the meat or beans with authentic taco flavor; feel free to use a packet or your own homemade blend.
• Salsa/Diced Tomatoes – Adds moisture and flavor; you can swap this for pico de gallo if you prefer.
For the Toppings
• Shredded Cheese – Go for cheddar, Monterey Jack, or mozzarella to bind those savory fillings together.
• Jalapeños/Bell Peppers – Optional for an extra kick of flavor and vibrant color; adjust according to your heat preference.
• Fresh Cilantro – A fresh garnish that brightens the dish; substitute with green onions if desired.
With this yummy Oven-Baked Cheesy Tacos recipe at your fingertips, get ready to indulge in a family-favorite dish that’s easy to make and full of flavor!
Step‑by‑Step Instructions for Oven-Baked Cheesy Tacos
Step 1: Preheat the Oven
Begin by preheating your oven to 375°F (190°C). This is crucial for ensuring your tacos cook evenly and achieve that delightful crispiness. While the oven heats up, line a large baking sheet with aluminum foil for easy cleanup and to prevent the taco shells from sticking.
Step 2: Cook the Fillings
In a large skillet over medium heat, add your choice of ground beef, shredded chicken, or beans. Toss in diced onions and sprinkle with taco seasoning. Cook for about 7-10 minutes or until the meat is browned and fully cooked. Stir in salsa or diced tomatoes to combine everything beautifully, adding moisture and flavor to your savory filling.
Step 3: Assemble the Tacos
Once your filling is ready, it’s time to assemble your oven-baked cheesy tacos! Stand the taco shells upright on the prepared baking sheet. Begin by placing a layer of shredded cheese at the bottom of each shell, then fill generously with the cooked mixture. Top with more shredded cheese for that perfect melty finish.
Step 4: Bake Until Crispy
Carefully place the baking sheet in the preheated oven and bake for 12-15 minutes. Keep an eye on them; the taco shells should become golden and crispy, while the cheese bubbles and begins to brown. For added crunch, flip the taco shells halfway through the baking time to ensure both sides are perfectly crisp.
Step 5: Cool & Serve
After baking, remove the sheet from the oven and let the tacos cool for a few minutes. This allows the cheese to set slightly, making them easier to serve. Garnish your cheesy tacos with freshly chopped cilantro and any additional toppings you love, like jalapeños or sour cream, and get ready to enjoy a delightful family dinner!
Make Ahead Options
These Oven-Baked Cheesy Tacos are perfect for meal prep enthusiasts! You can prepare the filling (ground beef, shredded chicken, or veggies) up to 3 days in advance; simply cook it as directed, allow it to cool, and then refrigerate in an airtight container. The taco shells can be set aside or even filled and assembled the night before; just leave off the cheese until you’re ready to bake to maintain their crunch. When it’s time to enjoy, preheat your oven, top the assembled tacos with cheese, and bake for about 12-15 minutes until golden and bubbly. This way, you’ll have a delicious family dinner ready with minimal effort!
Oven-Baked Cheesy Tacos: Variations & Substitutions
Feel free to get creative with this recipe and tailor it to your family’s taste buds. The joy of cooking lies in making it your own!
-
Breakfast Tacos: Use scrambled eggs, cheese, and jalapeños for a vibrant morning twist. Pairing warm eggs with gooey cheese creates a decadent brunch experience.
-
Vegetarian Tacos: Swap in black beans, corn, and sautéed peppers for a colorful, wholesome alternative. These plant-based fillings bring a burst of flavor and texture that everyone will enjoy.
-
Spicy Tacos: Add extra heat by mixing diced jalapeños into the filling and topping with a spicy salsa. This variation not only enhances flavor but adds a fun kick that spice lovers will adore.
-
Mixed Protein Tacos: Combine ground beef and shredded chicken for a unique flavor profile in every bite. The mingling of tastes elevates this classic recipe to new heights.
-
Cheesy Bean Tacos: Replace meat with refried beans and extra cheese for a gooey, satisfying treat. This option is perfect for a filling vegetarian meal without sacrificing flavor.
-
Gluten-Free Tacos: Opt for gluten-free corn tortillas to make this dish welcoming for those with dietary restrictions. The crunchy texture of corn shells pairs exceptionally well with the cheesy filling.
-
Sweet & Spicy Tacos: Add a hint of sweetness by mixing in pineapple chunks with your protein filling. The delightful contrast makes for an adventurous twist to the traditional taco night.
-
Smoky Chipotle Tacos: Enhance the flavor by incorporating chipotle seasoning into your fillings. This brings depth and complexity to each bite, creating an unforgettable experience.
Feel free to explore these variations, and if you’re interested, check out my dairy-free alternatives for even more options!
Expert Tips for Oven-Baked Cheesy Tacos
-
Preheat Perfectly: Always preheat the oven to ensure even cooking. Skipping this step may result in soggy taco shells.
-
Layer of Cheese: Start with a layer of cheese at the bottom of each taco shell. This prevents the filling from making the shell soggy and enhances flavor in your oven-baked cheesy tacos.
-
Cooking Uniformity: Stir the filling frequently while cooking to prevent burning. Ensure your protein is cooked through; using a meat thermometer can help.
-
Foil Lining: Don’t skip lining your baking sheet with aluminum foil. This not only eases cleanup but also prevents sticking, making serving a breeze.
-
Crispier Tacos: Flip taco shells halfway through baking for an extra crispy texture. This ensures both sides are evenly golden and crunchy!
-
Garnish Wisely: Add garnishes like cilantro after baking. This keeps them fresh and vibrant, enhancing the visual appeal of your delicious tacos!
Storage Tips for Oven-Baked Cheesy Tacos
Fridge: Store leftover oven-baked cheesy tacos in an airtight container for up to 2-3 days to maintain their deliciousness and prevent sogginess.
Freezer: For longer storage, freeze tacos in a single layer on a baking sheet, then transfer to a freezer-safe container for up to 2 months.
Reheating: When you’re ready to enjoy, reheat the tacos in the oven or air fryer at 350°F (175°C) for about 10-12 minutes to restore their crispy texture.
What to Serve with Oven-Baked Cheesy Tacos
Elevate your taco night into a memorable feast with delightful side dishes that perfectly complement the cheesy and savory goodness of your tacos.
- Crispy Homemade Tortilla Chips: Serve these alongside fresh salsa or guacamole for the ultimate crunchy snack that echoes the flavors of your tacos.
- Zesty Mexican Street Corn Salad: The sweetness of corn, combined with lime and cilantro, adds a refreshing contrast—perfect for balancing the richness of cheesy tacos.
- Creamy Avocado Dip: This rich and smooth dip enhances each bite, providing a creamy texture that pairs beautifully with the crispy taco shells.
- Tangy Coleslaw: A crunchy, tangy coleslaw offers a delightful crunch and cooling effect—great for cutting through the heaviness of melted cheese.
- Spicy Refried Beans: This hearty, flavorful side adds an extra layer of Mexican flair while ensuring ample protein to round out your meal.
- Cilantro Lime Rice: Light and fragrant, this rice dish enhances your meal with citrusy notes, providing a perfect base for taco fillings.
- Margaritas: Choose a classic or fruity blend—this cocktail brings extra cheer to your taco night and pairs nicely with those savory flavors.
- Churros for Dessert: End the meal on a sweet note with warm, cinnamon-dusted churros for a delightful finishing touch that all ages will enjoy.
- Watermelon Agua Fresca: This refreshing drink is perfect for cleansing the palate, making it a lovely companion to the spicy, cheesy tacos.

Oven-Baked Cheesy Tacos Recipe FAQs
What type of taco shells should I use?
Absolutely! You can choose from corn, flour, or whole wheat taco shells depending on your preference. Corn shells offer a classic crunch, while flour gives a softer bite, making them a great option for families.
How do I store leftover cheesy tacos?
To keep your oven-baked cheesy tacos fresh, refrigerate any leftovers in an airtight container for up to 2-3 days. This will help maintain their flavor and prevent them from getting soggy.
Can I freeze cheesy tacos?
Yes, you can freeze your oven-baked cheesy tacos! Place them in a single layer on a baking sheet until frozen, then transfer them to a freezer-safe container or zip-top bag. They will stay good for up to 2 months. When you’re ready to enjoy, just reheat in the oven for that crispy texture you love.
What should I do if my taco shells are soggy?
If you’re facing sogginess, there are a couple of steps to rejuvenate them. First, ensure your taco fillings aren’t too wet—consider draining excess liquid from salsa or tomatoes. If you’ve already baked them, you can place them back in a preheated oven at 375°F (190°C) for about 5-7 minutes to crisp them up again.
Are oven-baked cheesy tacos safe for kids and pets?
Very! Oven-baked cheesy tacos are a kid-friendly dinner option, but be mindful of ingredients like spices or toppings that may not be suitable for young children or pets. If sharing with pets, make sure to skip onions, garlic, and any spicy toppings, as these can be harmful to them.
Oven-Baked Cheesy Tacos: Your Family's New Favorite Dinner
Ingredients
Equipment
Method
- Preheat your oven to 375°F (190°C) and line a baking sheet with aluminum foil.
- In a skillet, cook ground beef, shredded chicken, or beans with diced onions and taco seasoning for 7-10 minutes. Stir in salsa or diced tomatoes.

- Assemble tacos by placing cheese at the bottom of each shell, filling with the cooked mixture, and topping with more cheese.

- Bake the tacos for 12-15 minutes until golden and crispy, flipping halfway through.

- Cool for a few minutes, garnish with cilantro and additional toppings, then serve.
Leave a Reply