
As I rummaged through my pantry, a familiar aroma wafted from a half-open jar of peanut butter. Instantly, memories of school lunches flooded back, the signature taste of a peanut butter and jelly sandwich bringing comfort like an old friend. That’s when it struck me—why not turn this childhood favorite into something even sweeter? Enter my Peanut Butter & Jelly Cookies, a fun and nostalgic twist that’s sure to take you back in time. What’s even better? This easy recipe requires no mixer, making it the perfect go-to for both seasoned bakers and those just starting out. With each soft, chewy bite and pockets of gooey jam, these cookies are not just a treat—they’re a heartwarming reminder of carefree days. Are you ready to indulge your taste buds and relive those sweet memories? Let’s dive in!

Why Are These Cookies So Special?
Nostalgia at its finest: Each bite transports you back to childhood, capturing the essence of a classic peanut butter and jelly sandwich.
Simplicity is key: With no mixer required, this easy recipe is perfect for quick creations, making it accessible for everyone.
Customizable options allow for creativity; try substituting with almond butter or different jam flavors like raspberry for a unique spin!
Perfect for sharing at parties or summer BBQs, these cookies are sure to be a crowd favorite, pleasing both kids and adults alike.
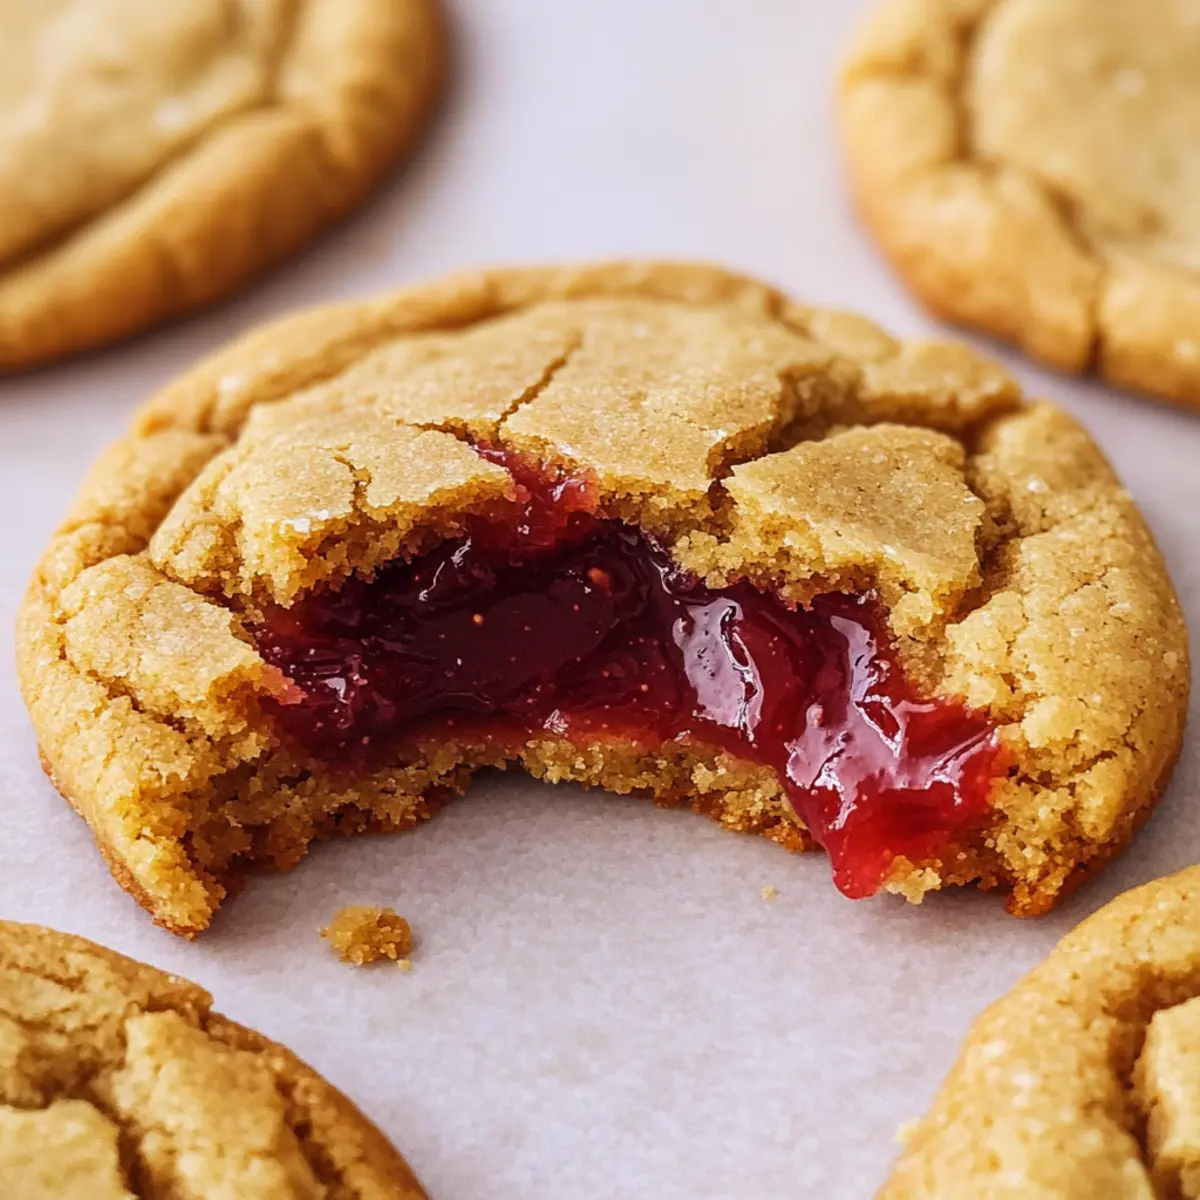
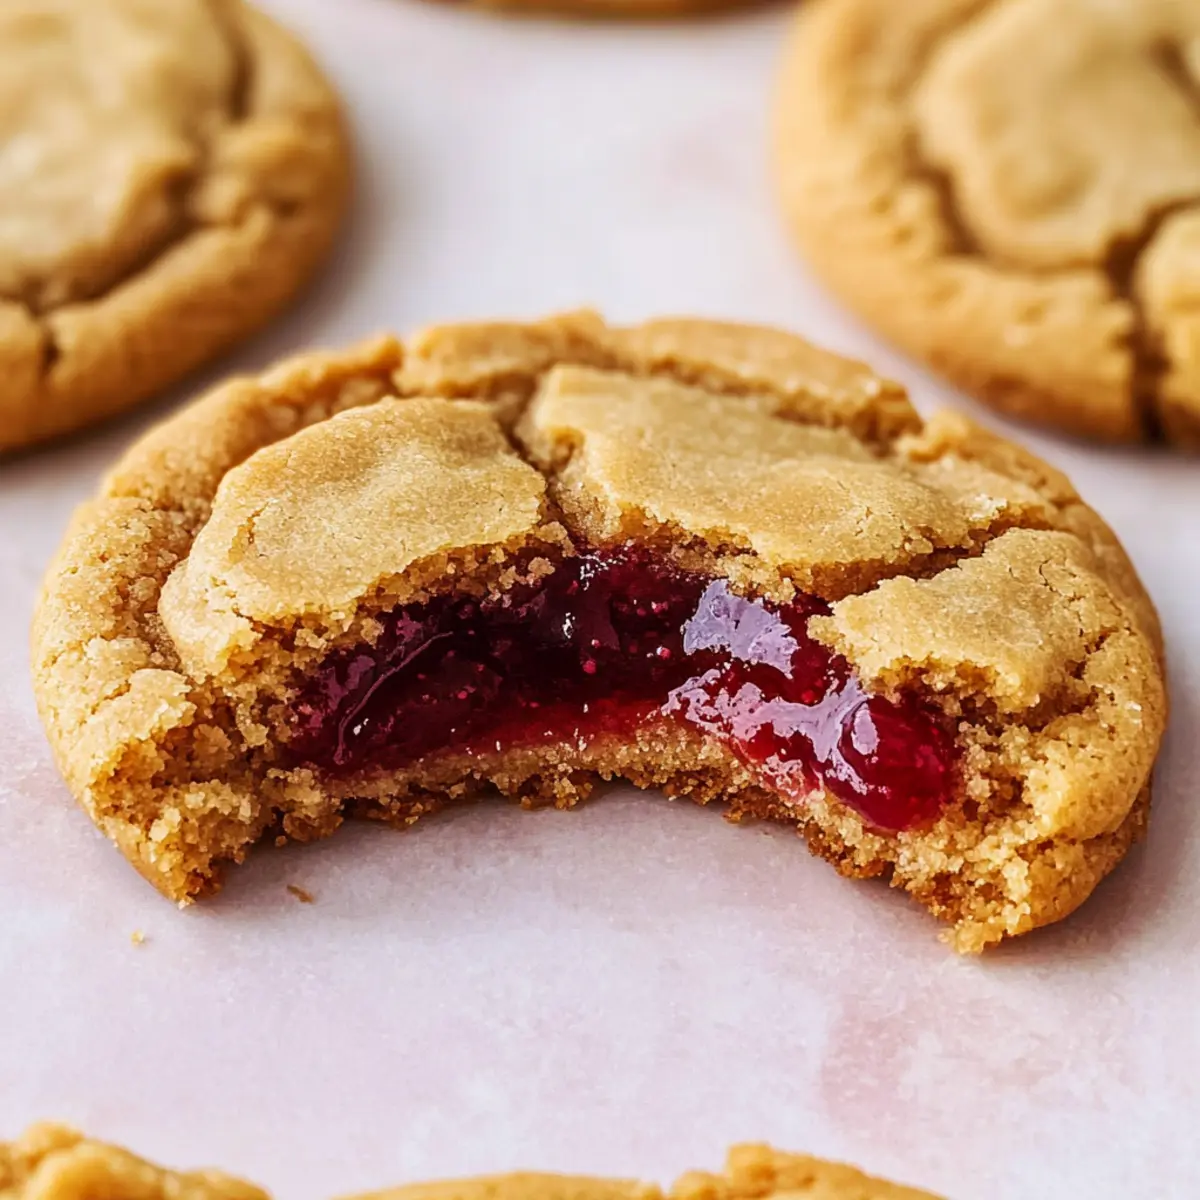
Gooey goodness awaits: The combination of soft cookie texture with warm, oozy jam makes them irresistibly delicious—ideal for satisfying sweet cravings.
You can’t go wrong with a classic remake! If you adore peanut butter flavors, don’t forget to check out these mouthwatering Peanut Butter Cookies or Chocolate Peanut Butter Oatmeal Bars for more delectable delights.
Peanut Butter & Jelly Cookies Ingredients
For the Cookie Base
• Unsalted Butter – provides richness and moisture; substitute with plant-based butter for a dairy-free option.
• Creamy Natural Peanut Butter – the main flavor source; natural peanut butter is preferred for a bolder taste.
• Light Brown Sugar – adds sweetness and moisture; using dark brown sugar gives a richer flavor.
• Granulated Sugar – balances sweetness and aids in cookie spread.
• Bleached All-Purpose Flour – essential for structure; unbleached might yield a dry cookie, so reduce flour by 1-2 tablespoons if using.
• Baking Soda & Baking Powder – leavening agents that ensure proper rise and texture.
• Fine Sea Salt – enhances flavor and balances sweetness.
• Large Eggs – binds ingredients together; ensure they are at room temperature for the best results.
• Milk – adds moisture; can substitute with non-dairy milk if preferred.
• Vanilla Extract – adds depth of flavor; optional but recommended.
For the Signature Filling
• Strawberry Jam or Jelly – provides the signature filling; feel free to substitute with any preferred jam for a different twist.
Indulge in these delightful Peanut Butter & Jelly Cookies that blend nostalgic flavors into a fun treat everyone will love!
Step‑by‑Step Instructions for Peanut Butter & Jelly Cookies
Step 1: Preheat and Prepare
Begin by preheating your oven to 350°F (175°C). While it warms, line two baking sheets with parchment paper, ensuring a non-stick surface for your delicious Peanut Butter & Jelly Cookies. The soft, buttery aroma filling your kitchen as they bake will be the first hint of the delightful treat to come.
Step 2: Melt and Mix
In a microwave-safe bowl, melt ½ cup of unsalted butter until just melted, about 30 seconds. Stir in 1 cup of creamy natural peanut butter until the mixture is smooth and well combined. This rich peanut butter blend will form the flavorful base of your cookies, bringing that nostalgic taste to life.
Step 3: Incorporate the Sugars
Next, mix in ¾ cup of light brown sugar and ½ cup of granulated sugar. Use a fork or a spatula to blend until the sugars dissolve and the mixture becomes creamy, about 2 minutes. Let this peanut butter mixture cool slightly; you want it warm but not hot to ensure the eggs don’t scramble when added.
Step 4: Add Wet Ingredients
Once cooled, beat in 1 large egg, 2 tablespoons of milk, and 1 teaspoon of vanilla extract until well blended and smooth. These ingredients will bind everything together, adding moisture and depth of flavor to your Peanut Butter & Jelly Cookies. The batter will begin to feel rich and comforting as you mix.
Step 5: Mix in Dry Ingredients
In a separate bowl, whisk together 2 cups of bleached all-purpose flour, 1 teaspoon of baking soda, 1 teaspoon of baking powder, and ½ teaspoon of fine sea salt. Gradually add this dry mixture to your wet ingredients, folding gently until everything is just combined. Be careful not to overmix; the dough should be soft but not sticky.
Step 6: Shape the Cookies
Using a large cookie scoop, portion 3-tablespoon-sized balls of dough onto the prepared baking sheets, spacing them about 3 inches apart. Roll each portion into a smooth ball, letting the comforting aroma of peanut butter fill your kitchen. The cookies will spread as they bake, so proper spacing is essential.
Step 7: Create the Jam Wells
With your thumb, gently press down on the center of each dough ball to create a small well. Spoon 1 heaping teaspoon of strawberry jam into each well, allowing it to mound slightly without overflowing. This sweet moment is where the classic PB&J flavor truly comes to life, waiting to ooze out when baked.
Step 8: Bake the Cookies
Place the baking sheets into the preheated oven and bake for 12-14 minutes, or until the edges are slightly golden. You’ll know they’re ready when the centers look set but still soft. The enticing smell of warm peanut butter and sweet jam will fill the air, beckoning everyone to the kitchen.
Step 9: Cool and Enjoy
Remove the cookies from the oven and let them rest on the baking sheets for about 5 minutes. This cooling time will help them set perfectly. Gently transfer the Peanut Butter & Jelly Cookies to a wire rack to cool completely. The enticing sight and scent will make it hard to wait, but trust me, the flavor will be worth it!
How to Store and Freeze Peanut Butter & Jelly Cookies
Room Temperature: Store your cookies in an airtight container at room temperature for up to 3 days for the best flavor. They’ll soften slightly, but that makes them even more delightful!
Fridge: If you prefer, you can keep the cookies in the fridge for up to a week. They’ll stay fresh longer, but you may want to allow them to come to room temperature for the best taste.
Freezer: Freeze assembled cookie dough for up to one month. Let the dough thaw in the fridge before baking, adding a minute or two to the baking time if using cold dough.
Reheating: To enjoy your cookies warm, simply pop them in the microwave for 10-15 seconds. This will revive the gooeyness of the strawberry jam and the rich peanut butter in your Peanut Butter & Jelly Cookies!
What to Serve with Peanut Butter & Jelly Cookies
Transform your delightful cookies into a heartwarming meal with these perfect pairings!
-
Milk: A classic choice, the creaminess of milk beautifully complements the rich flavors of peanut butter, ensuring every bite is a match made in heaven.
-
Chocolate Milkshake: For an indulgent treat, a thick chocolate milkshake will elevate the nostalgic experience, creating a dreamy dessert duo.
-
Fruits: Sliced strawberries or bananas add freshness and brightness, balancing the sweetness of the cookies while enhancing those fruity jam flavors.
-
Vanilla Ice Cream: The cool creaminess of vanilla ice cream works wonderfully with the warm, gooey cookies, creating a delightful contrast in every bite.
-
Cold Brew Coffee: If you’re looking for a more sophisticated pairing, a refreshing cold brew coffee pairs perfectly to enhance the nutty flavors while soothing cravings.
-
Peanut Butter Smoothie: Blend up a peanut butter smoothie with banana and almond milk for a creamy, nutty drink that fits the cookie’s profile perfectly.
-
Nutty Trail Mix: Serve your cookies alongside a handful of nutty trail mix for added crunch and flavor variation, making snack time extra fun.
-
Fruit Sorbet: A scoop of fruity sorbet offers a refreshing contrast to the cookies’ richness, making for a light and sweet pairing.
-
Sparkling Water: For something refreshing and light, a splash of sparkling water can cleanse the palate between bites of these beautifully rich cookies.
Make Ahead Options
These Peanut Butter & Jelly Cookies are perfect for meal prepping, allowing you to enjoy a nostalgic treat without the last-minute hassle! You can prepare the cookie dough up to 24 hours in advance by mixing all the ingredients and chilling the dough (this helps maintain their chewy texture). Simply form the dough balls and create the jam wells, then cover and refrigerate until you’re ready to bake. If you want to prep even further ahead, you can freeze the assembled dough for up to 3 months—just thaw in the fridge overnight before popping them in the oven. When you’re ready to enjoy them, bake as directed, and your cookies will come out just as delicious and fresh!
Helpful Tricks for Peanut Butter & Jelly Cookies
-
Chill the Dough: After shaping, chill the dough for 30 minutes to achieve thicker cookies, preventing them from spreading too much during baking.
-
Reshape if Needed: If cookies bake into odd shapes, use a round cookie cutter to gently reshape them while they’re still warm; it’s an easy fix!
-
Storage Mastery: Store cookies in an airtight container at room temperature. For the best flavor, enjoy them the next day, though they may soften over time.
-
Jam Choices: Don’t hesitate to experiment! Alternate jam flavors like raspberry or grape can elevate your Peanut Butter & Jelly Cookies to a new level.
-
Room Temperature Eggs: Remember to use large eggs at room temperature for a smoother batter. This will help bind your ingredients together more effectively.
Peanut Butter & Jelly Cookies Variations
Feel free to personalize your Peanut Butter & Jelly Cookies with these delightful twists that’ll keep your baking exciting!
- Dairy-Free: Substitute unsalted butter with plant-based butter for a deliciously vegan treat.
- Nutty Alternative: Swap creamy peanut butter for almond butter for a unique nutty flavor.
- Brown Sugar Varieties: Use dark brown sugar instead for a deeper, molasses-like sweetness that enhances flavor.
- Jam Flavors: Experiment with other jams like raspberry or grape, for a fun twist on the classic filling.
- Chocolate Lovers: Add chocolate chips into the dough for a decadent chocolate-peanut butter combination, earning extra smiles!
- Crunch Factor: Mix in chopped nuts like walnuts or pecans for added texture and a delightful crunch.
- Spice it Up: Incorporate a dash of cinnamon or nutmeg in the dough for a cozy, spiced twist.
- Oatmeal Boost: Blend in rolled oats for a heartier texture, reminiscent of oatmeal cookies, with layers of nostalgic flavor.
These variations are designed to inspire your creativity in the kitchen! For more comforting peanut butter recipes, check out these Oatmeal Peanut Butter Energy Bites and Healthy Peanut Butter Balls. Happy baking!

Peanut Butter & Jelly Cookies Recipe FAQs
How do I choose the best peanut butter for these cookies?
Absolutely! For the richest flavor, I recommend using creamy natural peanut butter, which typically has no added sugars or oils. This will give your Peanut Butter & Jelly Cookies a bold, authentic taste. If you’re in a pinch, conventional peanut butter like Jif or Skippy works fine too!
How should I store my Peanut Butter & Jelly Cookies?
Store your cookies in an airtight container at room temperature for up to 3 days. They’ll soften slightly, but this only enhances the delightful chewy texture. If you prefer a longer shelf life, you can keep them in the fridge for up to a week.
Can I freeze the cookie dough?
Very! You can freeze assembled cookie dough for up to one month. Just scoop the dough into balls and place them on a baking sheet lined with parchment paper. Freeze until solid, then transfer to a zip-top bag. When you’re ready to bake, thaw the dough in the fridge overnight, adding a minute or two to the baking time for best results.
What if my cookies spread too much while baking?
If you find your Peanut Butter & Jelly Cookies spreading excessively, try chilling the dough for at least 30 minutes before baking. Also, make sure you place the dough balls at least 3 inches apart on your baking sheet. If they aren’t uniformly round after baking, use a round cookie cutter to gently reshape them while they’re still warm!
Are these cookies suitable for people with nut allergies?
The traditional recipe does call for peanut butter, which makes these cookies unsuitable for those with nut allergies. However, if you’re seeking a nut-free alternative, you could try using sun butter or soy nut butter. Be sure to check for any other potential allergens in the ingredients you choose.
What’s the best way to reheat my cookies for maximum gooeyness?
To enjoy your Peanut Butter & Jelly Cookies warm, you can simply pop them in the microwave for about 10-15 seconds. This quick heat will revive the gooey strawberry jam and enhance that rich peanut butter flavor, making each bite even more delightful!
Peanut Butter & Jelly Cookies for a Nostalgic Treat
Ingredients
Equipment
Method
- Preheat oven to 350°F (175°C) and line two baking sheets with parchment paper.
- Melt ½ cup of unsalted butter in a microwave-safe bowl for about 30 seconds.
- Stir in 1 cup of creamy natural peanut butter until smooth and combined.
- Mix in ¾ cup of light brown sugar and ½ cup of granulated sugar until creamy, about 2 minutes.
- Beat in 1 large egg, 2 tablespoons of milk, and 1 teaspoon of vanilla extract until well blended.
- In a separate bowl, whisk together 2 cups of flour, 1 teaspoon of baking soda, 1 teaspoon of baking powder, and ½ teaspoon of salt.
- Gradually add dry ingredients to wet ingredients, folding gently until just combined.
- Using a cookie scoop, portion 3-tablespoon balls of dough onto the prepared sheets.
- Press a thumb into each ball to create a well and fill with 1 heaping teaspoon of jam.
- Bake for 12-14 minutes until edges are golden and centers are set.
- Remove from oven and let cool on baking sheets for 5 minutes before transferring to a wire rack.
Leave a Reply