
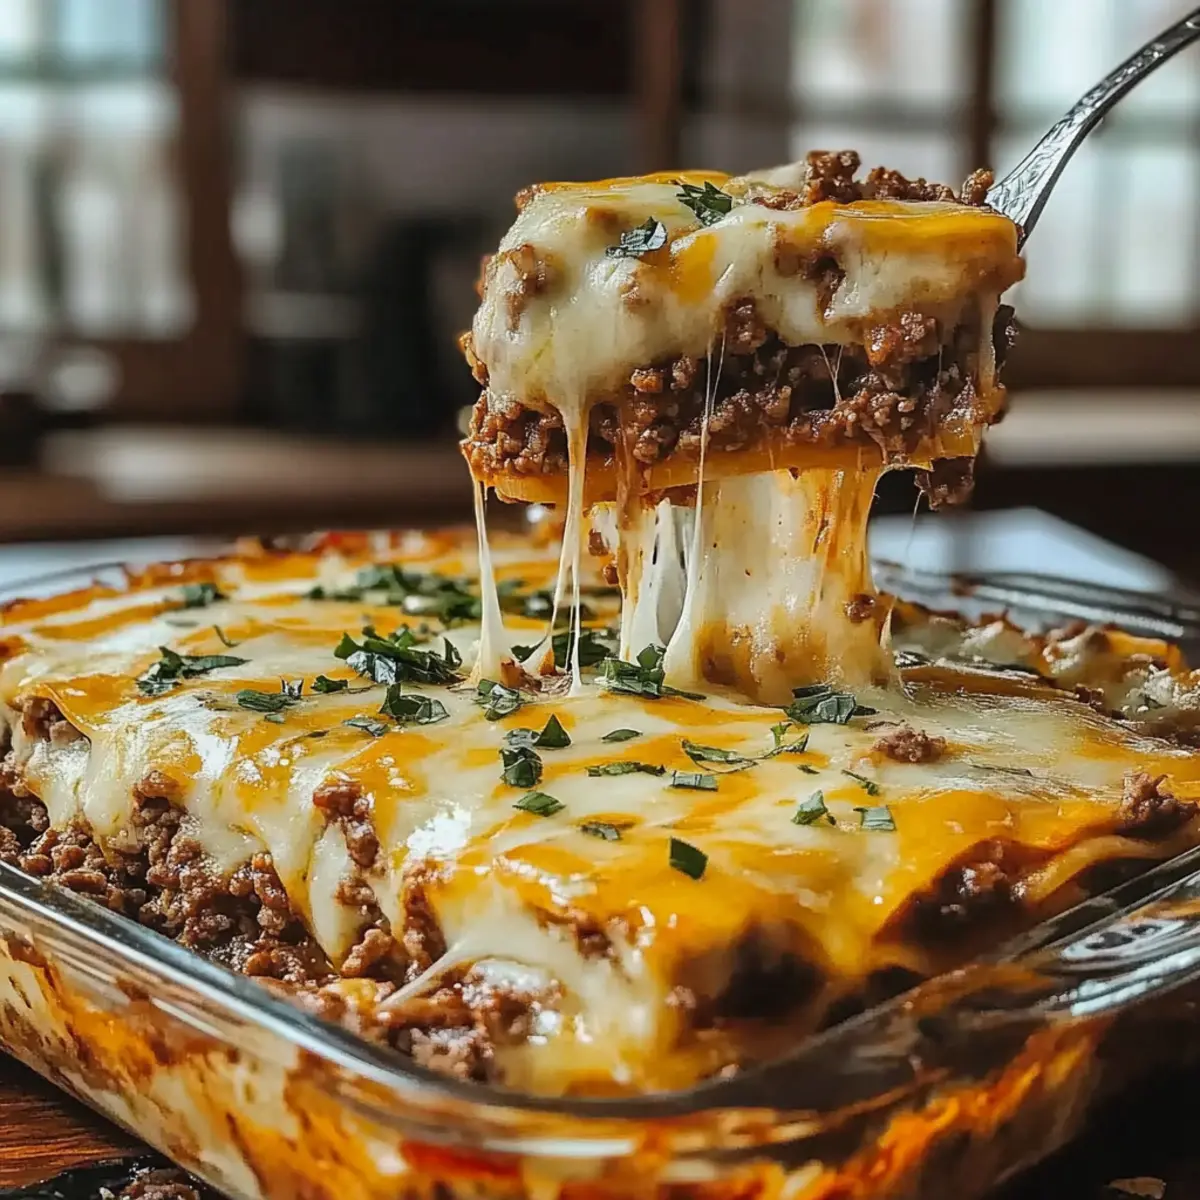
As I stirred the pot of Cattle Drive Casserole, the bubbling sounds echoed memories of hearty cowboy meals shared under an expansive sky. This robust dish layers ground beef, potatoes, and vibrant vegetables in a creamy sauce, topped with crispy cheese that oozes warmth. One of the best perks of this comforting casserole is its incredible flexibility—whether you prefer a spicy Southwestern twist or a meatless version, it easily adapts to your taste. Plus, it’s the ultimate crowd-pleaser, perfect for family dinners or gatherings with friends. Ready to dive into the world of cowboy cuisine? Let’s explore how to create this satisfying dish that brings both comfort and creativity to your kitchen!
Why Is Cattle Drive Casserole a Must-Try?
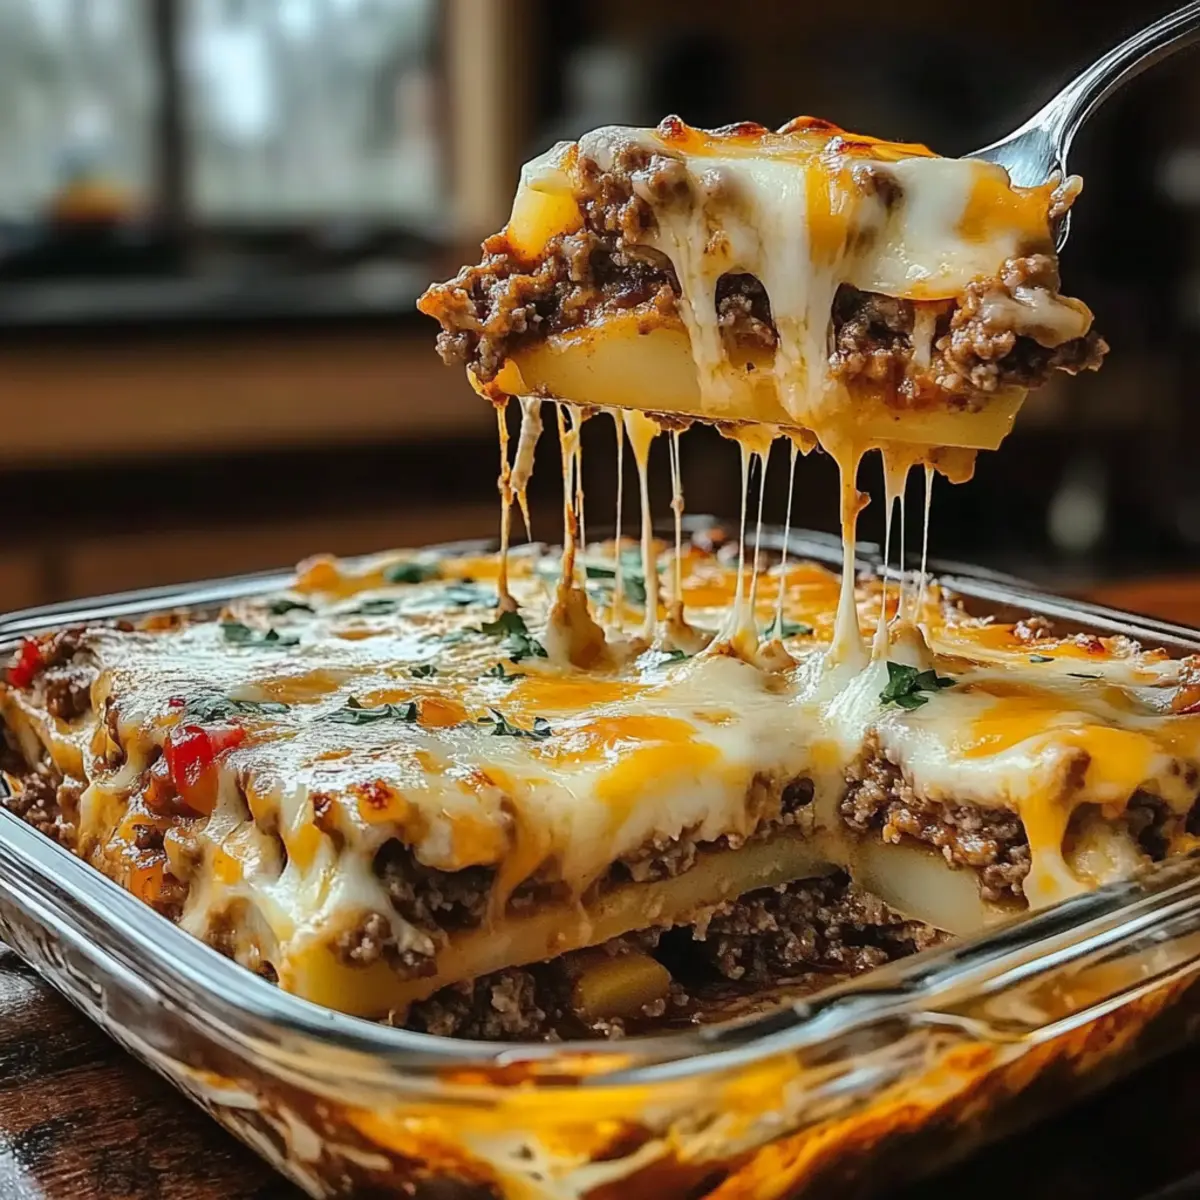
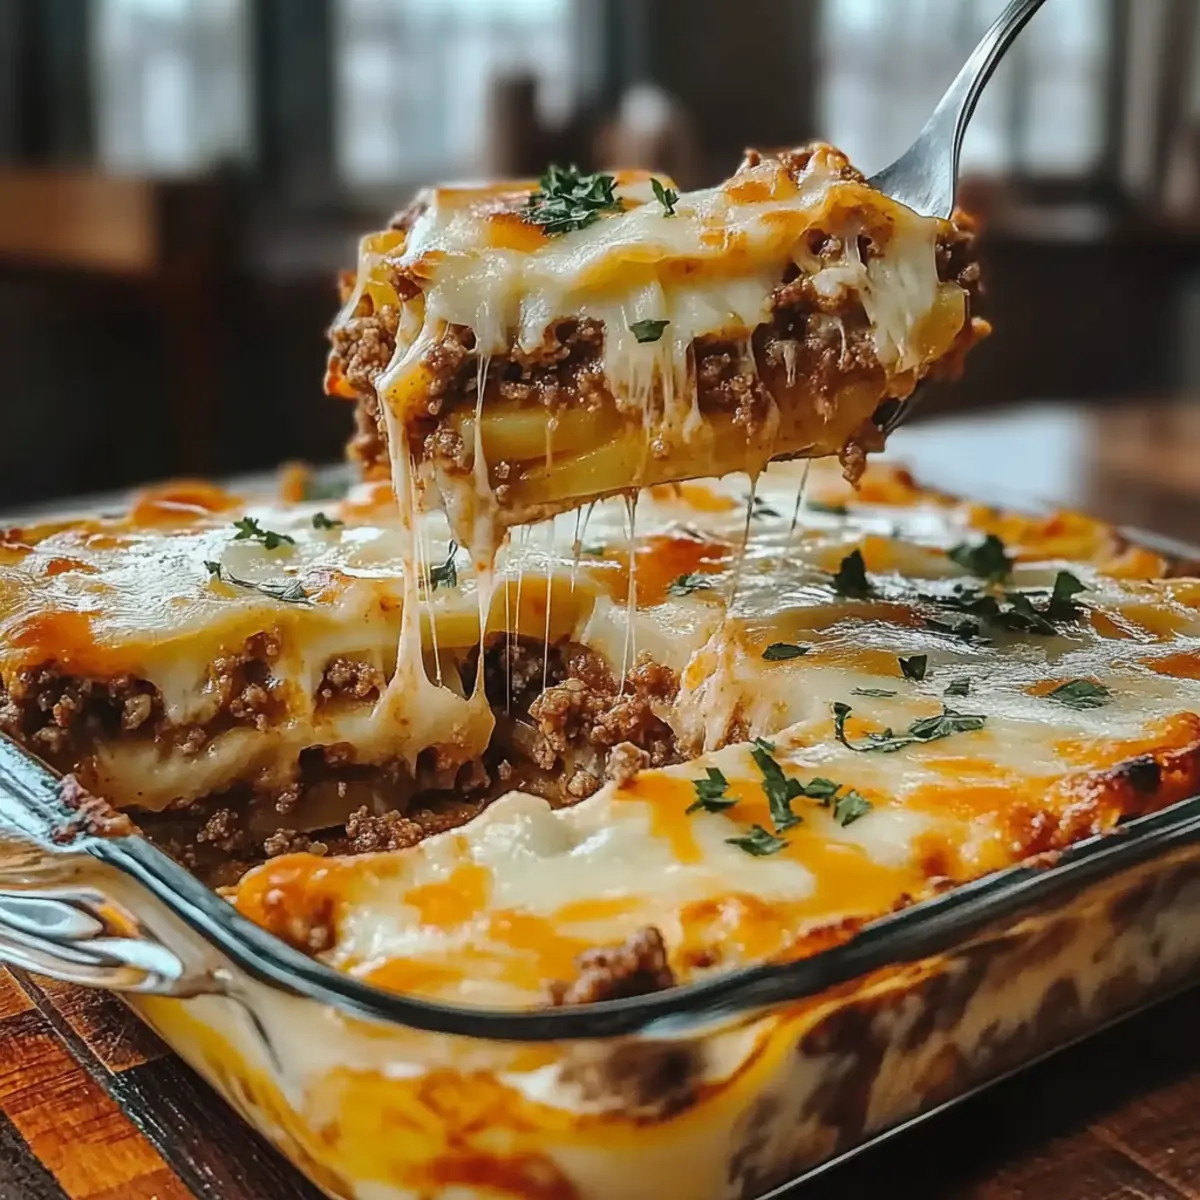
Comforting, Hearty Layers: This casserole layers ground beef, potatoes, and creamy sauce into a delicious meal that’s as satisfying as a cowboy feast.
Endless Customizations: Whether you add chili for a kick or swap in black beans for a vegetarian twist, each variation brings something special to the table.
Family-Friendly Appeal: Its familiar flavors and inviting aroma will make it a go-to dish for everyone at the dinner table, from kids to adults.
Quick Preparation: The straightforward steps mean you can have this hearty meal on the table in no time—ideal for weeknight dinners!
Perfect for Meal Prep: Make it ahead and store in the fridge or freeze for those busy days. Pair it with a fresh green salad or crusty bread for a complete meal! Don’t forget to check out my Cheesesteak Casserole Comfort for another delightful casserole option!
Cattle Drive Casserole Ingredients
For the Casserole Base
- Lean Ground Beef – This hearty protein provides robust flavor; you can substitute with plant-based meat for a vegetarian option.
- Red Bell Pepper – Adds a pop of color and sweetness; feel free to use green bell pepper or omit it if you prefer a simpler dish.
- Yellow Onion – Enhances overall flavor; shallots or leeks can be good substitutes for a different taste.
- Taco Seasoning Mix – Infuses the dish with a delightful spice blend; consider making your own seasoning for a personalized kick.
- Biscuit Mix (e.g., Bisquick) – Acts as the binding base for the casserole; gluten-free alternatives work wonderfully too.
- Water – Hydrates the biscuit mix to achieve the right consistency; adjust it according to your preferences.
- Cooking Spray – Prevents sticking in the baking dish; a light coating of oil is a perfect substitute.
For the Creamy Topping
- Sour Cream – Adds a rich creaminess with tang; swap it with Greek yogurt for a lighter option.
- Mayonnaise – Contributes moisture and richness; omit or replace it with extra sour cream to keep it creamy.
- Diced Green Chiles – Provides a mild kick to the dish; use jalapeños for an extra spicy twist.
- Cheddar Cheese (Fiesta Blend) – Melts beautifully on top for that comforting finish; any cheese blend can be used as a substitute.
- Garlic Powder – Elevates the flavor profile; consider fresh garlic for a vibrant taste enhancement.
- Salsa – Brings together moisture and flavor; you can tailor the spice level to your liking.
With these ingredients in hand, you’re just a few simple steps away from enjoying your homemade Cattle Drive Casserole!
Step‑by‑Step Instructions for Cattle Drive Casserole
Step 1: Preheat and Prepare
Preheat your oven to 350°F (175°C). While it warms up, take a 9×13-inch casserole dish and lightly spray it with cooking spray to prevent sticking. This is a crucial step to ensure your Cattle Drive Casserole comes out perfectly crusted and easy to serve.
Step 2: Sauté the Meat and Veggies
In a large skillet over medium heat, brown 1 pound of lean ground beef along with 1 diced yellow onion and 1 chopped red bell pepper. Stir frequently for about 7-10 minutes, until the meat is no longer pink and the vegetables are tender, showing vibrant colors. Drain any excess fat before proceeding.
Step 3: Season the Mixture
Once the beef and vegetables are cooked, add 1 packet of taco seasoning mix, 1 can of diced green chiles, and 1 teaspoon of garlic powder into the skillet. Mix everything well and let the flavors meld together for another 2-3 minutes, until fragrant and well combined, creating a deliciously seasoned filling.
Step 4: Prepare the Biscuit Base
In a separate bowl, mix together 2 cups of biscuit mix, 1 cup of water, ½ cup of sour cream, and ¼ cup of mayonnaise until smooth. The mixture should be well combined without lumps, forming a creamy batter that will serve as the base of your Cattle Drive Casserole.
Step 5: Layer the Casserole
Start layering your prepared casserole dish by spreading the beef mixture evenly across the bottom. Follow this with half of your biscuit mixture, smoothing it out over the beef layer. This creates a hearty foundation for your comforting casserole that will bake beautifully.
Step 6: Add Salsa and Cheese
Spread a generous layer of salsa over the biscuit mixture, then sprinkle with half of the shredded cheddar cheese. This combination adds flavor and moisture, ensuring your Cattle Drive Casserole is rich and satisfying. Next, cover this layer with the remaining biscuit mixture, spreading it gently but evenly.
Step 7: Bake to Perfection
Place the casserole in your preheated oven and bake for about 30-40 minutes. You’ll know it’s ready when the top is golden brown and firm, and a toothpick inserted into the center comes out clean. Take a moment to enjoy the delightful aroma wafting through your kitchen!
Step 8: Add Final Cheese Layer
After baking, remove the casserole from the oven and sprinkle the remaining shredded cheese on top. Return it to the oven for an additional 5-7 minutes, or until the cheese is melted and bubbly. This final step enhances the overall cheesy goodness of your Cattle Drive Casserole.
Step 9: Cool and Serve
Once the casserole is done, let it cool for about 5-10 minutes before serving. This allows the layers to set up a bit, making it easier to cut and serve. Enjoy each hearty bite of your comforting Cattle Drive Casserole, packed with flavor and love!
What to Serve with Cattle Drive Casserole?
As you prepare to delight in the comforting, hearty layers of this dish, consider complementing it with fresh and vibrant sides to complete your meal.
- Garlicky Green Beans: These tender green beans, sautéed in garlic and olive oil, add a fresh crunch and bright flavor to balance the richness of the casserole.
- Crispy Cornbread: Golden, buttery cornbread is the perfect companion, soaking up the casserole’s delicious sauce while adding a delightful texture contrast.
- Classic Caesar Salad: Crispy romaine, creamy dressing, and crunchy croutons provide a refreshing contrast to the hearty layers of the casserole.
- Tangy Coleslaw: A cool, tangy coleslaw offers a fresh crunch and helps to cut through the rich flavors of the casserole, enhancing each bite.
- Spiced Grilled Corn: Grilled corn on the cob brushed with chili lime butter is a delightful sweet and spicy addition that echoes the Southwestern flavors of the casserole.
- Homemade Tortilla Chips: Serve these alongside for a delightful crunch, perfect for scooping up any leftovers from your casserole dish and adding a Tex-Mex flair.
- Chilled Watermelon Salad: A chilled watermelon salad with mint brings a refreshing, sweet note to the table, making it a delightful summer addition.
- Craft Beer or Sweet Tea: Pair your meal with a cold craft beer or a glass of sweet tea for a refreshing drink that enhances the flavors of this hearty dish.
- Chocolate Chip Cookies: For dessert, end your meal on a sweet note with warm chocolate chip cookies, ensuring a satisfying finish to your comforting dinner experience.
Expert Tips for Cattle Drive Casserole
- Choose the Right Meat: Lean ground beef provides flavor, but substituting with turkey or plant-based options offers versatility. Adjust cooking times accordingly.
- Watch Your Consistency: Avoid a soggy base by balancing moisture levels. Fresh vegetables add water; consider sautéing them first to reduce water content.
- Layering is Key: Proper layering ensures a great texture. Spread the meat, then biscuit mix evenly, and don’t rush this step for even cooking.
- Let it Rest: Allow the Cattle Drive Casserole to cool for a few minutes after baking. This helps the layers set for easy serving and better presentation.
- Experiment with Spice: Don’t hesitate to customize the heat level! Vary the amount of salsa or add fresh jalapeños to suit your family’s taste for this comforting casserole.
Make Ahead Options
Cattle Drive Casserole is a fantastic dish to prepare ahead of time, making your mealtime a breeze! You can assemble the entire casserole up to 24 hours in advance. Simply follow the recipe steps until layering the final biscuit mix, then cover it tightly with plastic wrap and refrigerate. To maintain its delightful quality, avoid adding the final cheese layer until just before baking; this prevents sogginess. When you’re ready to enjoy this comforting casserole, remove it from the fridge, sprinkle with cheese, and bake as instructed. Following these easy make-ahead steps ensures your Cattle Drive Casserole is just as delicious, perfect for those busy weeknights!
How to Store and Freeze Cattle Drive Casserole
Fridge: Store leftover Cattle Drive Casserole in an airtight container for up to 3 days. Reheat in the oven to maintain its crispy topping.
Freezer: Cool the casserole completely before wrapping it tightly in plastic wrap, then aluminum foil. It can be frozen for up to 3 months.
Reheating: For best results, thaw overnight in the fridge and reheat in the oven at 350°F (175°C) until heated through, about 20-30 minutes.
Make-Ahead Tip: You can prepare the casserole in advance and store it in the fridge uncooked for up to 2 days. Just assemble the layers without baking.
Cattle Drive Casserole Variations & Substitutions
Feel inspired to put your own spin on the Cattle Drive Casserole and explore delightful alternatives that cater to your taste buds!
-
Vegetarian Option: Swap out ground beef for plant-based meat or black beans, creating a hearty dish that everyone can enjoy.
-
Southwestern Twist: Incorporate corn and top with tortilla chips for that extra crunch. This version brings a fiesta to your dinner table!
-
Spicy Delight: Add diced jalapeños or a spicy salsa to crank up the heat and awaken those taste buds. It’s an exciting way to elevate flavors!
-
Gluten-Free: Use a gluten-free biscuit mix as a base. Your comforting casserole will still be deliciously satisfying without the gluten.
-
Cheesy Variation: Try different cheese blends like Pepper Jack or Monterey Jack for added creaminess and flavor. A simple switch can make all the difference!
-
Saucy Addition: For added moisture, mix in a bit of your favorite salsa into the biscuit base before layering. It will create an irresistible fusion of flavors.
-
Chili Infusion: For a chili-inspired take, fold in canned chili beans along with the beef. This twist adds a comforting warmth perfect for cool evenings.
-
Hearty Vegetables: Feel free to toss in extra veggies like sliced mushrooms or spinach for added nutrition and color. They’ll blend right in with the tasty layers!
With these variations, you can easily customize your Cattle Drive Casserole to your liking. And if you ever want to explore more comforting casserole ideas, consider trying my Cheesesteak Casserole Comfort or my Low Carb Chicken Casserole recipes for a delightful assortment of flavors!

Cattle Drive Casserole Recipe FAQs
What type of ground beef should I use for Cattle Drive Casserole?
Absolutely! Lean ground beef is ideal for this recipe as it provides robust flavor without too much grease. However, if you’re looking for a lighter option, turkey or plant-based meat are excellent substitutes, just adjust the cooking times accordingly.
How should I store leftovers of Cattle Drive Casserole?
Store any leftovers in an airtight container in the fridge. It will keep well for up to 3 days. When reheating, I recommend using the oven to maintain that delightful crispy topping. Just pop it in at 350°F (175°C) until heated through.
Can I freeze Cattle Drive Casserole?
Yes, you can! First, allow the casserole to cool completely. Then, wrap it tightly with plastic wrap, followed by aluminum foil to prevent freezer burn. It can be frozen for up to 3 months. When you’re ready to eat, simply thaw it overnight in the fridge and reheat it in the oven at 350°F (175°C) for about 20-30 minutes until warmed through.
What if my casserole turns out too soggy?
Great question! To avoid a soggy Cattle Drive Casserole, it’s essential to balance moisture levels. Consider sautéing fresh vegetables beforehand to lessen their water content. Also, be mindful not to add too much liquid to the biscuit mixture—it’s better to err on the side of less moisture.
Is there a way to make this Cattle Drive Casserole gluten-free?
Very! You can easily adapt this recipe using a gluten-free biscuit mix. Just check the package for the equivalent measurements and instructions. Additionally, ensure there’s no gluten-containing seasoning in the taco mix if you’re using store-bought.
Can I modify the spice level in Cattle Drive Casserole?
Definitely! If you enjoy a bit of heat, consider swapping the diced green chiles for jalapeños or choose a spicier salsa. You can also increase the amount of taco seasoning to add more flavor without overwhelming spice. The more the merrier with spices—just taste as you go!
Comforting Cattle Drive Casserole: Hearty Family Favorite
Ingredients
Equipment
Method
- Preheat your oven to 350°F (175°C). Spray a 9x13-inch casserole dish with cooking spray.
- In a large skillet, brown the ground beef with diced onion and chopped bell pepper for 7-10 minutes. Drain excess fat.
- Add taco seasoning, diced green chiles, and garlic powder to the skillet and mix well, cooking for another 2-3 minutes.
- In a mixing bowl, combine biscuit mix, water, sour cream, and mayonnaise until smooth.
- Layer the beef mixture, followed by half of the biscuit mixture in the casserole dish.
- Spread salsa over the biscuit mixture, then top with half of the shredded cheese and cover with remaining biscuit mix.
- Bake in preheated oven for 30-40 minutes until golden brown.
- After baking, add remaining cheese on top and return to oven for an additional 5-7 minutes.
- Allow to cool for 5-10 minutes before serving.
Leave a Reply