
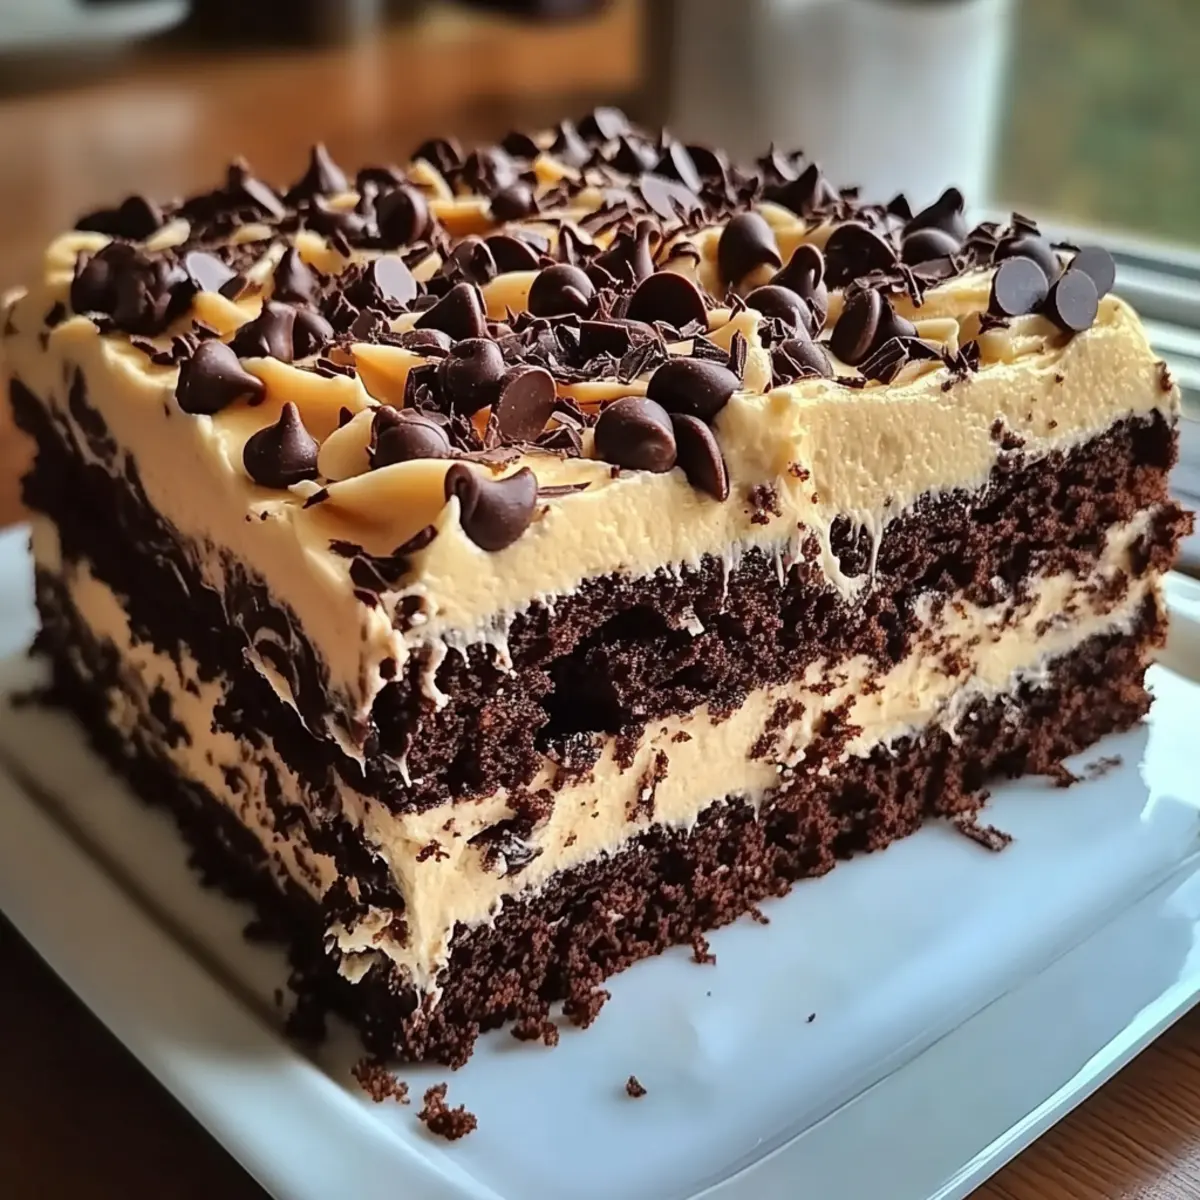
In the midst of a bustling afternoon, a friend declared, “This cake looks like an earthquake hit it, but in the best way!” And that’s when I knew I had to share my Irresistible Earthquake Cake—a delightful dessert that’s as fun to make as it is to eat. With its unique marbled cream cheese layer and decadent chocolate flavor, this cake delivers gooey chocolate bliss with every forkful. The best part? It’s a total crowd-pleaser that’s quick to whip up, making it the perfect solution for those moments when you need a delicious dessert without the fuss. Plus, you can customize it to suit your taste by swapping nuts or omitting coconut altogether. Are you ready to bring a little whimsy to your baking adventures?
Why is Earthquake Cake so irresistible?
Decadent Chocolate Flavor: This cake is a dream come true for chocolate lovers, with rich flavors that evoke comfort and indulgence.
Customizable Recipe: You can easily tailor this dessert to your preferences! Swap nuts or leave out coconut to cater to all dietary needs.
Quick and Easy: With minimal preparation time and just one baking dish needed, you’ll be on your way to dessert bliss in no time.
Gooey Texture: Each bite features a unique blend of creamy, crunchy, and gooey layers that make it utterly satisfying.
Pair it with a scoop of ice cream for an unforgettable treat, or even serve it alongside a slice of Chocolate Depression Cake for an indulgent dessert platter that will impress your guests!
Gooey Chocolate Bliss Ingredients
• Ready to create your own gooey chocolate bliss? Here’s what you’ll need!
For the Cake Base
- Chocolate Cake Mix – A standard boxed mix gives a rich flavor and structure.
- Milk – This adds moisture; any kind works wonders!
For the Cream Cheese Layer
- Cream Cheese – Use fully softened cream cheese for a smooth blend.
- Butter (melted) – Enhances the cream cheese flavor and creates a luscious texture.
- Powdered Sugar – Sweetens the cream cheese layer for that perfect balance.
For the Crunch and Texture
- Chopped Pecans or Walnuts – Adds delightful crunch; feel free to substitute or omit if nut-free.
- Sweetened Shredded Coconut – Optional, but offers fabulous texture and flavor; can be left out if desired.
- Semi-Sweet Chocolate Chips – Provides extra chocolatey goodness that melts to gooey perfection.
Now that you have your ingredients ready, you’re one step closer to making this delightful Earthquake Cake, the pinnacle of gooey chocolate bliss!
Step‑by‑Step Instructions for Gooey Chocolate Bliss
Step 1: Preheat the Oven
Begin by preheating your oven to 350°F (175°C). While the oven heats up, grab a 9×13-inch baking dish and thoroughly grease it with butter or cooking spray to ensure easy removal later. This step is crucial for our Irresistible Earthquake Cake, as it helps create that beautiful crust and keeps the cake from sticking.
Step 2: Prepare the Bottom Layer
Evenly spread the chopped pecans or walnuts, along with the sweetened shredded coconut if using, across the bottom of your prepared baking dish. This layer adds delightful crunch and flavor, which will blend perfectly with the rich chocolate cake base. Make sure the nuts are spread out to ensure every bite is packed with that delightful texture.
Step 3: Mix the Cake Batter
In a large mixing bowl, combine the chocolate cake mix and milk according to the package instructions. Use a whisk or electric mixer to blend until the batter is completely smooth and free of lumps. Once ready, carefully pour this luscious mixture over the nut layer in the baking dish, ensuring even coverage across the bottom for a uniform bake.
Step 4: Create the Cream Cheese Mixture
In another bowl, blend the softened cream cheese and melted butter until creamy and smooth. Gradually add in the powdered sugar while continuing to mix, creating a luscious cream cheese layer that will bring a rich flavor to your Earthquake Cake. This mixture is key for that decadent marbled effect, so make sure it’s well combined and smooth.
Step 5: Swirl the Cream Cheese
Using a spoon, drop generous spoonfuls of the cream cheese mixture on top of the chocolate cake batter. Then, take a knife and gently swirl through the spoonfuls to create a beautiful marbled effect. Be careful not to overmix; you want to maintain distinct layers of decadent chocolate and creamy goodness in your gooey chocolate bliss.
Step 6: Add Chocolate Chips
Evenly sprinkle semi-sweet chocolate chips atop the cream cheese mixture, making sure to distribute them well across the surface. As these chips melt during baking, they will contribute to the overall chocolate goodness of the Earthquake Cake. This final touch enhances the gooey texture and adds delightful pockets of melting chocolate throughout.
Step 7: Bake the Cake
Carefully place the baking dish in the oven and let it bake for 40-45 minutes. Keep an eye on the cake; it should be firm at the edges with a slightly jiggly center when done. A toothpick inserted into the center may come out with moist crumbs, indicating that your gooey chocolate bliss is perfectly baked and ready for cooling.
Step 8: Cool and Serve
Once baked, remove the Earthquake Cake from the oven and allow it to cool in the pan for at least 30 minutes. This cooling period helps the cake set and makes slicing easier. After cooling, cut it into squares and serve, either plain or topped with your favorite ice cream or whipped cream for an even more indulgent treat.
Make Ahead Options
These Irresistible Earthquake Cake preparations are perfect for busy cooks looking to save time! You can mix the cake batter and prepare the cream cheese layer up to 24 hours in advance. Simply store each mixture in separate airtight containers in the refrigerator. Before baking, allow the cream cheese mixture to soften at room temperature for about 30 minutes for easy swirling. Additionally, you can layer the chopped nuts and shredded coconut in the baking dish a day ahead; just cover it tightly to maintain freshness. When ready to serve, simply combine the components and bake as directed for that gooey chocolate bliss that’s just as delightful as when freshly made!
How to Store and Freeze Earthquake Cake
Fridge: Store leftovers tightly covered in the refrigerator for up to 5 days. This helps maintain the cake’s moistness and rich flavor.
Freezer: Wrap individual slices of the cake in foil or plastic wrap, then place them in an airtight container. They can be frozen for up to 2 months for that gooey chocolate bliss whenever you want it.
Thawing: To enjoy, thaw frozen slices in the fridge overnight or at room temperature for a few hours before serving.
Reheating: For a warm experience, heat in the microwave for about 15-20 seconds, making sure to enjoy this indulgent treat warm!
Gooey Chocolate Bliss Variations
Feel free to let your creativity shine by customizing this delightful Earthquake Cake to suit your tastes!
-
Nut-Free: Omit the nuts altogether or substitute them with sunflower or pumpkin seeds for a crunchy twist. This makes the cake accessible for those with nut allergies while still providing that satisfying texture.
-
Coconut-Free: Leave out the sweetened shredded coconut for a classic chocolate cake flavor. This simple swap keeps the focus on the rich, chocolatey goodness of the cake and cream cheese layers.
-
Flavor Boost: Try using a fudge or devil’s food cake mix instead of standard chocolate for an extra layer of richness. These variations enhance the flavor profile, making each bite sinfully good.
-
Extra Chocolate: Add a handful of dark chocolate chips or chunks to the batter for an intense chocolate hit. The gooey pockets of melted chocolate enhance the overall indulgence, creating a dessert that chocolate enthusiasts will adore.
-
Fruity Addition: Incorporate a layer of fresh raspberries or sliced strawberries before adding the cake batter. This fresh element balances the richness and adds a vibrant contrast when baked.
-
Spicy Twist: For a kick of heat, add a pinch of cayenne pepper or a teaspoon of cinnamon to the cake batter. This unexpected flavor notes a delightful depth, inviting adventurous eaters to enjoy something different.
-
Creamier Swirl: Substitute half of the cream cheese with mascarpone cheese for a richer, creamier layer. The luxurious texture elevates this already decadent cake to heavenly heights.
If you’re looking to savor more chocolate delights, consider pairing a slice of this cake with a side of Chocolate Depression Cake or indulging in some Brown Butter Chocolate cookies for an extraordinary dessert table!
What to Serve with Irresistible Earthquake Cake
Satisfy your taste buds and elevate your Earthquake Cake experience with delightful pairings that enhance every slice.
-
Vanilla Ice Cream: The creamy coldness provides a perfect contrast to the warm, gooey cake, creating a melt-in-your-mouth sensation.
-
Whipped Cream: Light and airy, a generous dollop complements the rich chocolate layers while adding a touch of elegance to your dessert plate.
-
Fresh Berries: The tartness of strawberries or raspberries cuts through the sweetness of the cake, providing a refreshing balance and a pop of color.
-
Chocolate Sauce: Drizzling warm chocolate sauce on top amplifies the indulgent experience, resulting in a silken texture that enhances the already gooey chocolate bliss.
-
Coffee: A rich, dark brew enhances the cake’s chocolate flavor, seamlessly merging with its sweetness for a comforting after-dinner delight.
-
Nutty Biscotti: The crunchy texture of biscotti pairs beautifully with the cake. You can dunk it into coffee or enjoy it alongside sweet treats for a delightful contrast.
-
Lemon Bars: Their tangy brightness offers a refreshing twist that complements the rich chocolate, adding vibrancy to your dessert spread.
-
Glass of Milk: A classic pairing, a tall glass of cold milk not only satisfies childhood nostalgia but also helps cut through the richness of the cake.
-
Chocolate Milk: For those extra indulgent moments, rich chocolate milk amplifies the flavors of the cake while adding a playful twist to your dessert experience.
Expert Tips for Gooey Chocolate Bliss
-
Softened Cream Cheese: Ensure your cream cheese is at room temperature before mixing; this prevents lumps and ensures a smooth, creamy texture.
-
Avoid Overmixing: When swirling the cream cheese layer, be gentle. Overmixing can blend the layers too much, losing that beautiful marbled effect.
-
Check Doneness Carefully: Around the 40-minute mark, check if the center is set but slightly jiggly. A toothpick should come out with moist crumbs for that gooey chocolate bliss!
-
Store Properly: For best results, store leftover cake tightly covered in the fridge. It stays fresh for up to 5 days and can be frozen for 2 months!
-
Customize to Taste: Feel free to swap out the nuts or omit the coconut entirely to cater to personal preferences or dietary needs.
Gooey Chocolate Bliss: Earthquake Cake Recipe FAQs
How do I choose the right chocolate cake mix?
Absolutely! Any standard boxed chocolate cake mix works perfectly for this recipe. Look for one with rich cocoa content for the best flavor, and consider experimenting with variations like fudge or devil’s food to elevate your cake’s chocolatey goodness.
How should I store leftover Earthquake Cake?
For the best results, store your leftovers in the refrigerator, tightly covered, for up to 5 days. This helps maintain its moistness and rich flavor. If you find there’s still some left after that, wrap the slices in foil and freeze them for up to 2 months. Just remember, when you crave that gooey chocolate bliss, you can easily thaw it in the fridge overnight or at room temperature for a few hours before serving!
Can I freeze Earthquake Cake? What’s the process?
Yes, you can definitely freeze this cake! To do it right, wrap individual slices in foil or plastic wrap to prevent freezer burn. Place the wrapped slices in an airtight container or a zip-top bag. They can be stored for up to 2 months. When you’re ready to indulge, just thaw them in the fridge overnight, and if you prefer a warm treat, pop them in the microwave for about 15-20 seconds. Enjoy the delightful gooeyness just like fresh!
What if my cream cheese layer isn’t blending well?
Very common! Ensure that your cream cheese is fully softened to room temperature before mixing, as this will help it blend smoothly. If it’s still a bit lumpy, try using a hand mixer to combine the cream cheese with melted butter and powdered sugar for a perfectly creamy consistency. Remember, the key to that beautiful marbled effect is to avoid overmixing when you swirl in the cream cheese.
Are there any dietary considerations when making this cake?
Absolutely! If you’re catering to dietary needs, you can easily make this Earthquake Cake nut-free by substituting chopped nuts with seeds, such as sunflower or pumpkin seeds. Also, you can omit the sweetened shredded coconut without losing much flavor. Just make sure to check labels for any allergies in the chocolate chips and cake mix you choose. Don’t hesitate to get creative with the ingredients to suit your guests’ preferences!
Gooey Chocolate Bliss: Your New Favorite Dessert Adventure
Ingredients
Equipment
Method
- Preheat your oven to 350°F (175°C) and grease a 9x13-inch baking dish.
- Spread the chopped pecans or walnuts across the bottom of the prepared baking dish, along with the coconut, if using.
- In a mixing bowl, combine the chocolate cake mix and milk as per package instructions until smooth. Pour over the nut layer.
- Blend cream cheese and melted butter until smooth. Gradually add powdered sugar, mixing until creamy.
- Drop spoonfuls of the cream cheese mixture on top of the chocolate cake batter and swirl gently with a knife.
- Sprinkle semi-sweet chocolate chips over the cream cheese layer evenly.
- Bake for 40-45 minutes until firm at the edges and slightly jiggly in the center.
- Allow the cake to cool in the pan for at least 30 minutes before slicing and serving.
Leave a Reply