
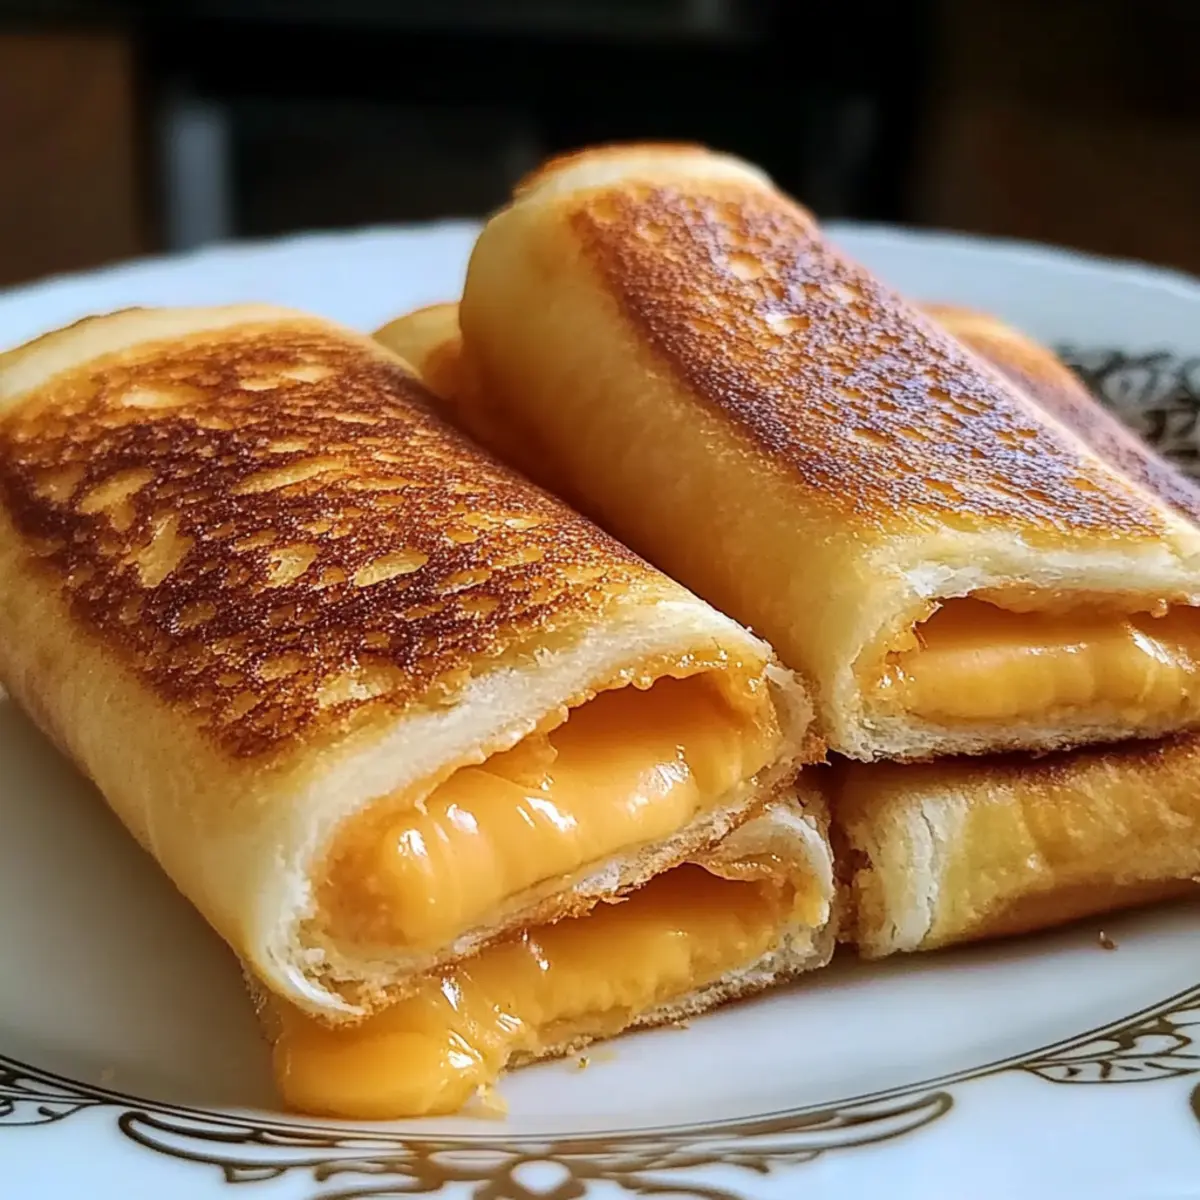
There’s something magical about the sound of crunching bread as you dive into a plate of Grilled Cheese Roll Ups! These delightful morsels bring a playful twist to a classic comfort food, turning the beloved grilled cheese sandwich into a dippable treat that’s perfect for any occasion. With quick prep time and the ability to please the pickiest eaters, this recipe is ideal for busy days or when you want to impress with minimal effort. Just imagine golden brown roll-ups oozing with gooey cheese, ready to be paired with your favorite dipping sauce. Ready to roll up some cheesy goodness? Let’s dive into the details!
Why are Grilled Cheese Roll Ups a Must-Try?
Deliciously Fun: These Grilled Cheese Roll Ups transform a classic dish into an exciting experience.
Quick and Easy: Perfect for busy days, this recipe takes minimal time to prepare!
Kid-Friendly Appeal: Watch your kids light up as they enjoy a dippable twist on their favorite comfort food.
Versatile Options: Swap in different cheeses or add ingredients like spinach for a delicious twist. Try pairing them with warm tomato soup for a satisfying meal.
Crowd Pleaser: Great for gatherings, these roll-ups are a sure hit, disappearing in no time!
With their gooey cheese and crispy exterior, they are truly irresistible. If you’re looking for more delicious recipes like these, don’t miss out on Pizza Lasagna Roll for another delight!
Grilled Cheese Roll Ups Ingredients
For the Roll Ups
- Bread – Use soft sandwich bread that can be flattened easily without tearing for the perfect roll.
- Cheese – Opt for pre-sliced cheeses like cheddar, provolone, or American, as they melt beautifully in these Grilled Cheese Roll Ups.
- Butter – Adds richness and helps achieve a golden, crispy exterior; feel free to adjust the amount for desired crunchiness.
Optional Add-Ins
- Cooked Bacon – For added savory flavor and a delightful crunch, incorporate crispy bacon into the mix.
- Spinach – Toss in some fresh or cooked spinach to give an extra boost of nutrition and color.
Dipping Sauce Suggestions
- Tomato Soup – A classic partner that complements the cheesy goodness perfectly.
- Marinara Sauce – Perfect for a zesty twist, providing a burst of flavor with each bite.
Your Grilled Cheese Roll Ups are sure to be a hit! Enjoy crafting these dippable delights with the ingredient list right at your fingertips!
Step‑by‑Step Instructions for Grilled Cheese Roll Ups
Step 1: Prepare the Bread
Begin by placing 4 slices of soft sandwich bread on a clean surface, then, using a rolling pin, flatten each slice to about 1/4 inch thick. This will help you roll the bread easily without tearing it. Aim for an even thickness, as this ensures uniform cooking and a delightful crispy exterior when you fry your Grilled Cheese Roll Ups.
Step 2: Assemble the Roll Ups
Next, take a slice of your favorite cheese, such as cheddar or provolone, and place it onto each flattened slice of bread. Tightly roll up the bread from one end to the other, ensuring the cheese is enveloped inside. This step is crucial for keeping the gooey cheese from spilling out during cooking, so roll them tightly but gently for the best results.
Step 3: Heat the Skillet
In a non-stick skillet, melt about 2 tablespoons of butter over medium heat. Make sure the butter coats the bottom of the pan evenly to promote that perfect golden-brown crust on your Grilled Cheese Roll Ups. Allow the butter to heat up just until it’s bubbling but not smoking, indicating it’s ready for cooking.
Step 4: Cook the Roll Ups
Carefully place the assembled roll-ups seam side down in the skillet. Cook them for about 2-3 minutes on one side, or until they’re golden brown and crispy. Flip the roll-ups with tongs and allow them to brown on the other side for another 2-3 minutes. Keep an eye on them to avoid burning!
Step 5: Let Cool and Serve
Once both sides are beautifully browned, remove the Grilled Cheese Roll Ups from the skillet and place them on a paper towel-lined plate to drain any excess butter. Allow them to cool slightly for a minute, enhancing the cheese’s melty texture. Slice them in half diagonally for an inviting presentation and serve warm with your favorite dipping sauce, like tomato soup or marinara.
Make Ahead Options
These Grilled Cheese Roll Ups are perfect for meal prep enthusiasts looking to save time during busy weeknights! You can assemble the roll-ups and refrigerate them for up to 24 hours before cooking. To do this, prepare the bread and cheese as instructed, then place the assembled roll-ups in an airtight container, ensuring they are not stacked to prevent squishing. When you’re ready to serve, simply heat a skillet with butter and cook the roll-ups for 2-3 minutes on each side until golden brown. This way, you’ll enjoy the same gooey, delicious results with minimal effort, making your cooking experience just as delightful as the final dish!
Expert Tips for Grilled Cheese Roll Ups
-
Choose the Right Bread: Use soft, fresh sandwich bread that rolls easily; stale or crusty bread can lead to tearing and uneven cooking.
-
Perfect Cheese Thickness: Aim for cheese slices about 1/8 inch thick. Thicker slices take longer to melt, risking burning the bread before the cheese is gooey.
-
Control the Heat: Medium heat is key! Cooking on too high a flame can cause the bread to brown before the cheese melts, leading to less-than-perfect Grilled Cheese Roll Ups.
-
Batch Cooking: Make a larger batch using an electric griddle. This not only speeds up the process but also allows you to serve a crowd all at once.
-
Experiment with Fillings: Don’t hesitate to get creative! Add in cooked bacon or veggies like spinach for a tasty twist that keeps things interesting.
Grilled Cheese Roll Ups Variations
Feel free to give your Grilled Cheese Roll Ups a delightful twist that caters to your personal taste!
-
Cheese Medley: Combine mozzarella and pepper jack for a flavor-packed surprise that adds a little spice. This creamy, melty mix brings out the best in every bite!
-
Bacon Lovers: Add crispy bacon crumbles to the cheese for an irresistible savory crunch. The marriage of salty bacon and gooey cheese will elevate your roll-ups to new heights.
-
Veggie Boost: Incorporate fresh spinach or sautéed mushrooms into your roll-ups for a nutritious upgrade. These add-ins not only enhance flavor but also brighten up the dish with vibrant colors.
-
Herbed Delight: Sprinkle fresh herbs like basil or chives on the cheese before rolling for a fresh, aromatic touch. This can take your Grilled Cheese Roll Ups from ordinary to extraordinary!
-
Light and Healthy: Opt for low-fat cheese or whole grain bread for a guilt-free version without sacrificing flavor. Enjoy comfort without the extra calories!
-
Sweet Surprise: Try adding a bit of sweet jam or apple slices for a unique twist on the classic. The juxtaposition of sweet and savory will surprise and delight your taste buds.
-
Spice it Up: For those who enjoy an extra kick, add jalapeños or a dash of hot sauce inside your roll-ups. This fiery addition will awaken your senses and provide a fun flavor experience.
To explore more delicious recipes, check out my Egg Cheese Roll or try some comforting Pizza Lasagna Roll for more family-favorite fun!
What to Serve with Grilled Cheese Roll Ups?
Picture this: a cozy gathering where the aroma of crispy, cheesy goodness fills the air. Your Grilled Cheese Roll Ups are sure to be the star of the show!
-
Tomato Soup: A classic companion; its creamy texture complements the crispy roll-ups beautifully, creating a comforting duo.
-
Marinara Sauce: This zesty dip adds a vibrant flavor, perfect for pairing with the gooey cheese and crunchy bread.
-
Caesar Salad: Crunchy romaine and creamy dressing provide a refreshing contrast to the warm, melted cheese.
-
Sweet Potato Fries: Their natural sweetness enhances the savory flavors of the roll-ups, creating a delightful taste experience.
-
Vegetable Platter: Crisp, fresh veggies offer a crunchy balance and a dose of healthy nutrition alongside your indulgent roll-ups.
-
Apple Slices with Caramel Dip: The sweet and tart apple slices paired with warm caramel create a wonderful contrast to the savory roll-ups.
-
Sparkling Lemonade: This refreshing drink brightens up the meal, making it a perfect complement to your cheesy delights.
Imagine indulging in these flavorful pairings as you dip, crunch, and savor each bite. Your Grilled Cheese Roll Ups will shine even brighter!
Storage Tips for Grilled Cheese Roll Ups
Room Temperature: Best enjoyed fresh, but if you need to leave them out, they can stay at room temperature for up to 1 hour before they need to be refrigerated.
Fridge: Store leftover Grilled Cheese Roll Ups in an airtight container for up to 2 days. To maintain their texture, separate layers with parchment paper.
Freezer: For longer storage, wrap them tightly in plastic wrap followed by aluminum foil and freeze for up to 3 months. Thaw in the refrigerator before reheating.
Reheating: To reheat, place them in a skillet over medium heat for about 2-3 minutes per side to revive the crispy exterior and gooey cheese.
Grilled Cheese Roll Ups Recipe FAQs
What type of bread should I use for Grilled Cheese Roll Ups?
Absolutely! For the best results, I recommend using soft sandwich bread as it can be easily flattened without tearing. Avoid stale or overly crusty bread, as they won’t roll properly.
How long can I store leftover Grilled Cheese Roll Ups?
You can store leftover Grilled Cheese Roll Ups in an airtight container in the refrigerator for up to 2 days. Make sure to separate layers with parchment paper to maintain their delightful crunchiness.
Can I freeze Grilled Cheese Roll Ups?
Yes, you can! Wrap the cooled roll-ups tightly in plastic wrap followed by aluminum foil to prevent freezer burn. They can be frozen for up to 3 months. When you’re ready to enjoy them, allow the roll-ups to thaw in the refrigerator before reheating.
What can I do if my Grilled Cheese Roll Ups aren’t browning properly?
If they’re not browning, check the heat level. Cooking at medium heat is crucial; if it’s too low, they won’t brown, and if it’s too high, the bread may burn before the cheese melts. Keep an eye on the time and adjust accordingly. Flip them once golden brown for even cooking!
Are there any dietary considerations for Grilled Cheese Roll Ups?
Definitely! For those with lactose intolerance, consider using lactose-free cheese options or vegan cheeses that melt well. Additionally, if you’re concerned about gluten, gluten-free bread works beautifully for these roll-ups, just ensure it can be flattened without tearing.
Can I add other ingredients to my Grilled Cheese Roll Ups?
Very much so! You can add cooked bacon for a savory crunch or toss in some fresh spinach for added nutrition. Get creative with your choices! Just ensure any add-ins are either pre-cooked or won’t release excess moisture during cooking.
Deliciously Dippable Grilled Cheese Roll Ups for a Fun Snack
Ingredients
Equipment
Method
- Prepare the Bread: Flatten 4 slices of soft sandwich bread to about 1/4 inch thick using a rolling pin.
- Assemble the Roll Ups: Place cheese on each flattened slice and roll tightly from one end to the other.
- Heat the Skillet: Melt 2 tablespoons of butter in a non-stick skillet over medium heat until bubbling.
- Cook the Roll Ups: Place roll-ups seam side down in the skillet and cook for 2-3 minutes until golden brown, then flip and repeat.
- Let Cool and Serve: Remove from skillet, let cool slightly, slice in half and serve warm with dipping sauces.
Leave a Reply