
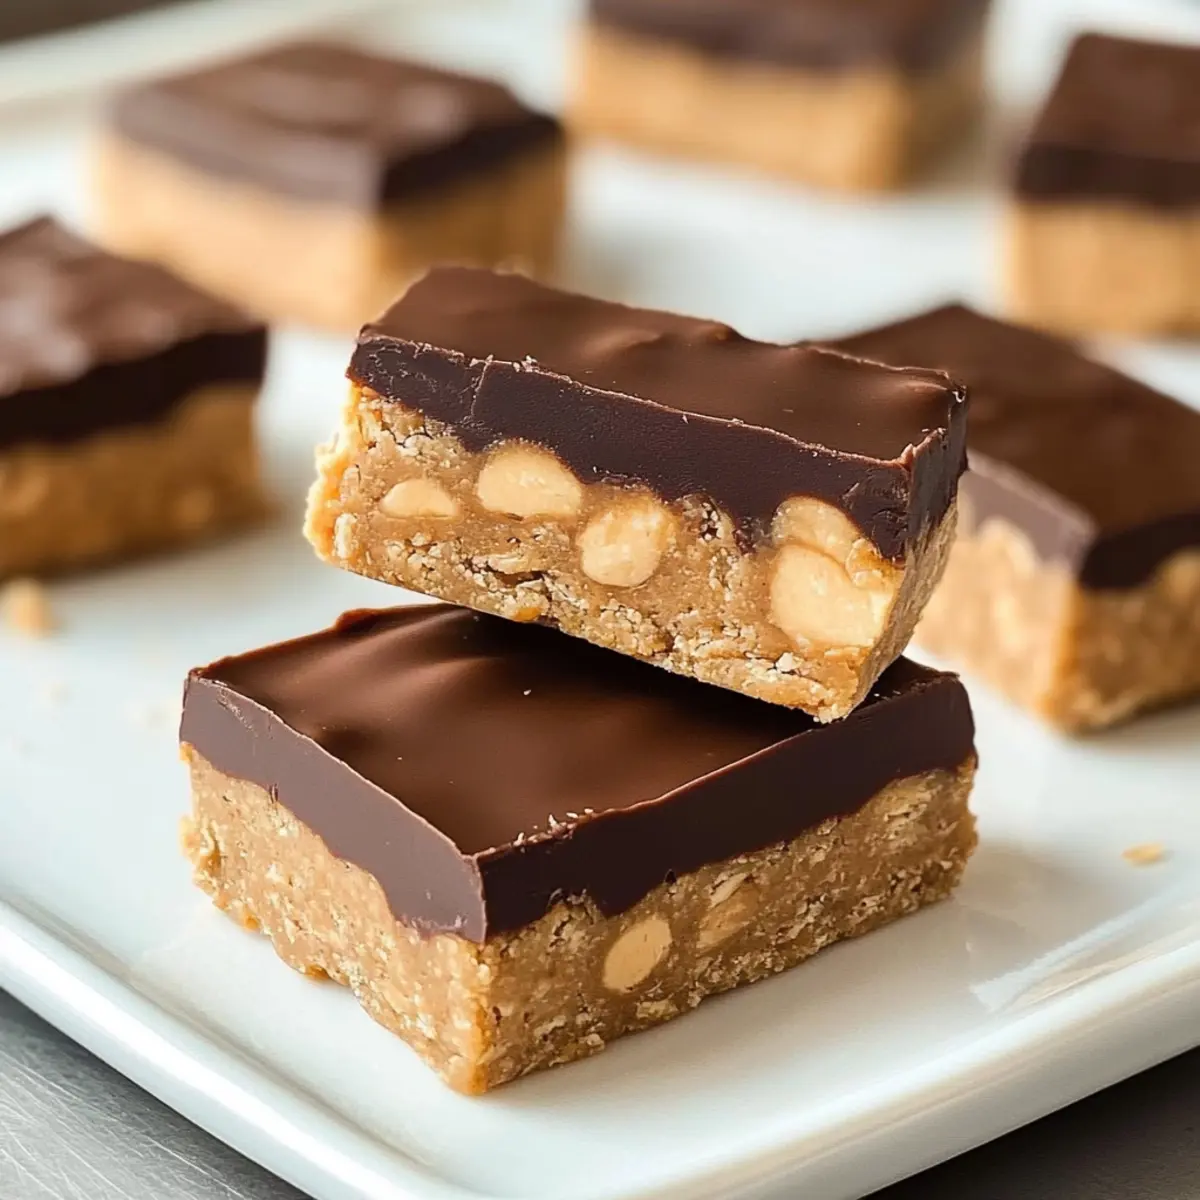
Amidst the chaos of a busy week, it’s refreshing to find a snack that satisfies both the craving for something tasty and the need for something nutritious. My homemade Protein Bars are the answer! With just four simple ingredients, these no-bake bars are not only easy to whip up, but they also cater to virtually every dietary need—vegan, gluten-free, keto-friendly, and more. Say goodbye to the chalky textures often found in store-bought options; these bars are chewy, flavorful, and can be customized to your heart’s content. Whether you’re gearing up for a workout, need a quick pick-me-up, or just want something delightful to nibble on, these protein-packed treats have got your back. Curious about how you can create your own perfect batch? Let’s dive in!
Why Are These Protein Bars So Special?
Irresistible Variety: With options like chocolate, peanut butter, and even banana bread, you can switch up flavors to keep your taste buds excited.
Dietary-Friendly: These bars are customizable for nearly every dietary requirement—think vegan, gluten-free, or keto!
Quick and Easy: The no-bake approach makes preparation a breeze, allowing for delicious snacks ready in minutes.
Healthy Satisfaction: Packed with 10-12 grams of protein, they are perfect for post-workout recovery or when you need a nutritious treat.
Perfect Pairing: Enjoy them solo or pair with a refreshing smoothie for a wholesome boost! For more fun ideas, check out these Chocolate Peanut Bars or Cake Batter Protein!
Protein Bars Ingredients
Unlock the door to a world of deliciousness with these easy-to-find ingredients!
For the Base
• Peanut Butter – Provides richness and structure; substitute with almond butter or any favorite nut butter for varied flavors.
• Protein Powder – Offers the essential boost you need—opt for unsweetened varieties for balanced sweetness, or use oat flour for a protein bar without protein powder.
• Pure Maple Syrup or Honey – Sweetens and enhances the texture; for keto options, a suitable low-carb sweetener works wonders.
• Salt – Elevates flavor and keeps it balanced; don’t skip it!
Optional Chocolate Coating
• Melted Chocolate Chips – Adds indulgence; for dairy-free needs, select melted dairy-free chocolate!
These Protein Bars are not only delicious but also versatile for every palate and dietary need!
Step‑by‑Step Instructions for 4-Ingredient No-Bake Protein Bars
Step 1: Combine Ingredients
In a large mixing bowl, add 1 cup of peanut butter, 1 cup of protein powder, 1/3 cup of pure maple syrup (or honey), and a pinch of salt. Using a spatula, mix the ingredients thoroughly until a cohesive dough forms. This should take about 2-3 minutes. The mixture will be thick and slightly sticky, resembling cookie dough in texture.
Step 2: Shape the Bars
Once the mixture has formed, transfer it onto a parchment-lined 8×8-inch baking dish. With your hands or a spatula, press the dough evenly into the dish, ensuring it reaches all corners. Aim for about 1-inch thickness for perfectly sized bars. Smooth the surface with the back of a spatula for a polished finish, then leave it aside to set.
Step 3: Refrigerate to Firm Up
Place the dish in the refrigerator and chill for at least 30 minutes. This step allows the bars to firm up, making them easier to slice. You’ll know they’re ready when the mixture feels solid to the touch and holds its shape. While they chill, you can prepare the optional chocolate coating if desired.
Step 4: Prepare the Chocolate Coating
If you opt for chocolate coating, melt 1/2 cup of chocolate chips in a microwave-safe bowl, heating in 20-second intervals until fully melted. Stir in 1 teaspoon of coconut oil to add smoothness. The chocolate should be glossy and thoroughly combined, creating a creamy consistency perfect for coating your bars.
Step 5: Coat the Bars
Once the protein bar mixture has set, remove it from the refrigerator and, if desired, cut it into bars or squares with a sharp knife. Dip each bar into the melted chocolate or drizzle it over the top for an indulgent finish. Ensure the bars are well-coated, then return them to the lined baking dish to set.
Step 6: Final Chill
After coating, place the bars back in the refrigerator for an additional 15-20 minutes to allow the chocolate to harden. Once they feel firm and the chocolate has set perfectly, they’re ready to be enjoyed. For best results, slice them into your preferred sizes before savoring your homemade protein bars!
Expert Tips for Perfect Protein Bars
• Choose Quality Ingredients: Opt for a protein powder you enjoy, as its flavor greatly impacts the taste of your protein bars.
• Mix Thoroughly: Ensure all ingredients are well combined to avoid dry spots – this helps create a uniform texture throughout the bars.
• Adjust Refrigeration Time: Chill your bars for at least 30 minutes, but if you like them firmer, feel free to refrigerate longer for an even sturdier bite.
• Customize Wisely: Feel free to get creative by mixing in extras like nuts or dried fruits; just keep in mind that dry ingredients might alter the texture of your protein bars.
• Avoid Overmixing for Chewy Texture: While mixing is important, overmixing can lead to dense bars – mix just until combined for that perfect chewiness!
Protein Bars Variations & Substitutions
Feel free to mix things up and make these protein bars uniquely yours with these enticing variations!
-
Nut Swap: Replace peanut butter with sunflower seed butter for a nut-free option. This will provide a similar texture with a slightly different flavor.
-
Chocolate Heaven: Add 1/4 cup cocoa powder to the mixture for a rich chocolate flavor. You can even fold in mini chocolate chips for that extra indulgence.
-
Banana Bread Bliss: Substitute the sweetener with 1 ripe mashed banana. This twist gives a naturally sweet banana flavor that’s perfect for breakfast or a snack.
-
Cookie Dough Delight: Mix in 1/2 cup of mini chocolate chips and a dash of vanilla extract for a classic cookie dough-inspired treat. The gooey chocolate is pure comfort!
-
Tropical Touch: Add 1/3 cup of shredded coconut or chopped dried pineapple. This brings out the sunny, tropical vibes while boosting texture.
-
Protein Punch: Want even more protein? Incorporate 1/4 cup of Greek yogurt into the dough. This adds creaminess and amps up the protein content!
-
Spicy Kick: Looking for a little heat? Add a pinch of cayenne pepper or cinnamon to your mixture for a warm, spicy twist that kicks up the flavor profile.
-
Texture Boost: For extra crunch, mix in 1/4 cup of chopped nuts or seeds. This variation gives the bars a delightful mix of chewiness and crunch you’ll love.
Explore your creativity with these ideas! And if you’re looking for more customizable options, don’t miss the Protein Pudding Customizable or Protein Pudding Guilt recipes—both are designed for variety and flavor enjoyment. Enjoy your baking adventure!
Make Ahead Options
These homemade Protein Bars are a dream for busy home cooks who enjoy meal prep! You can prepare the base mixture and shape the bars up to 24 hours in advance—just store them in an airtight container in the refrigerator to maintain the chewy texture and flavor. Additionally, you can melt and prepare the optional chocolate coating ahead of time; simply reheat before drizzling over the bars when you’re ready to serve. This allows for a quick finish that keeps the bars just as delicious. When you’re ready to enjoy, simply slice them and indulge in your convenient, protein-packed snack, all while saving valuable time in your busy week!
What to Serve with 4-Ingredient No-Bake Protein Bars
Looking to complete your snack experience? Discover delightful ideas that will elevate your homemade protein bars to new heights!
- Creamy Greek Yogurt: Add a dollop of tangy Greek yogurt for a boost of protein and a creamy contrast to your bars.
- Zesty Fruit Smoothie: Pair with a refreshing fruit smoothie to balance out flavors—think berry bliss or tropical mango!
- Crunchy Veggies: Serve alongside crunchy carrot and cucumber sticks for a healthful, colorful contrast that adds a refreshing crunch.
- Nutty Trail Mix: Mix it up with a handful of nutty trail mix; the crunch and flavor will complement the chewy texture of your bars.
- Dark Chocolate Drizzle: Elevate each bite with a drizzle of melted dark chocolate, perfectly harmonizing with your bars’ natural sweetness.
- Fresh Berries: Top your bars with fresh berries for a burst of juicy goodness and a pop of color that makes it more enticing.
- Almond Milk: Sip on a glass of almond milk to enhance the nutty flavors of your protein bars—it’s a match made in heaven!
- Coconut Chunks: Sprinkle shredded coconut on top for an extra tropical twist; it enhances texture and adds a lovely sweet note.
- Oatmeal Bowl: Serve with a warm bowl of oatmeal topped with fruits and nuts for a wholesome and filling meal.
- Matcha Latte: Pair your bars with a soothing matcha latte for a delightful caffeine kick alongside your post-workout snack!
How to Store and Freeze Protein Bars
Fridge: Store your protein bars in an airtight container for up to 2 weeks. This keeps them fresh and chewy, ready to grab whenever you need a nutritious snack.
Freezer: For longer storage, freeze them individually or in portions in a freezer-safe bag for up to 3 months. Thaw in the fridge overnight or enjoy them straight from the freezer!
Reheating: If you prefer a softer texture, you can warm a bar in the microwave for 10-15 seconds. This makes them gooey and delicious, particularly those with chocolate coating.
Wrapping: Consider wrapping each bar in parchment paper or plastic wrap before placing them in a container for easy access and to prevent sticking; this also helps maintain freshness.

Protein Bars Recipe FAQs
How can I tell if my peanut butter is fresh enough to use?
Absolutely! Fresh peanut butter should have a creamy texture and a slightly nutty aroma. Avoid jars with dark spots all over or a sour smell, as these can indicate spoilage. If you have any doubts, it’s best to replace it.
What’s the best way to store my protein bars?
Very easy! Store your protein bars in an airtight container in the refrigerator for up to 2 weeks. This keeps them fresh and ready to grab at any moment. If you need a longer storage solution, they can be frozen.
Can I freeze these protein bars? How should I do it?
Definitely! To freeze your protein bars, first, slice them into individual portions. Wrap each bar in parchment paper or plastic wrap. Then, place them in a freezer-safe bag or airtight container, ensuring they are sealed tightly. These can last for up to 3 months in the freezer. When you’re ready to eat, simply thaw them in the fridge overnight or enjoy them straight from the freezer!
What should I do if my protein bars are too crumbly?
If your protein bars are too crumbly, it often means that there wasn’t enough moisture added to the mix. To fix this, try adding a bit more peanut butter or a splash of maple syrup to the mixture until it reaches a texture that holds together. If adjusting doesn’t help, consider pressing the mixture more firmly into the pan next time.
Are these protein bars safe for those with nut allergies?
Absolutely! You can easily customize these protein bars to be nut-free. Simply replace peanut butter with sun butter or any seed butter available. Be sure to check the labels on all your ingredients to avoid any cross-contamination, especially with the protein powder.
How do I make my protein bars sweeter without adding extra sugar?
If you’d like to increase the sweetness naturally, consider using overripe bananas or adding in some mashed dates. These options lend not just sweetness but also moisture to your protein bars, enhancing their overall texture. Mix the mashed fruits in after combining your main ingredients to keep everything balanced!
Delicious Homemade Protein Bars for Any Dietary Need
Ingredients
Equipment
Method
- In a large mixing bowl, add peanut butter, protein powder, maple syrup, and salt. Mix until a cohesive dough forms.
- Transfer mixture to a parchment-lined baking dish and press evenly to about 1-inch thickness.
- Place in the refrigerator and chill for at least 30 minutes to firm up.
- If using chocolate coating, melt chocolate chips and coconut oil in a microwave-safe bowl.
- Once set, cut into bars and dip or drizzle melted chocolate over them.
- Return to refrigerator for an additional 15-20 minutes for the chocolate to harden.
Leave a Reply